Using The Advanced Query Creator
In this mode the SQL query box is shown as a free-text editor allowing you to create standard SELECT SQL queries of your own design and complexity. This is available for SQL Explorer, Data Object Explorer, Database Explorer, Host Explorer, and Exadata Explorer.
With Advanced Query Creator you can save the bind parameters as filters and load them into the data explorer. Additionally Bind parameters allow filters to be added within the dashboard for advanced explorer queries.

Write a Query
When developing queries the following must be taken into consideration:
SELECTorWITHmust be the first keyword used in the advanced SQL query box.- If the
WITHclause is used, it must be used at the start of the query, a nestedWITHclause is not supported. - If the data object name needs to be referred to more than once in the query, you need to define a
WITHclause CTE name, and use the CTE name in the query. For example:WITH MYDO AS (SELECT * FROM OPSIDO$HOSTINSIGHTS$HOST_CPU_AND_MEMORY_DAILY))
- Under Mode, select Advanced to access the free-text query editor.
- Clear the current query, click the Clear button.
- Write a new standard SELECT query.
- Click the Run button to execute the new query.
- Toggle between different chart type using the Visualization panel to the right of the query results. This will allow you to visualize your data in different manners.
Use Views, Columns, and Sample Queries
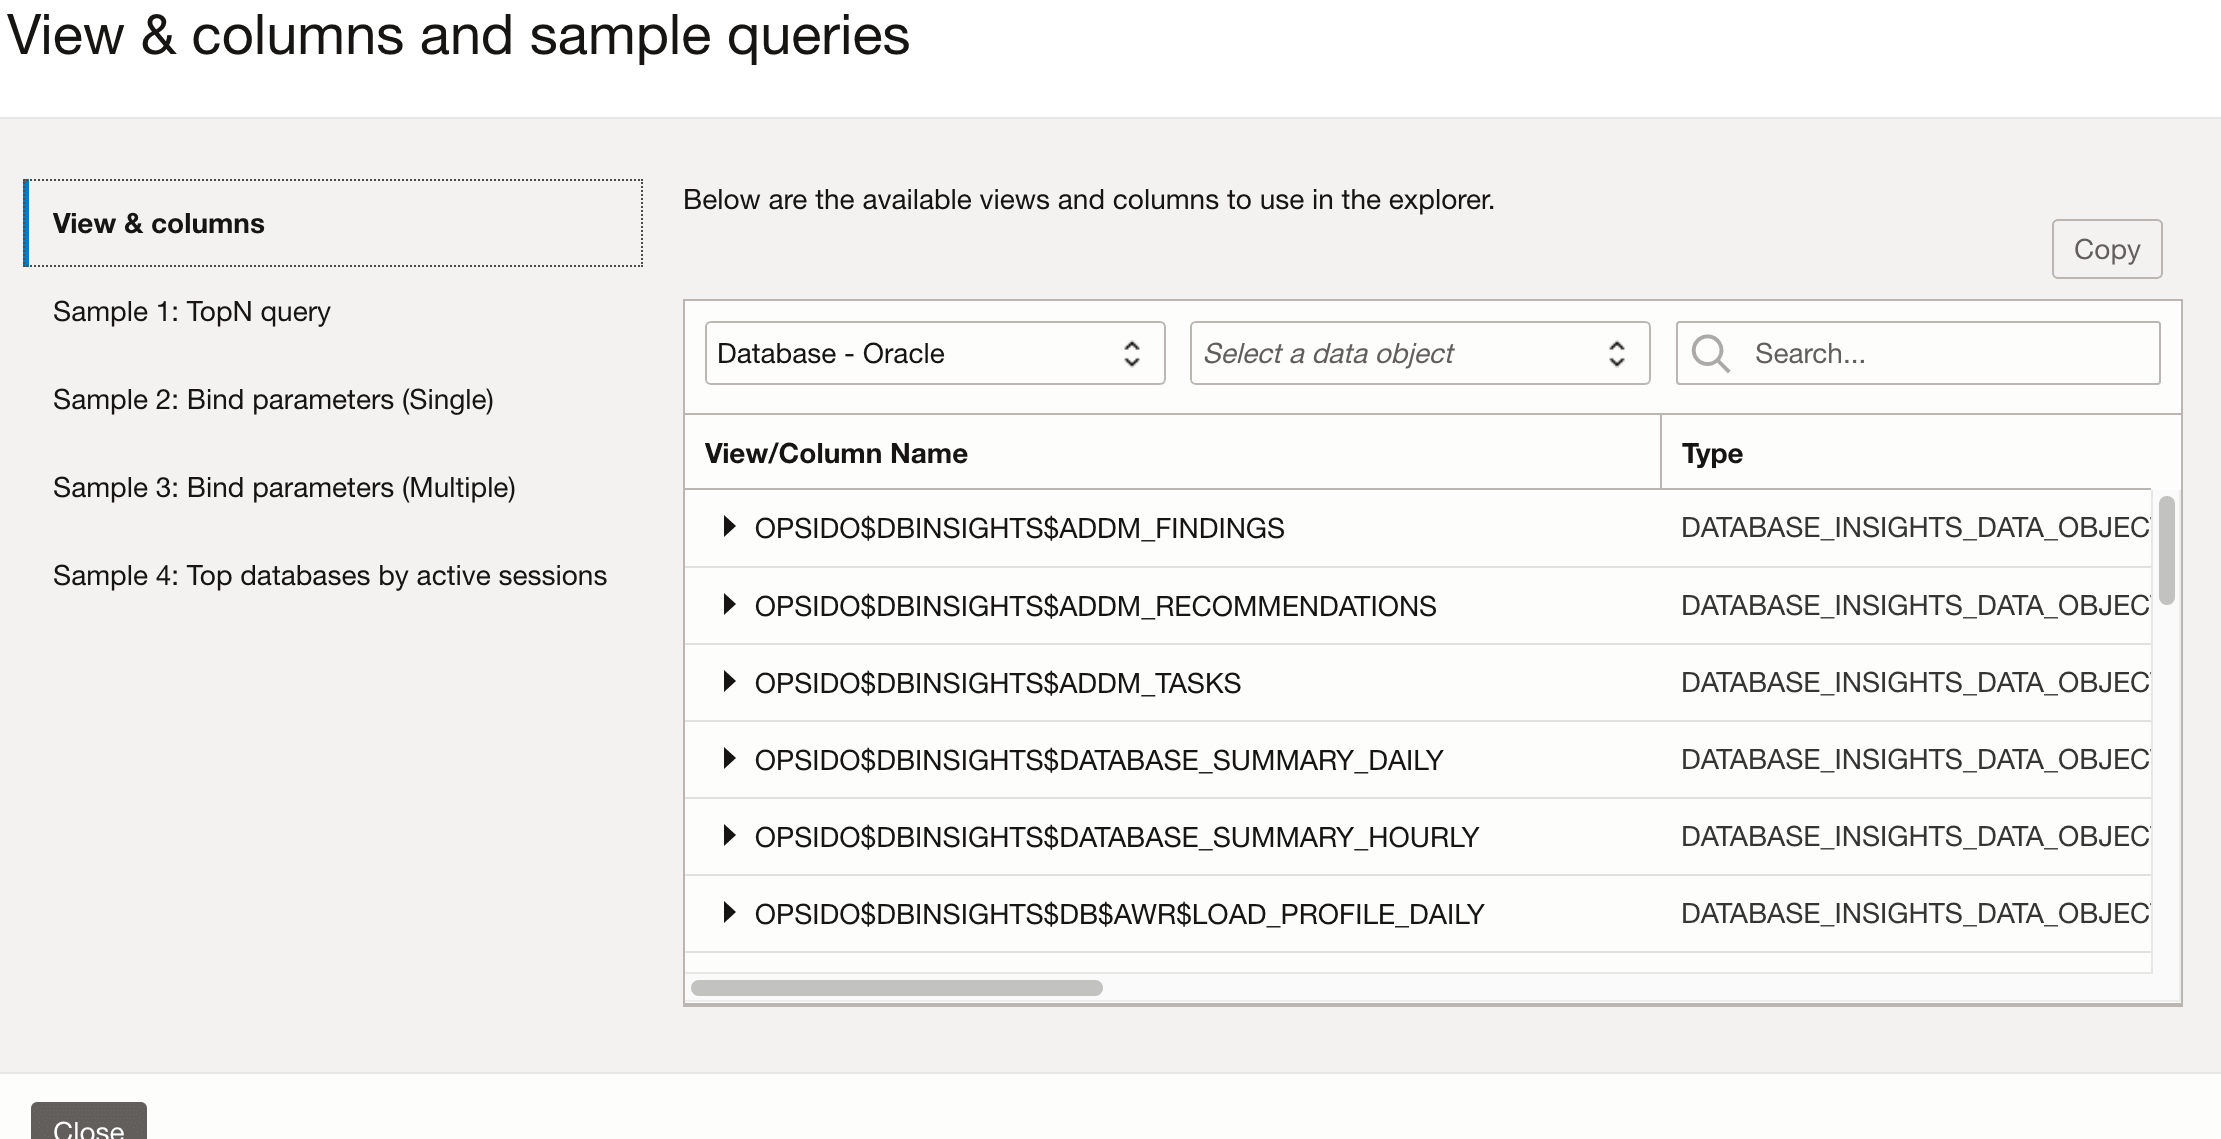
Predefined sample queries and view and column name are available for the various types of Data Objects, and can be used as a base for your personalized queries. To begin using the sample queries in advanced mode, click on the ? on the upper right hand side of the SQL editor window. This opens the View & Column and sample queries pop up screen.

Click on Views and columns tab view a complete list of view and column available parameters, type and description of views and columns are available. You can also expand views, allowing you to see all columns associated with that view. Once you have selected your view or column click Copy to copy its name into your query.
The Search field allows you to search and for specific view names and column names.
- SQL Explorer: Oracle, and MySQL
- Database Explorer: Oracle, and MySQL
- Data Object Explorer: Database - Oracle, Database - MySQL, Exadata, and Host.
Click on any Sample query to view query examples. Click Copy if you would like to use one as a basis for your own queries.
Once you have copied the item of your choosing, click Close to return to the Explorer screen and continue creating your query.
Using Bind Parameters in the Advanced Query Creator
: query notation as a placeholder and enter data values at a later moment. With Advanced Query Creator you can save the bind parameters as filters and load them into the data explorer.
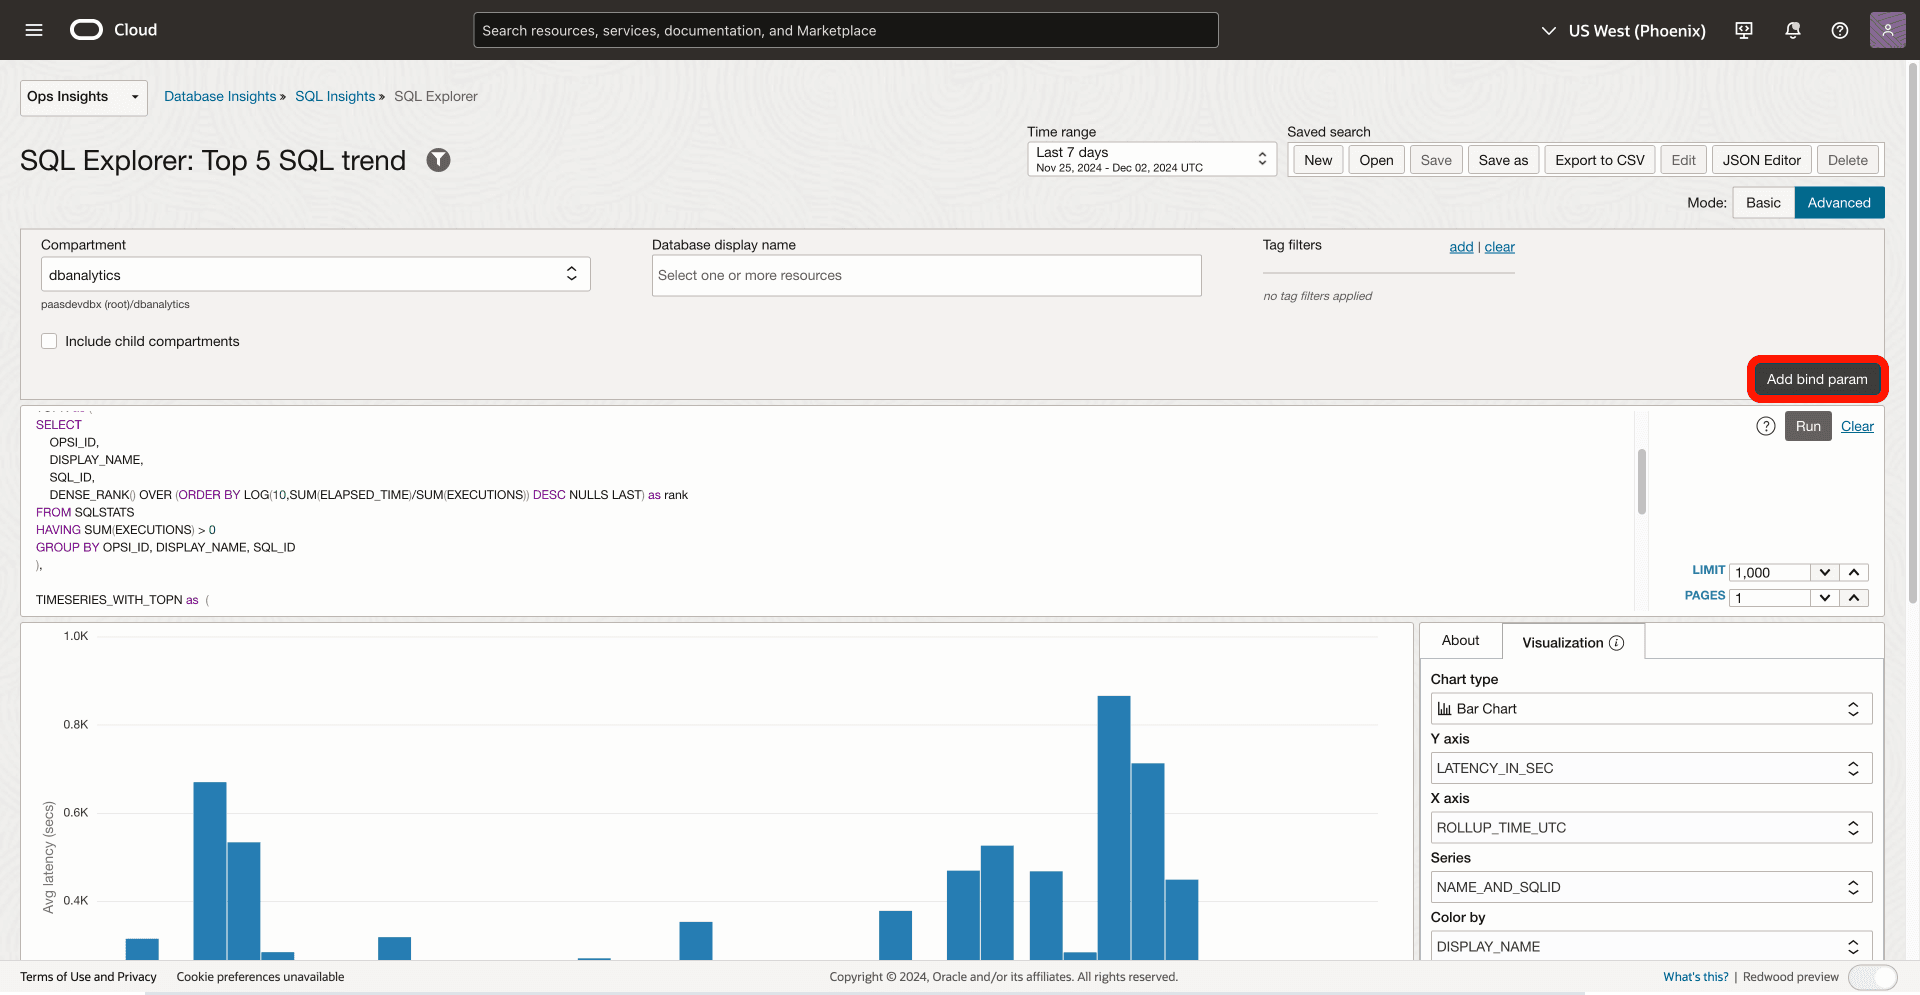
Figure 12-1 Adding Bind Parameters using Data Explorer

- Under Mode, select Advanced to access the free-text query editor.
- Click on the Add bind param button located on the right hand side of the screen. This will open the Add bind parameter slide out. You can select to use either:
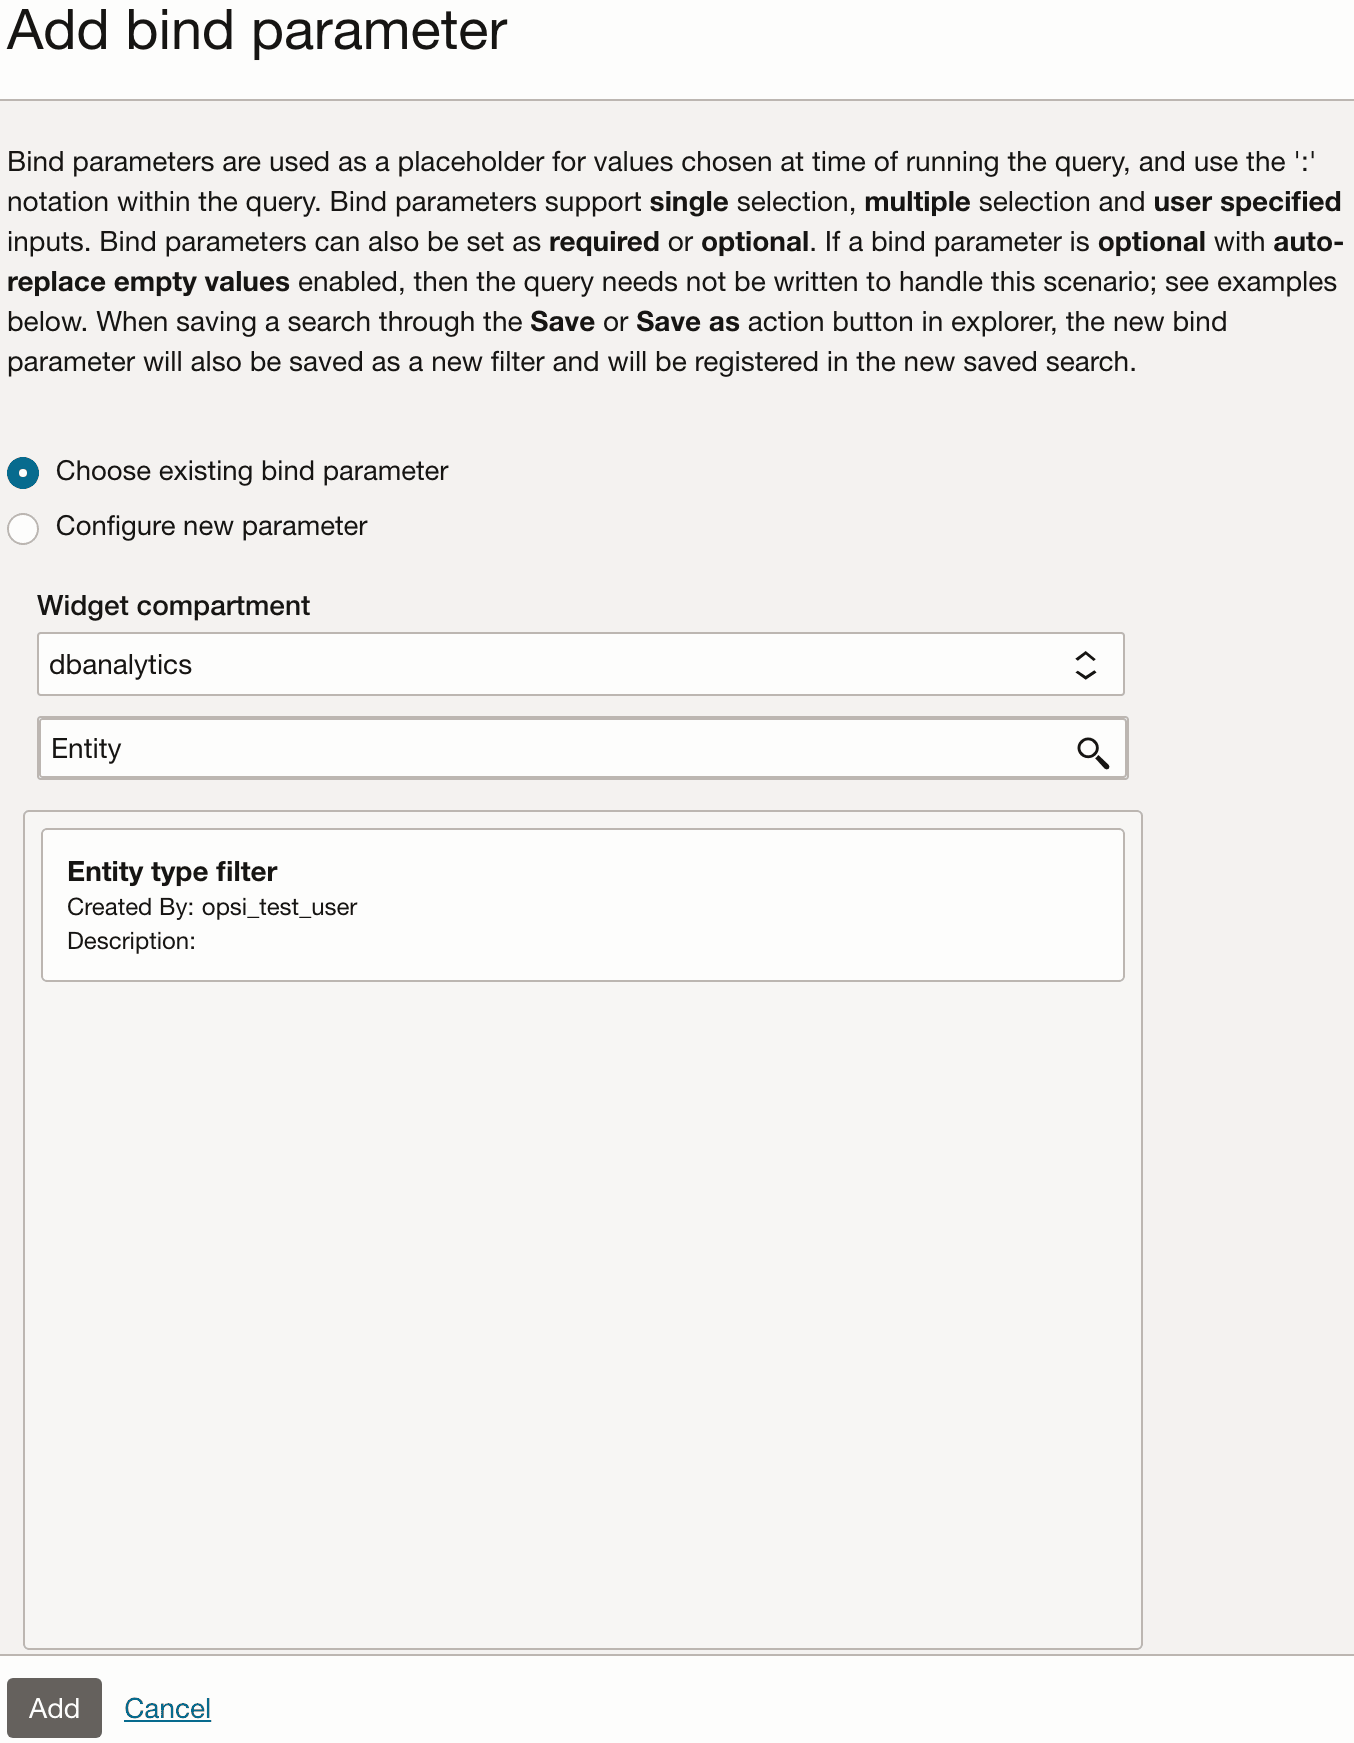
- Choose existing bind parameter: Select the Widget compartment and then select the filter of your choice. Click Add.
Figure 12-2 Add Existing Bind Parameter

- Configure new parameter: Select one of two options.
Figure 12-3 Add a New Bind Parameter

- List of values based on data object: Select the Data object, the desired Dimension field, that will be populated with the distinct values for this field. Enter a Bind parameter name. Under Parameter settings the following options are configurable:
- Selection mode: Determines if bind variable dropdown supports single or multiple selections.
- Is required: Determines if the bind parameter value requires a selection.
- Auto-replace empty value: Determines if empty bind parameter selections should automatically be handled. When auto-replace is enabled, empty bind variable values that used after '=' (Equals To operator) are automatically handled at runtime. You can view auto-replace examples within the slideout by expanding the Samples section.
Note
Only applicable when the parameter is not required.
- Use specified value: Enter the Bind parameter name and Type (STRING, NUMBER, DATETIME). Under Parameter settings the following options are configurable:
- Is required: Determines if the bind parameter value requires a selection.
- Auto-replace empty value: Determines if empty bind parameter selections should automatically be handled. Only applicable when the parameter is not required.
- List of values based on data object: Select the Data object, the desired Dimension field, that will be populated with the distinct values for this field. Enter a Bind parameter name. Under Parameter settings the following options are configurable:
- Choose existing bind parameter: Select the Widget compartment and then select the filter of your choice. Click Add.
- Once all information has been entered click Add, this will add the Bind parameter to the Data Explorer. You will now see the Bind Parameters options. You can select a value for the bind parameter, or manually enter the values for free-text input box.
Bind parameters only work when used within a query using the
':'annotation in front of the bind parameter name in order for it to be used properly within the query. Update the query, and then click Run; this will execute the query with the bind parameters - Additionally you can save the current search as well as the bind parameter as a saved search filter by clicking Save or Save As in the action button section.
Saved searches that link bind parameters will automatically load the linked bind parameters in Explorer. Likewise, when adding a saved search to a dashboard, the bind parameters filters will be added automatically. Bind parameters will only be added automatically to a dashboard when it is required for the saved search.
To add optional bind parameter to a dashboard widget see: Add an Optional Bind Parameter in a Dashboard.