Task 6: Set Up Identity Federation (Optional)
Learn how to set up identity federation for Oracle Database@Google Cloud.
Setting up identity federation for Oracle Database@Google Cloud is optional. Federation lets users sign in to the OCI tenancy associated with the service using Google Cloud IAM & Admin credentials. While most day-to-day database operations are performed in the Google Cloud environment and don't require the use of the OCI Console, some database management tasks do require signing in to OCI.
Use the following instructions to make Google Cloud IAM & Admin the identify provider for the OCI tenancy.
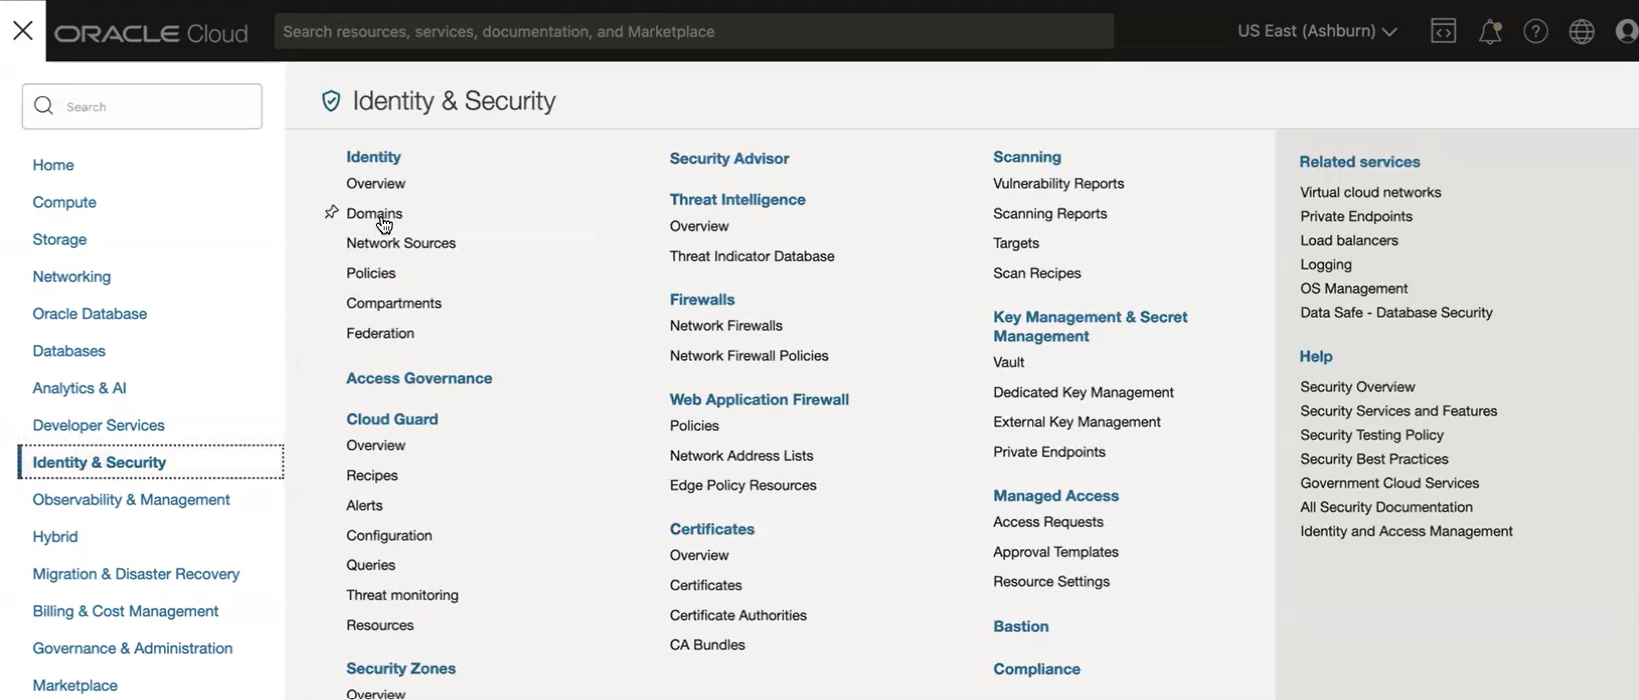
In the OCI Console, navigate to Identity & Security, then select Domains.
-
In the Domains list view, click the name of the "Default" domain to open the domain details page. Optionally, you can select another domain to configure single sign-on (SSO) for that domain.
-
Click Security in the Identity domain Overview page's navigation menu.
-
On the Security page for the domain, click Identity providers in the navigation menu.
-
On the Identity providers page, click Add IdP, then select Add SAML IdP.
-
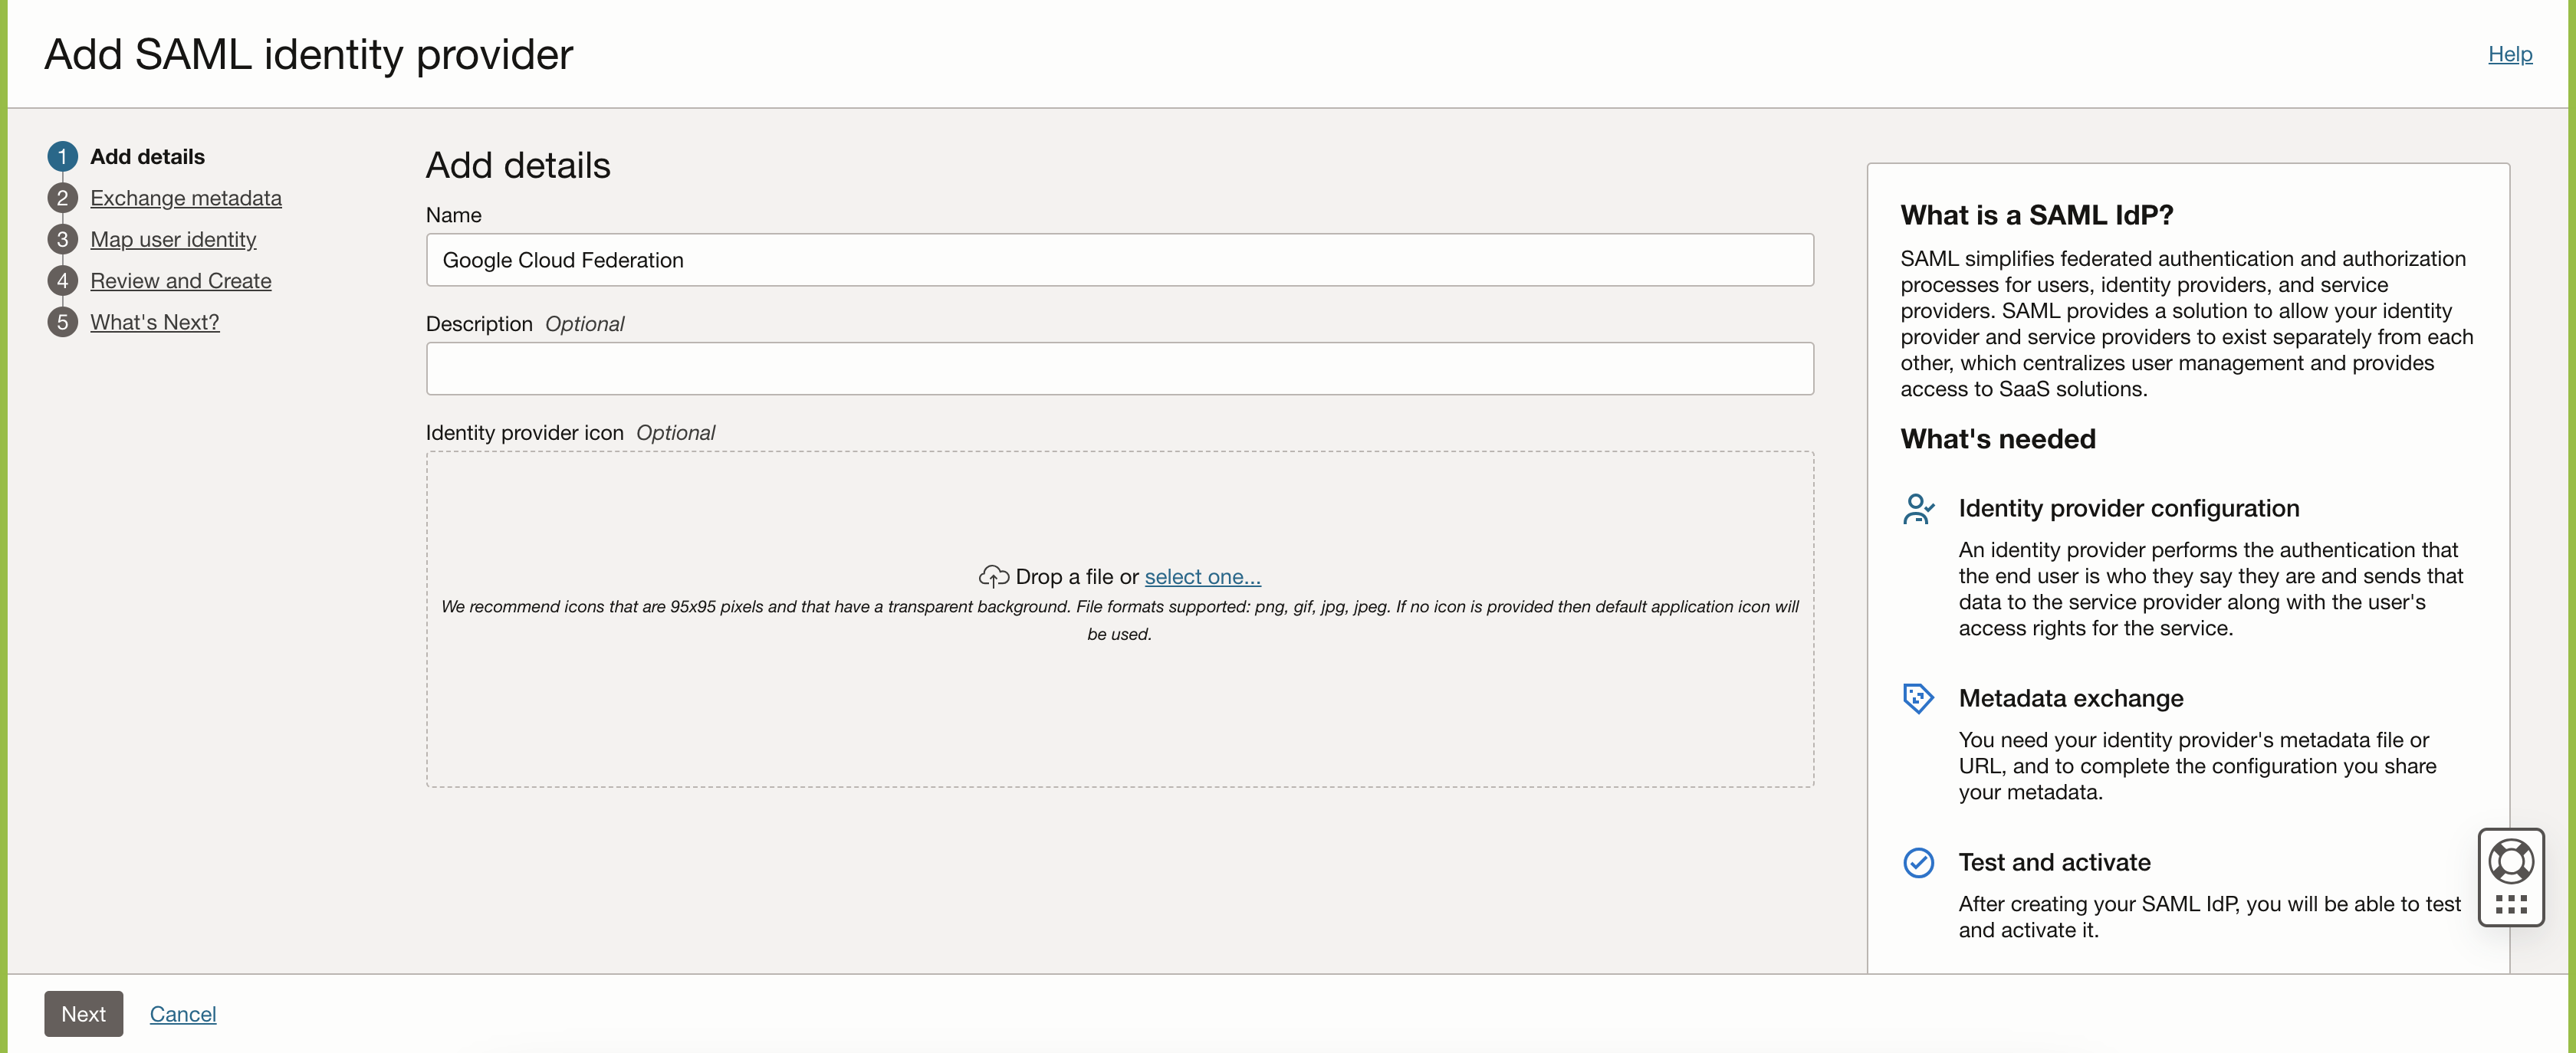
Enter the Name that you want to display on the OCI login page when using Single sign-on (SSO) to access the OCI Console. Optionally, you can add a Description. Click Next to continue.
Leave this window or tab open while you perform the next steps that require the Google Cloud admin Console.
-
From the web browser, open another tab or window and navigate to the Google Cloud admin Console at https://admin.google.com/ac/apps/unified.
-
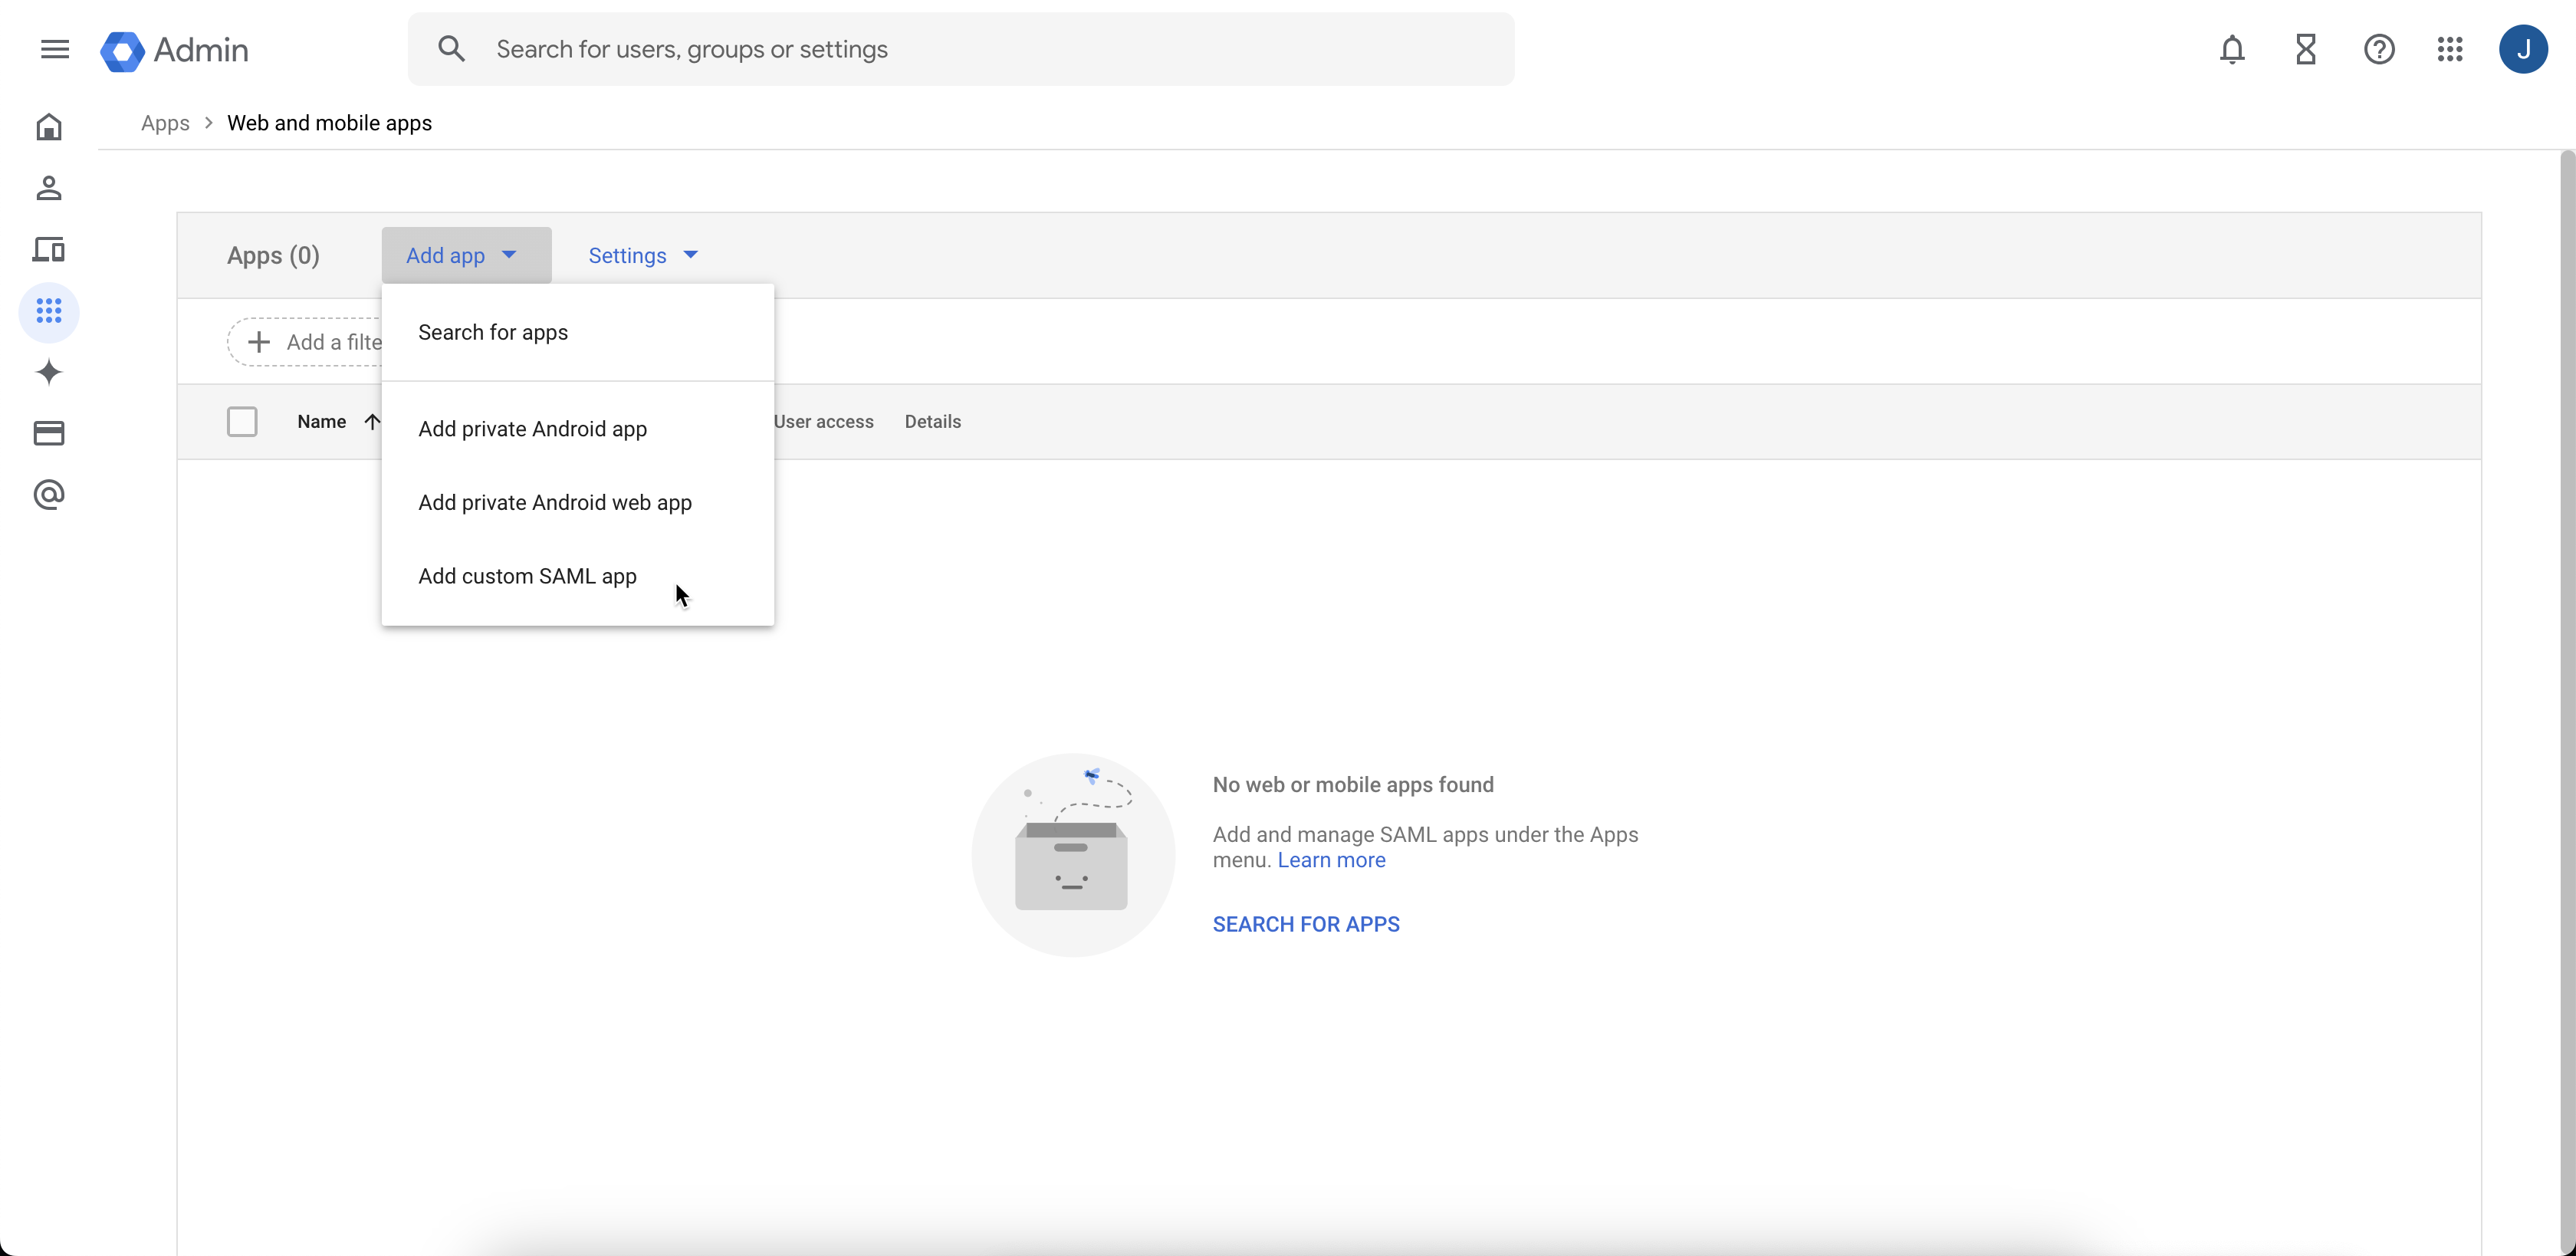
Select Add custom SAML app from the Add app menu.
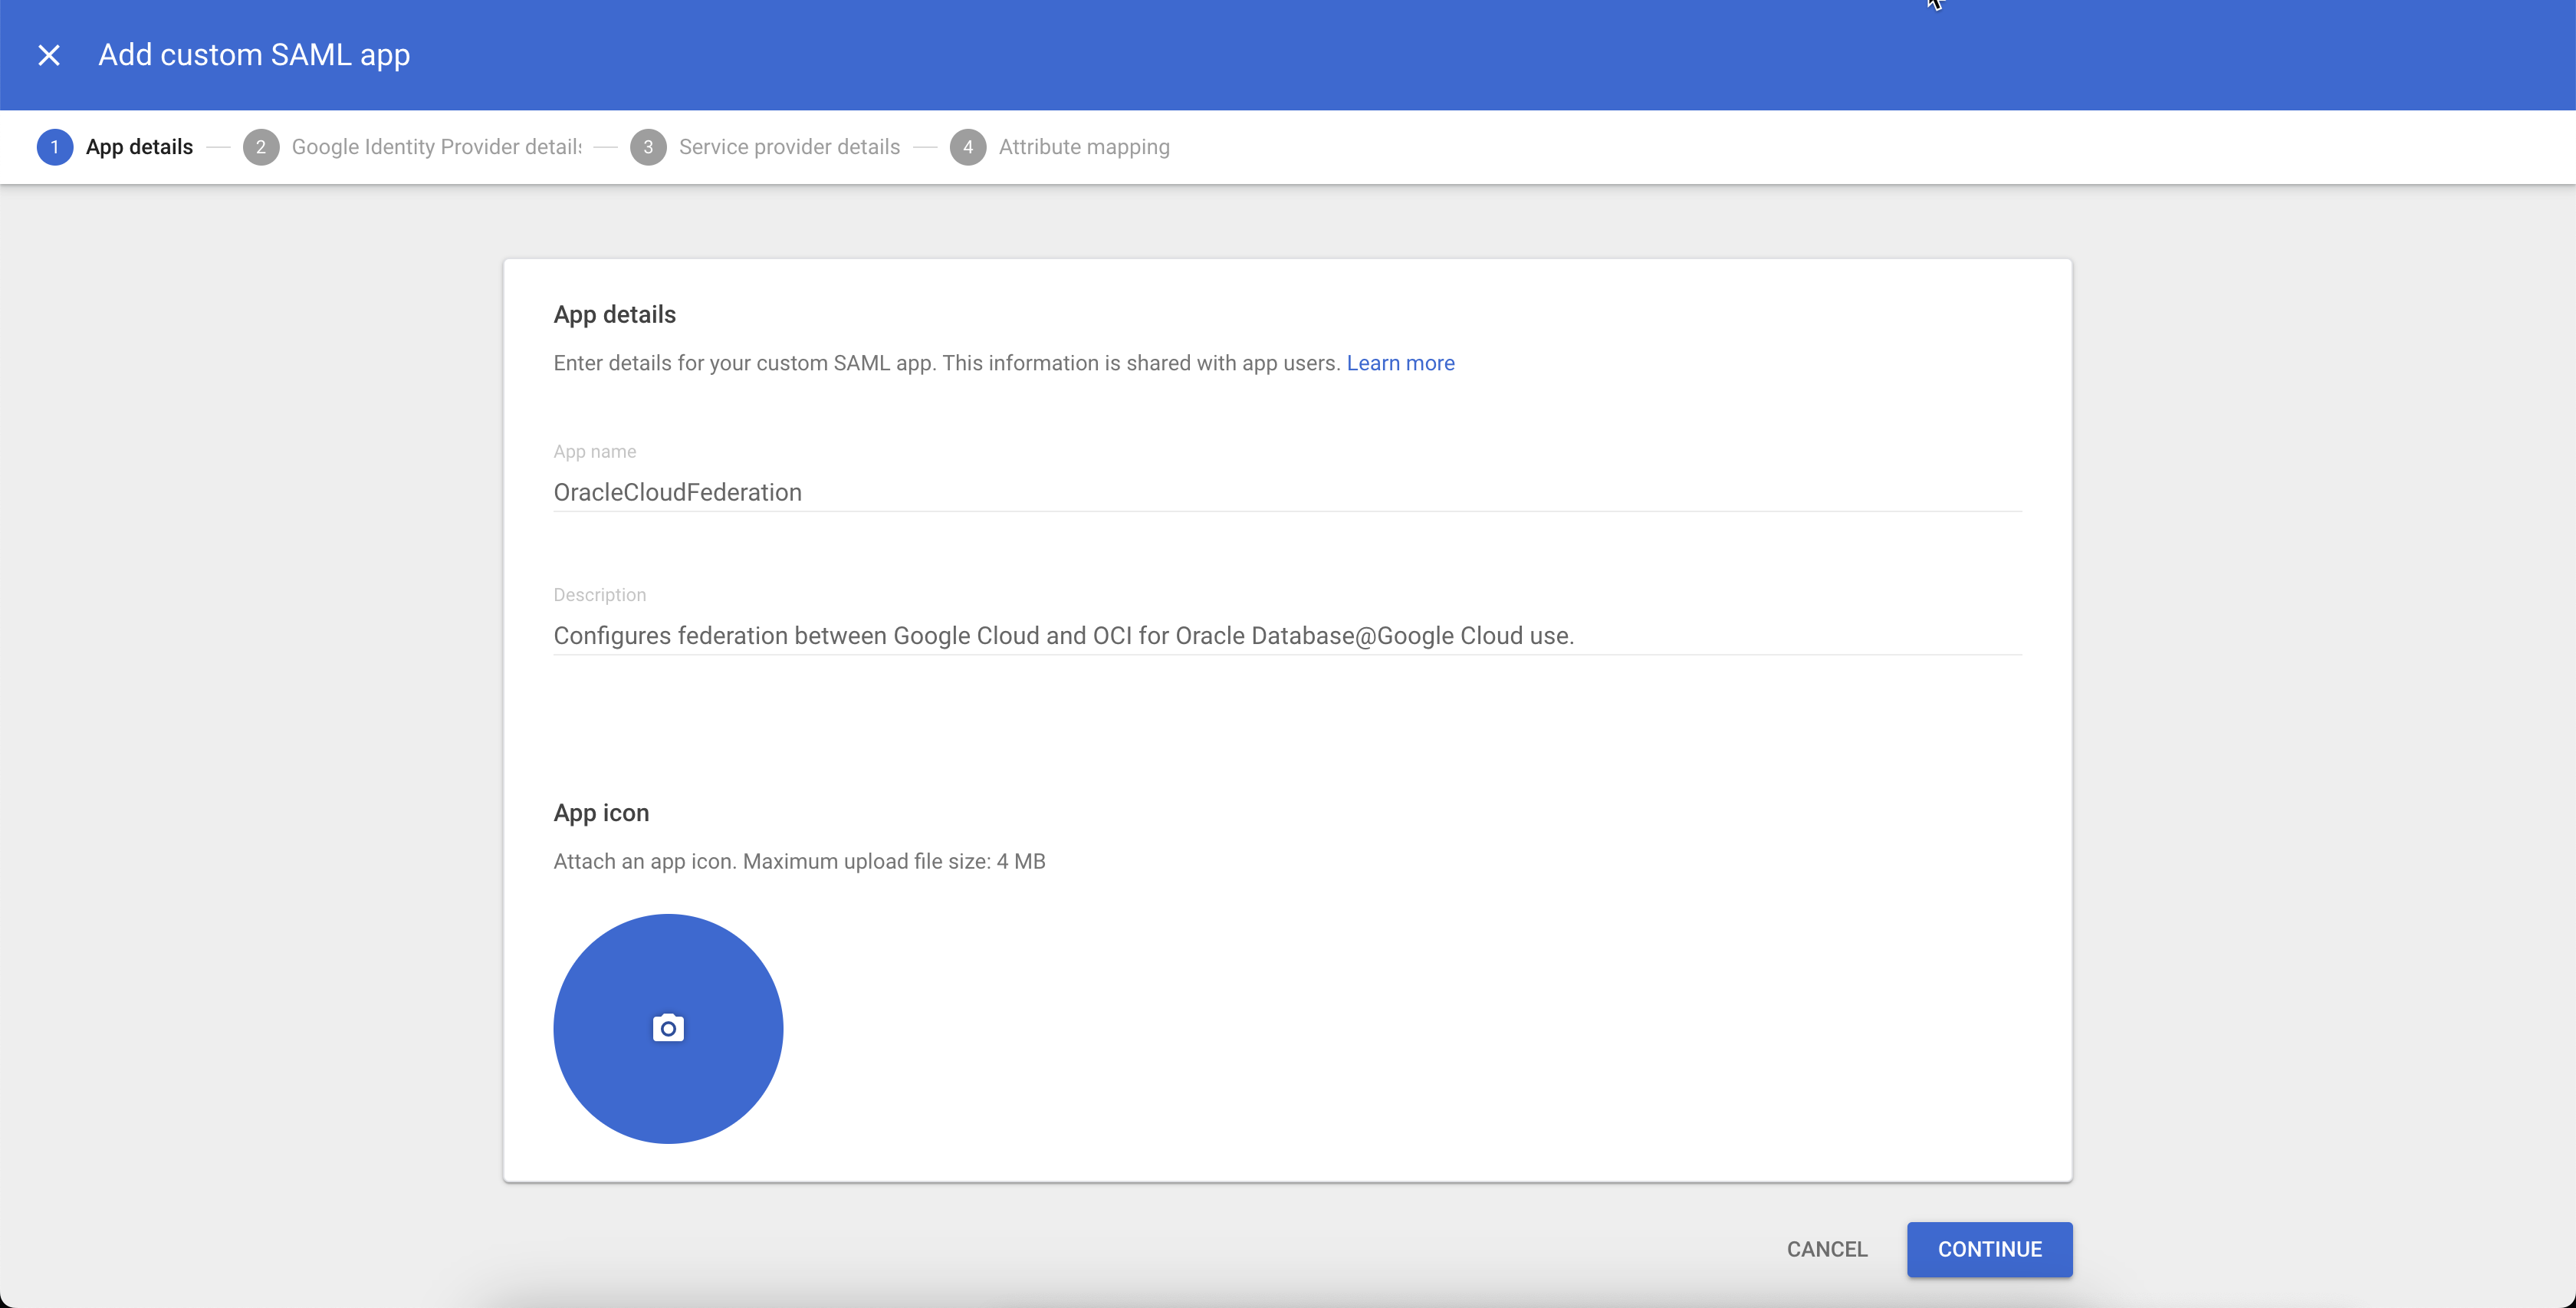
- Enter the following details and click Continue:
- App name: OracleCloudFederation
- Description: Configures identity federation between Google Cloud and Oracle Cloud for Oracle Database@Google Cloud use.
-
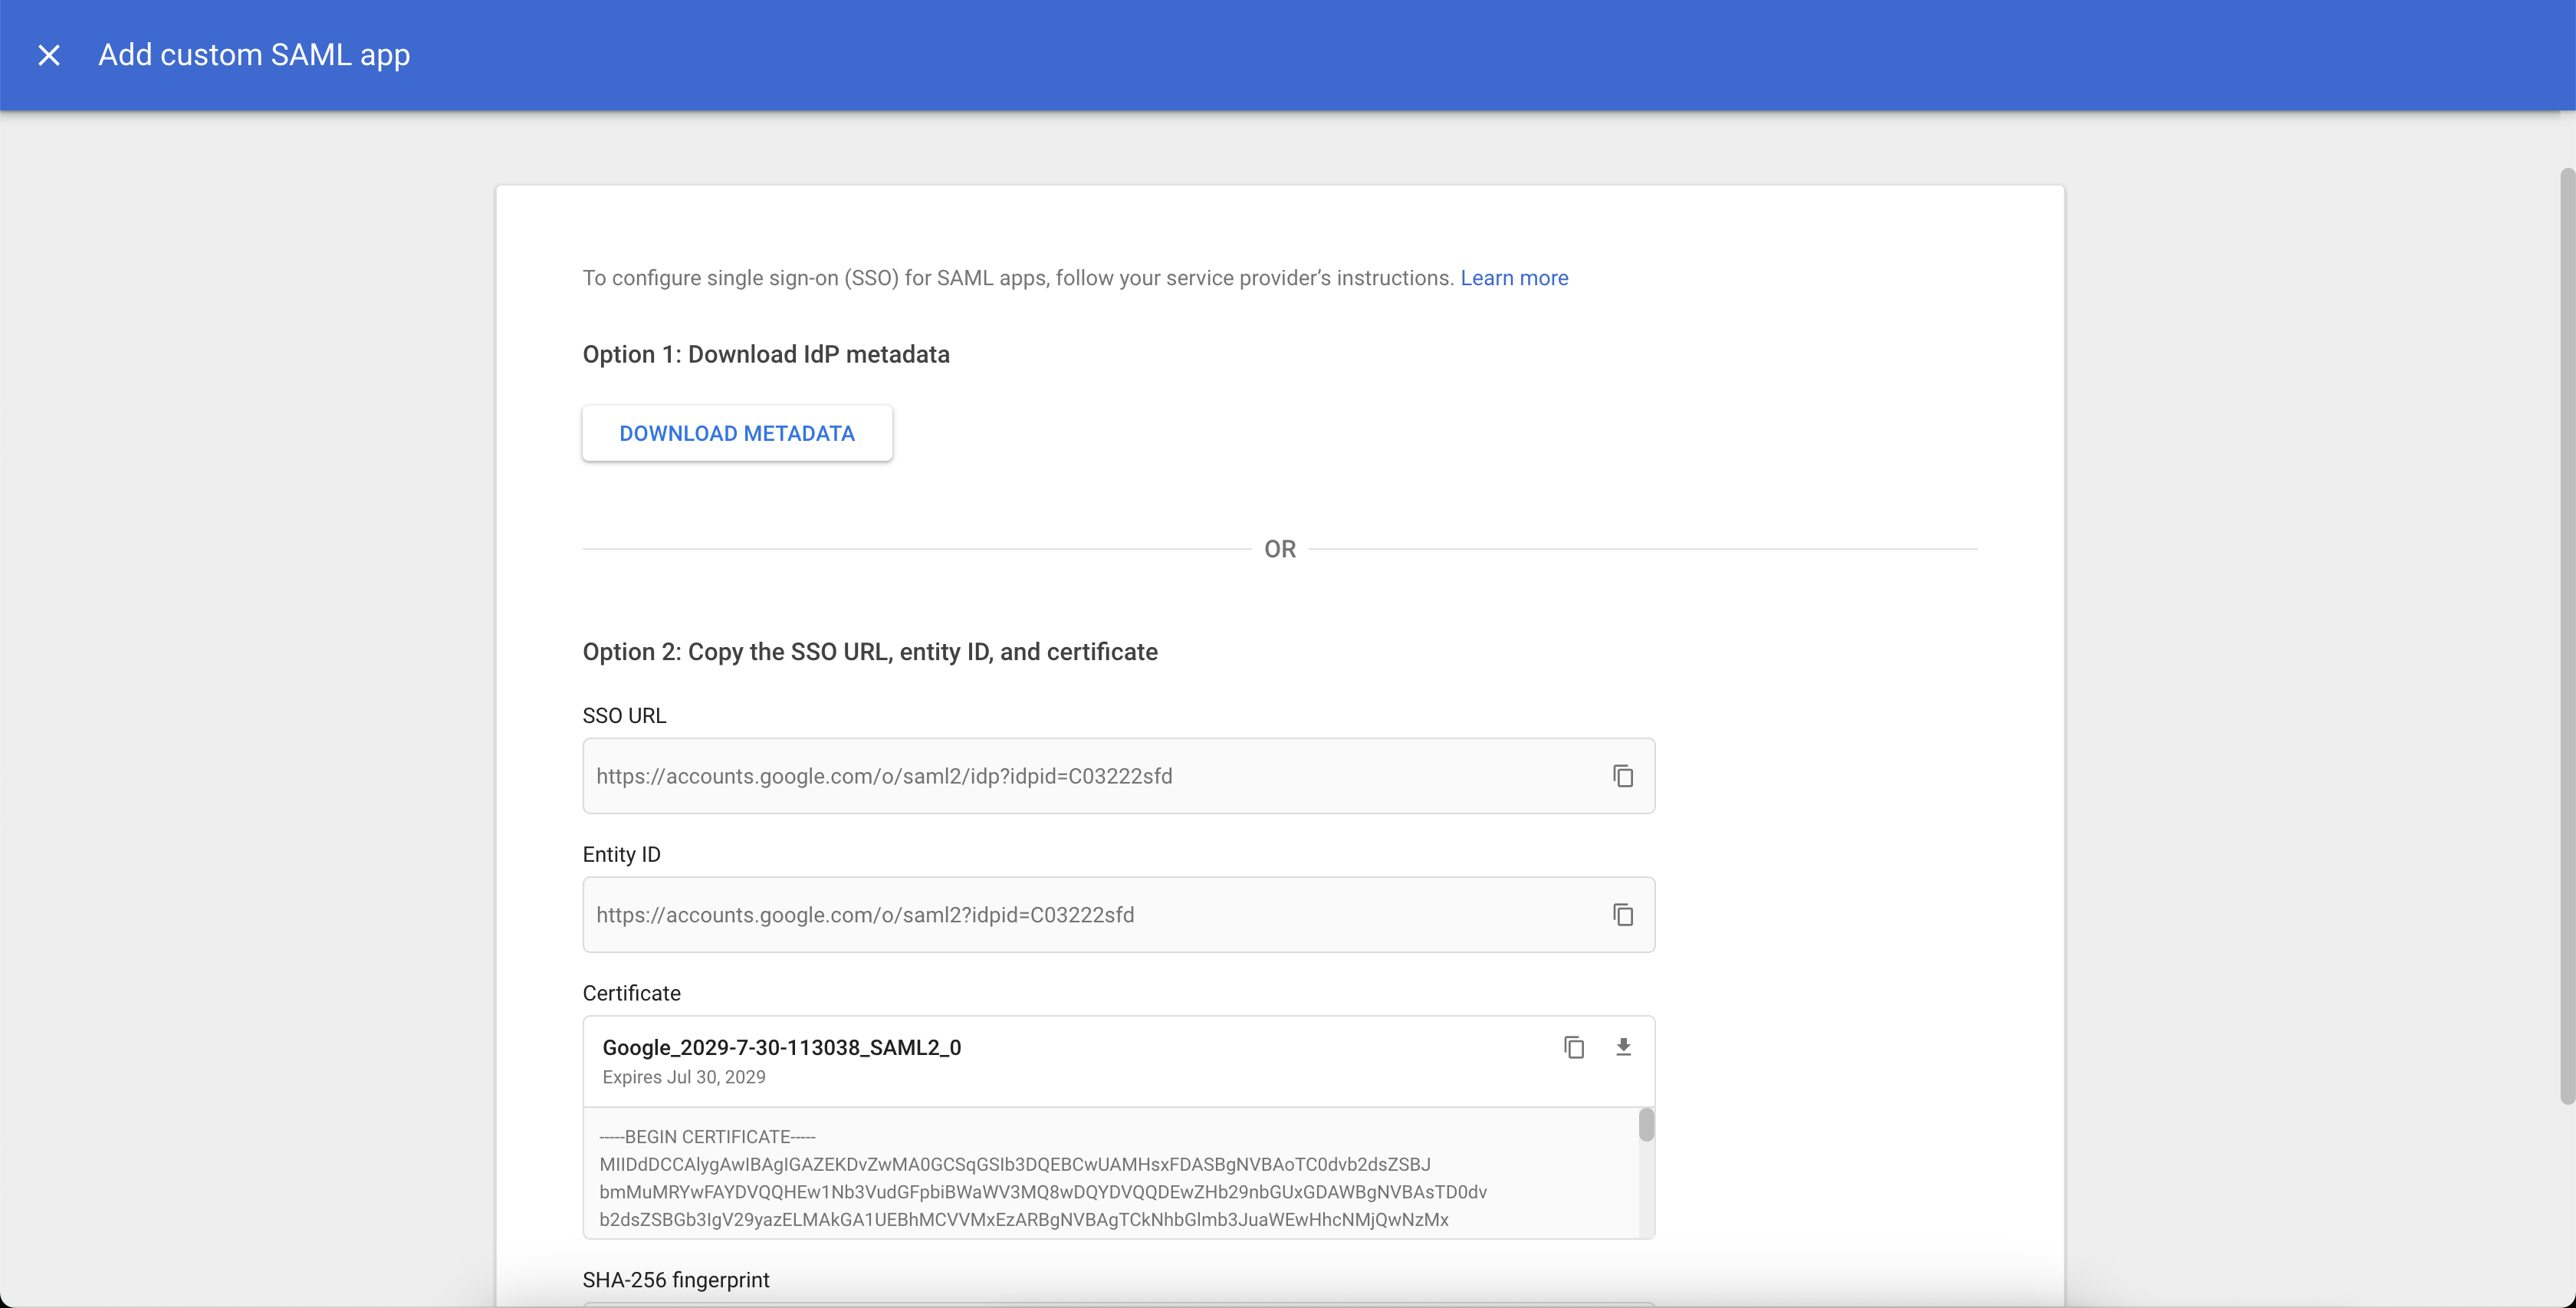
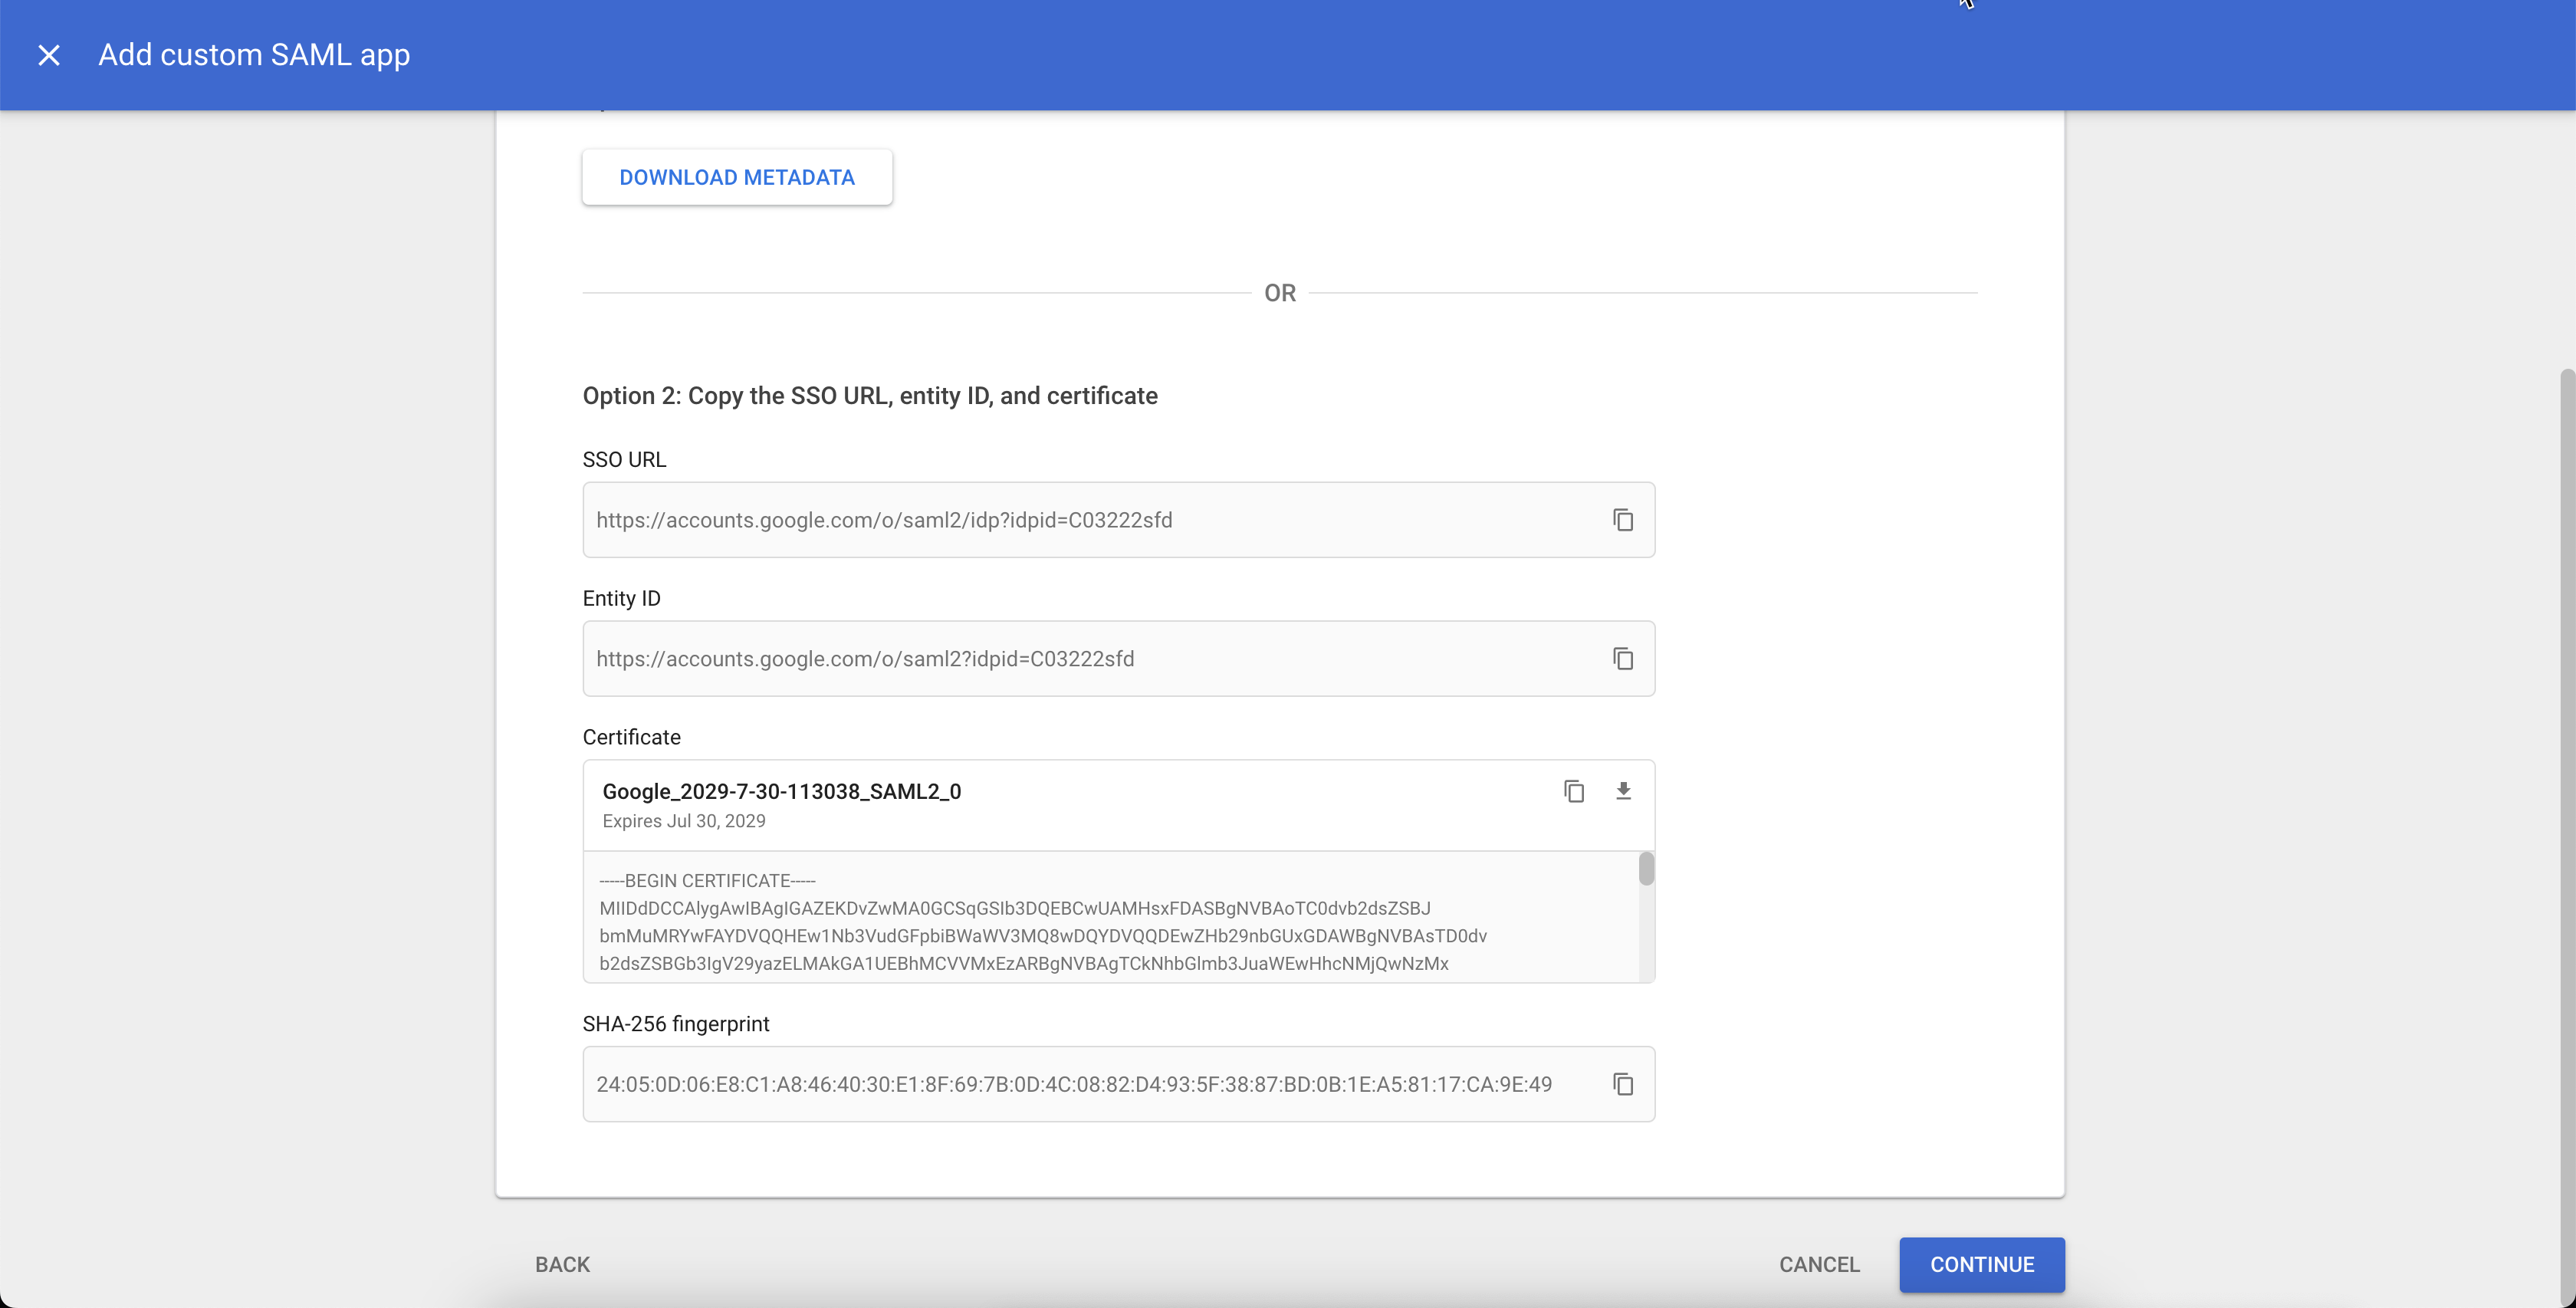
Under Option1: Download IdP metadata, click DOWNLOAD METADATA.
Click CONTINUE. Leave this window or tab open while you perform the next steps in the OCI Console.
-
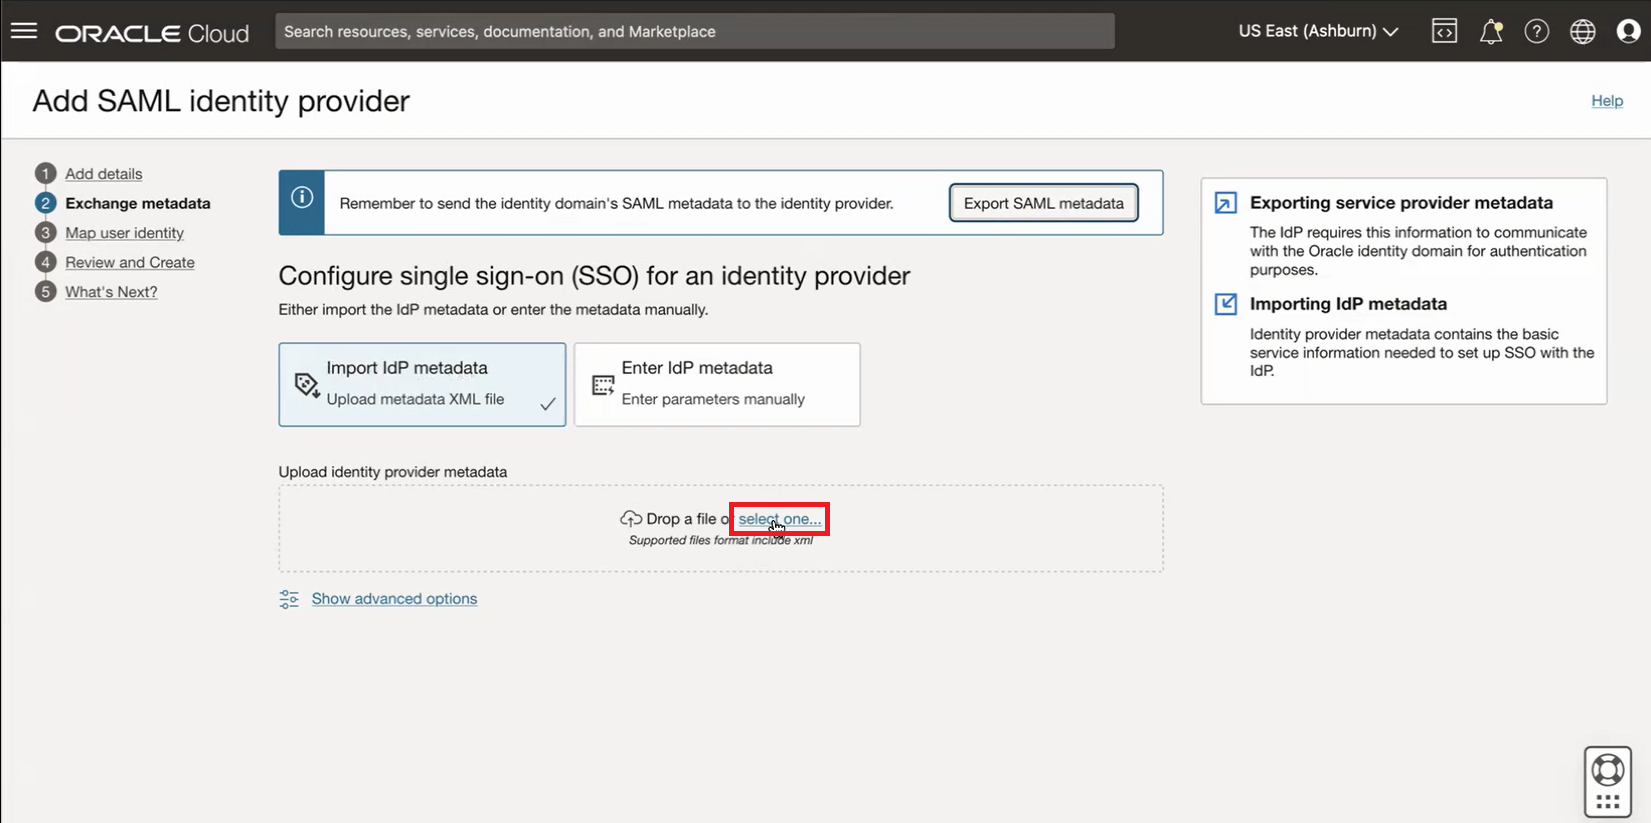
Return to the window or tab that displays the OCI Console. Click Import IdP metadata Upload metadata XML file. In the Upload identity provider metadata section, click select one..., then navigate to the XML file downloaded in the previous step from the Google Cloud admin console and upload the file.
-
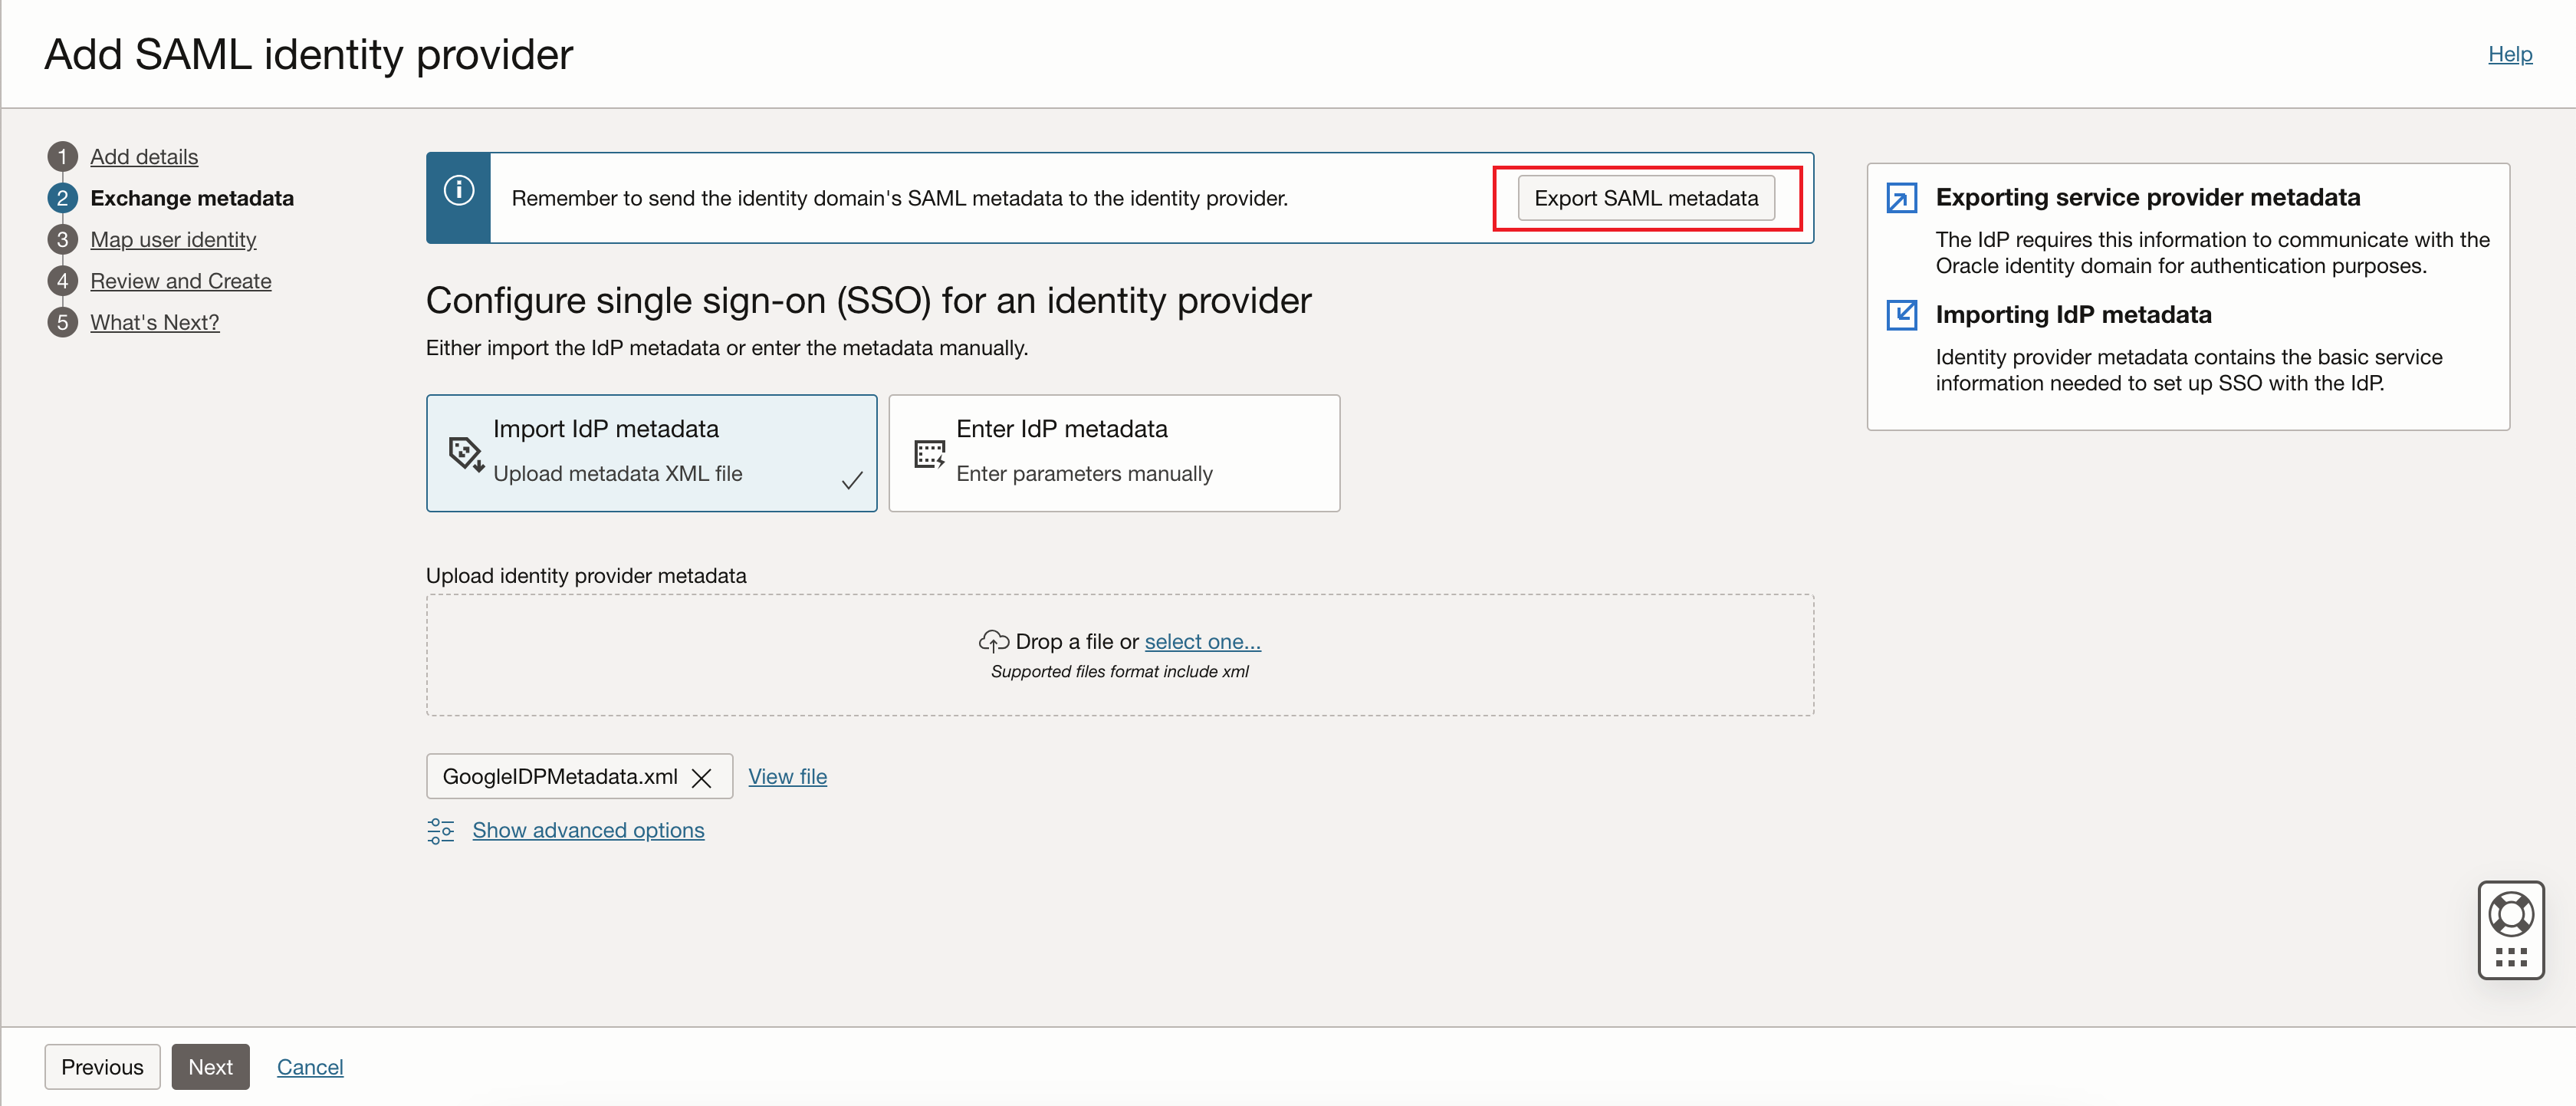
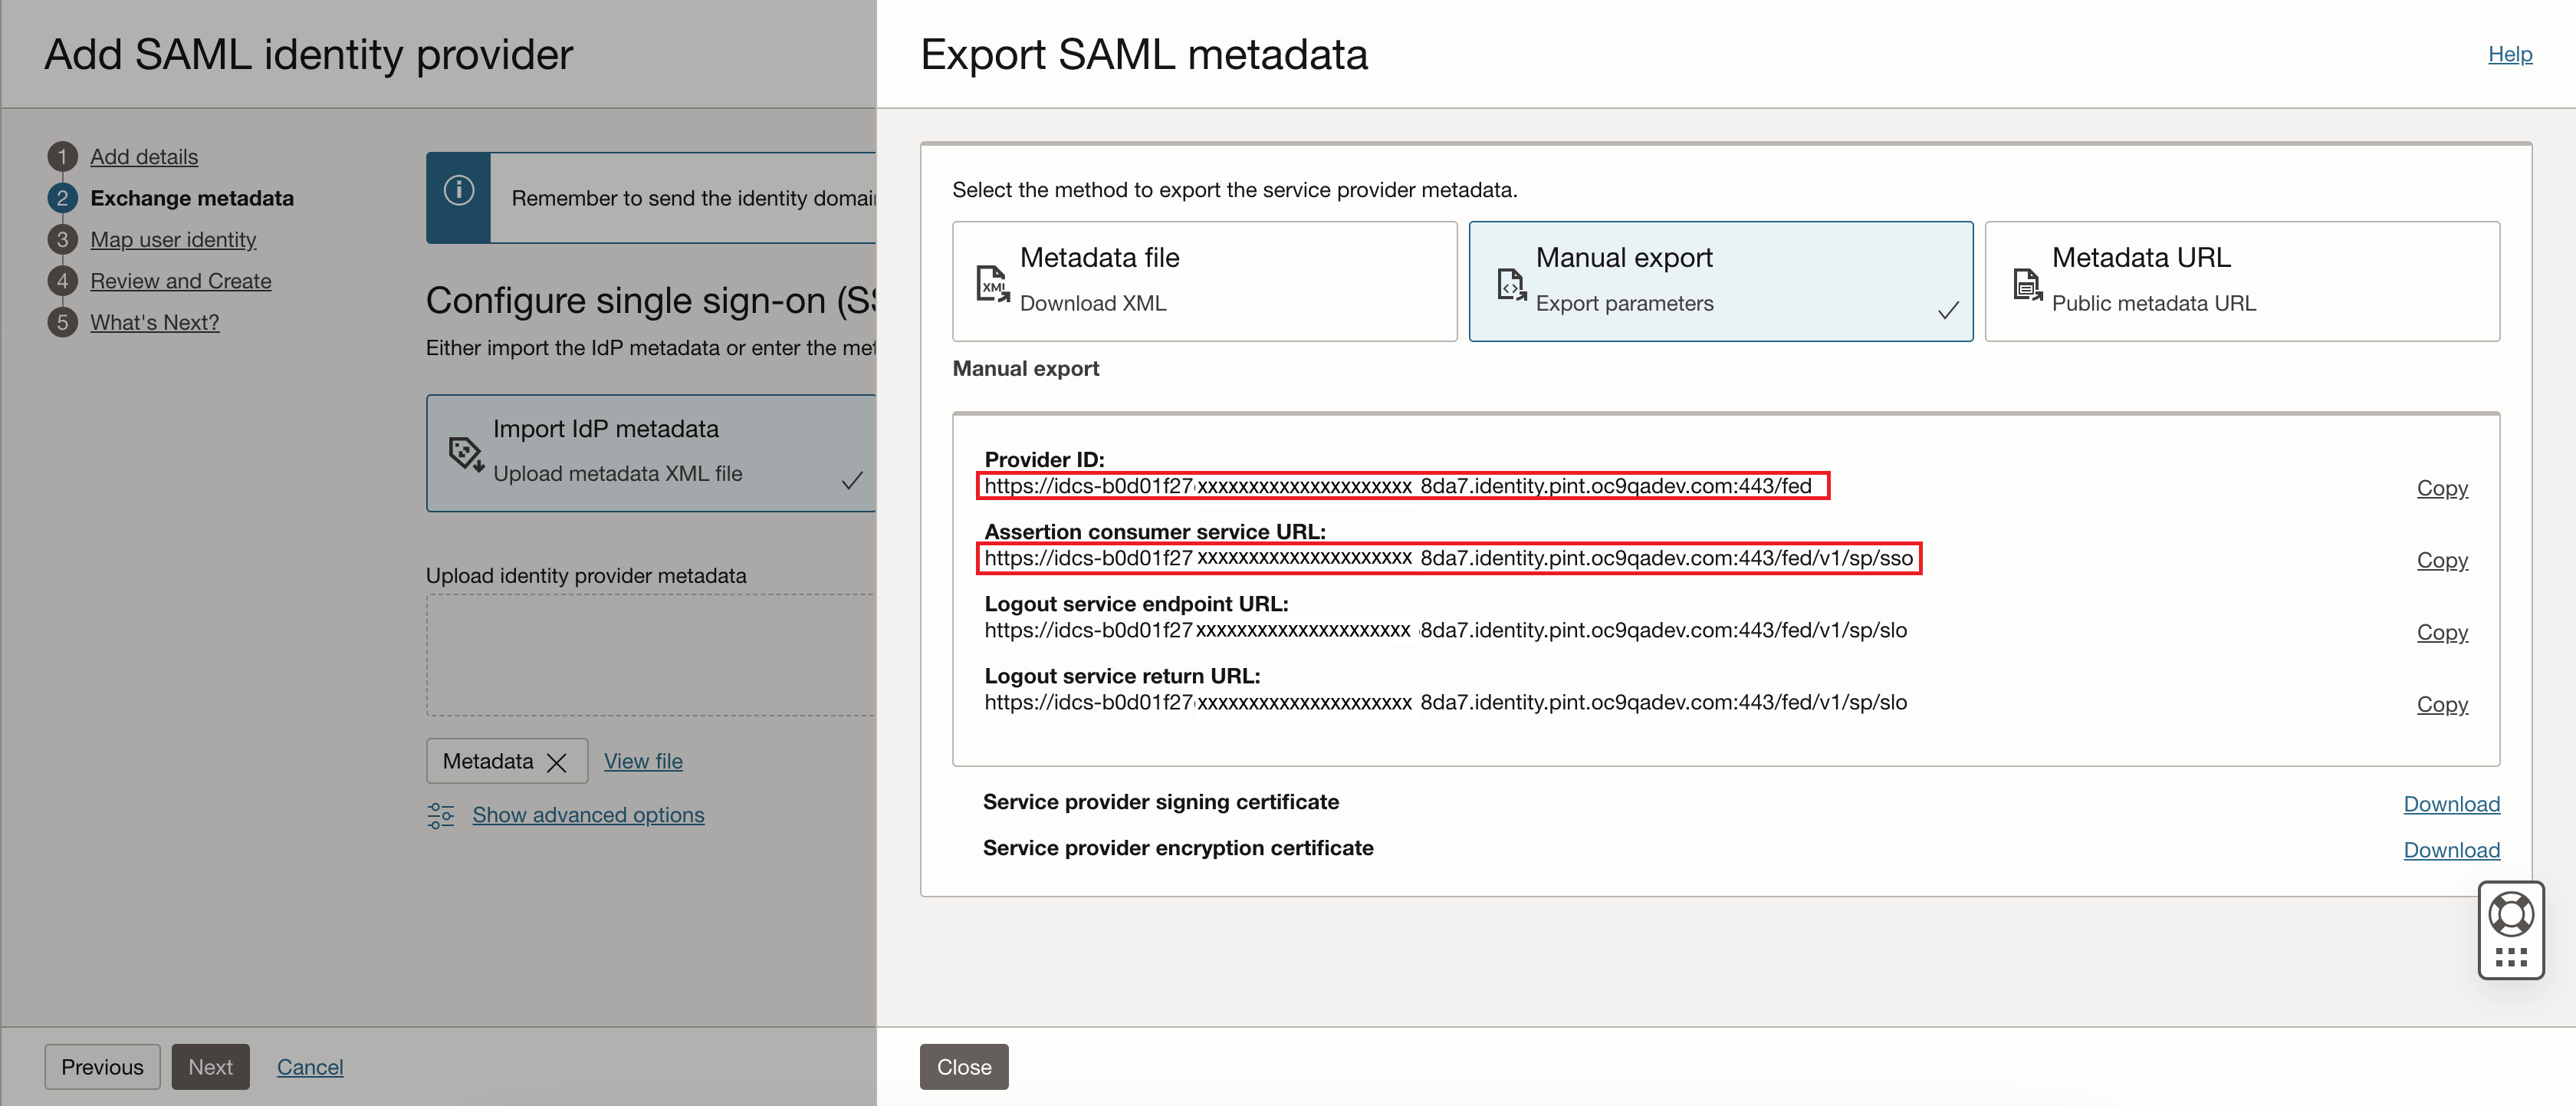
Click Export SAML metadata.
-
On the Export SAML metadata dialog, click Manual export. Copy the Provider ID and Assertion consumer service URL values into a notepad file on the local machine. Leave this window or tab open while you perform the next steps that require the Google Cloud admin console.
-
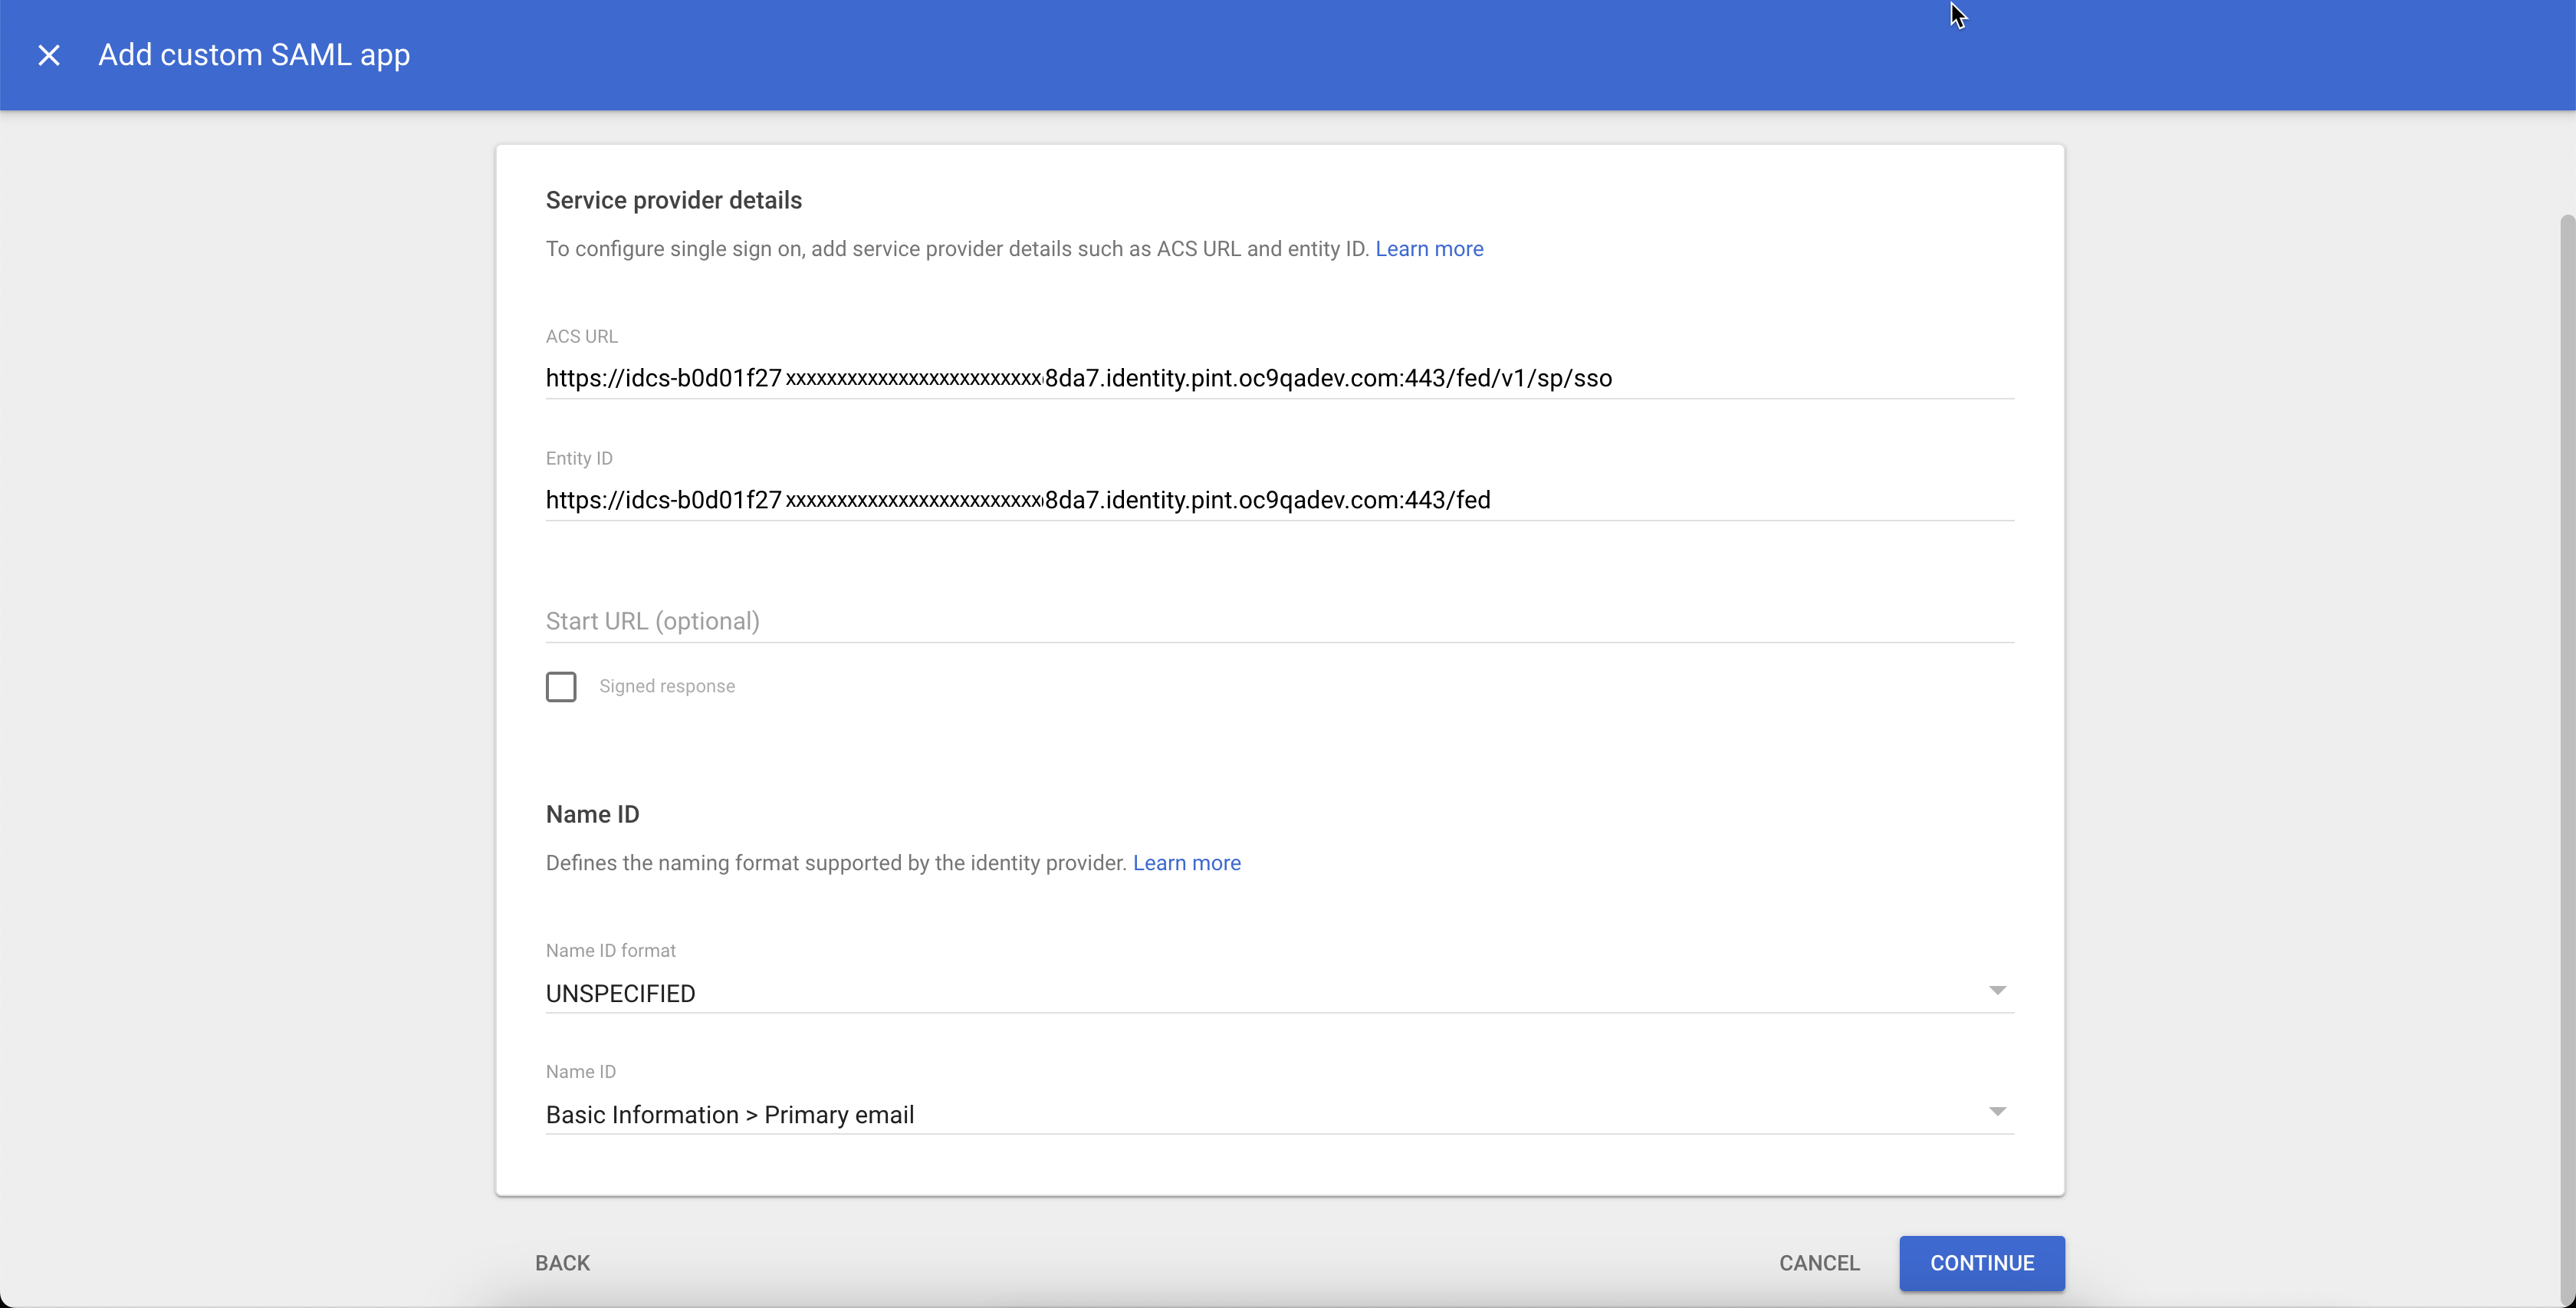
Return to the tab or window displaying the Google Cloud admin console. On the Service provider details page, enter the following:
- ACS URL: Enter the "Assertion consumer service URL" value copied from the OCI Console in the previous step.
- Entity ID: Enter the "Provider ID" value copied from the OCI Console in the previous step.
Click CONTINUE.
-
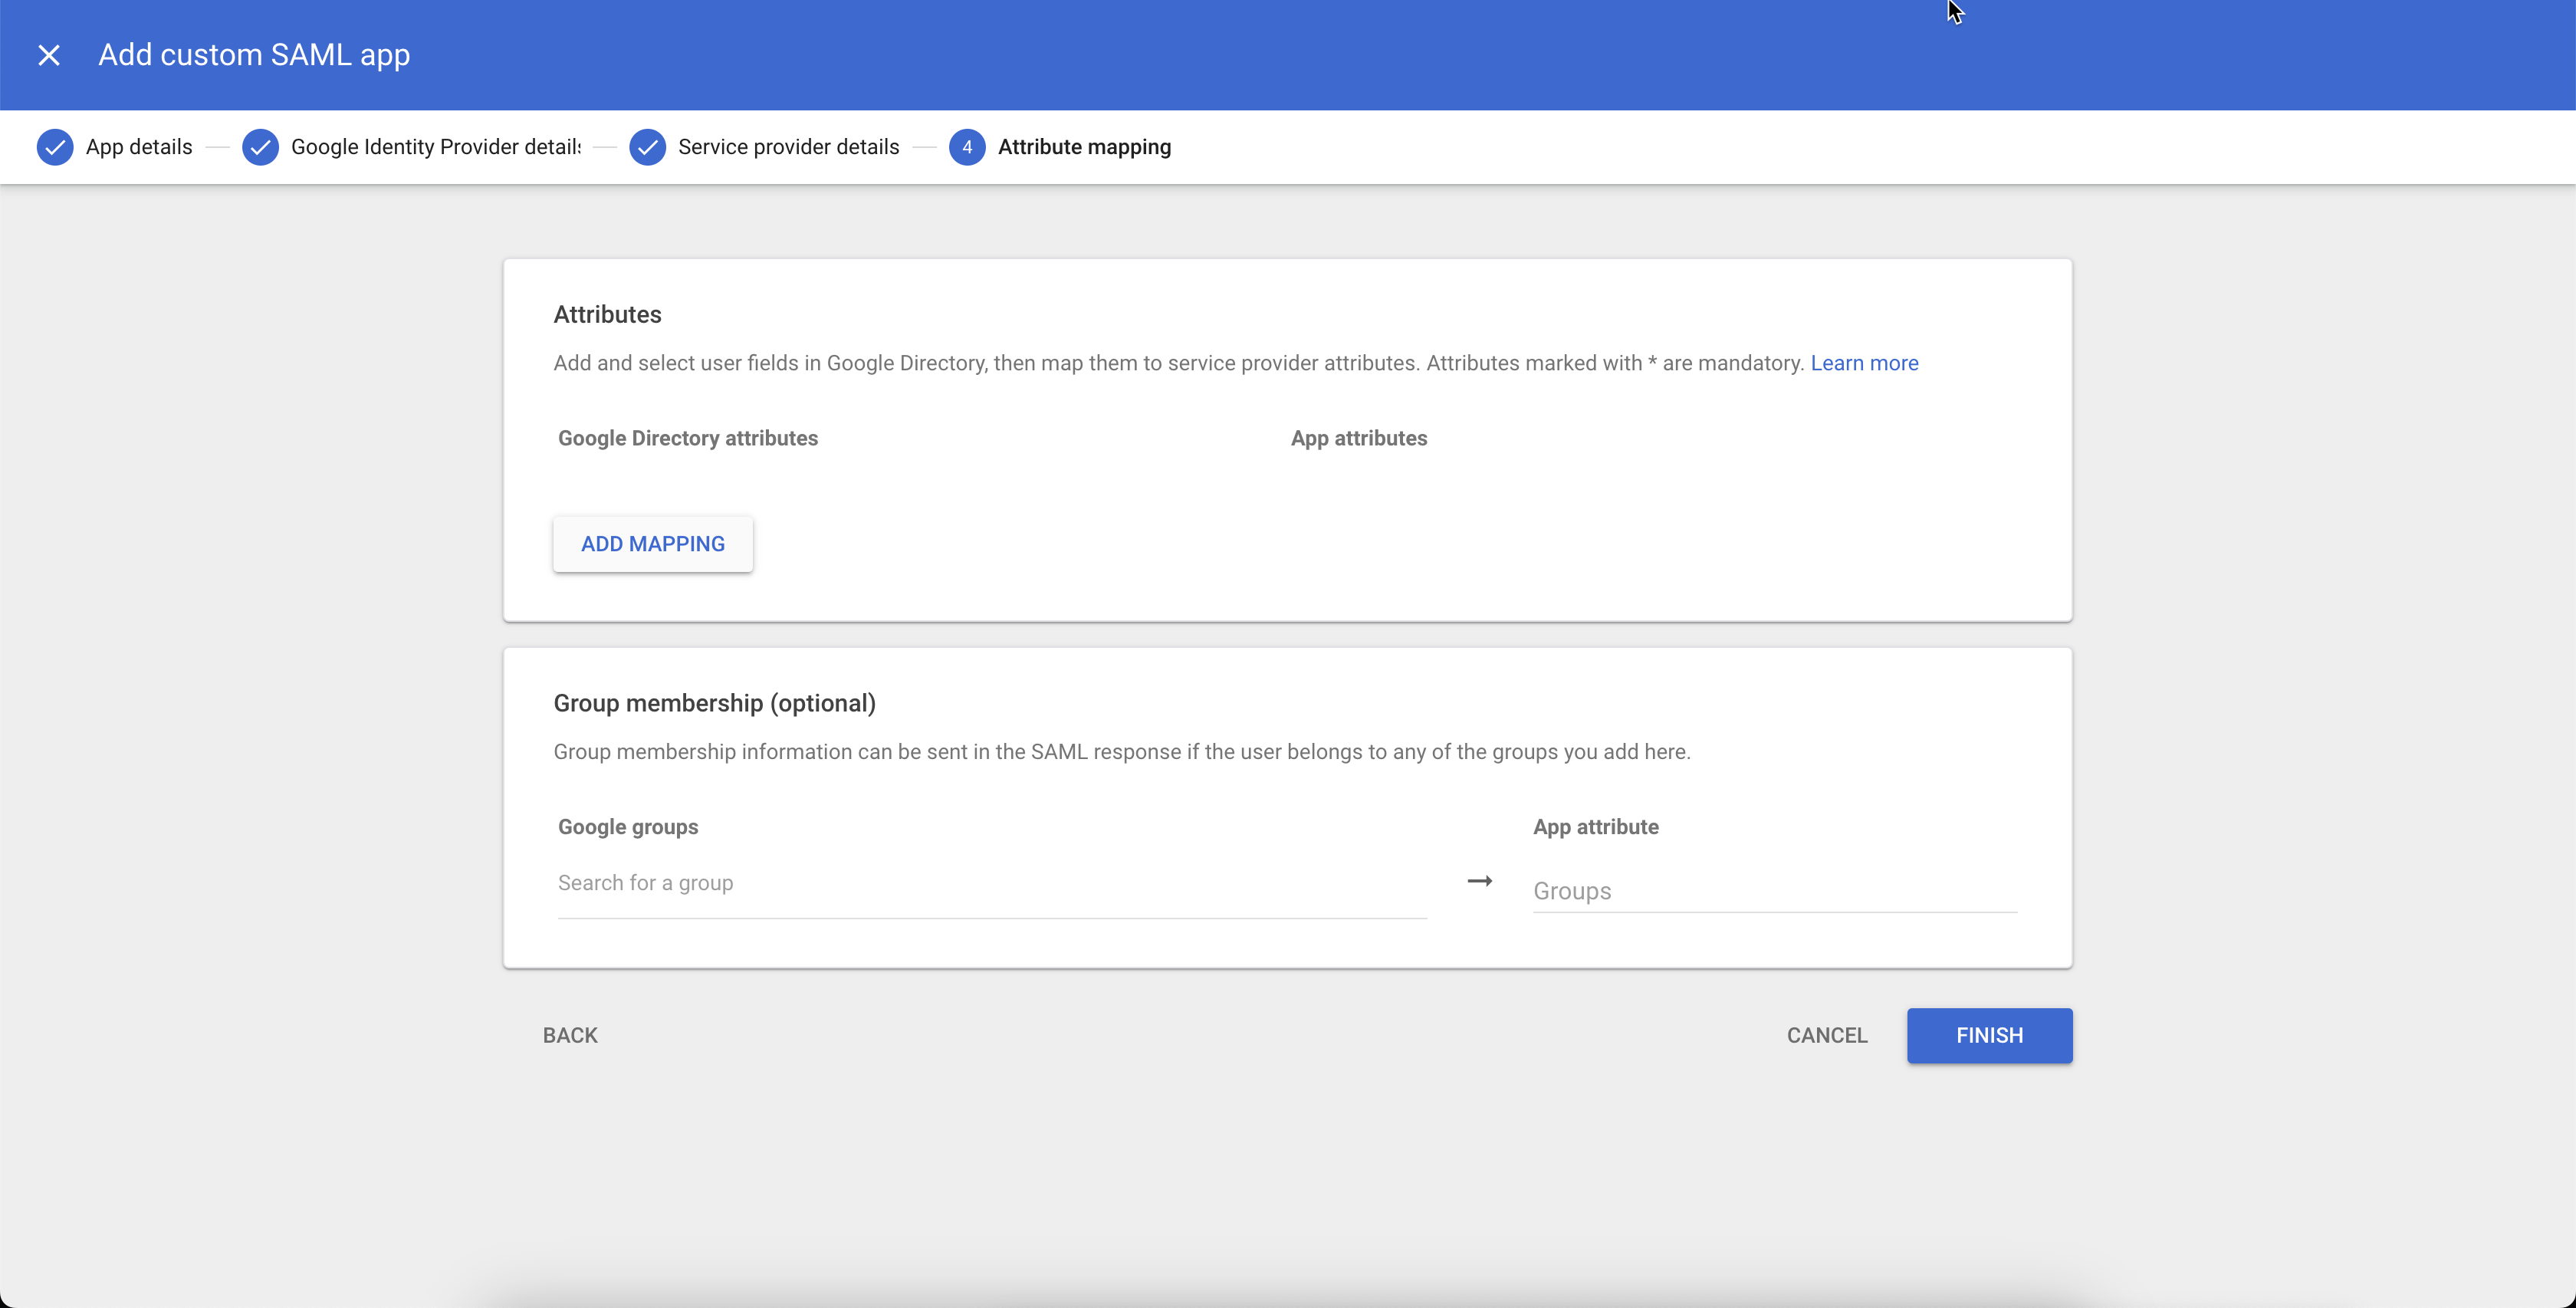
On the Attribute mapping page, click ADD MAPPING.
-
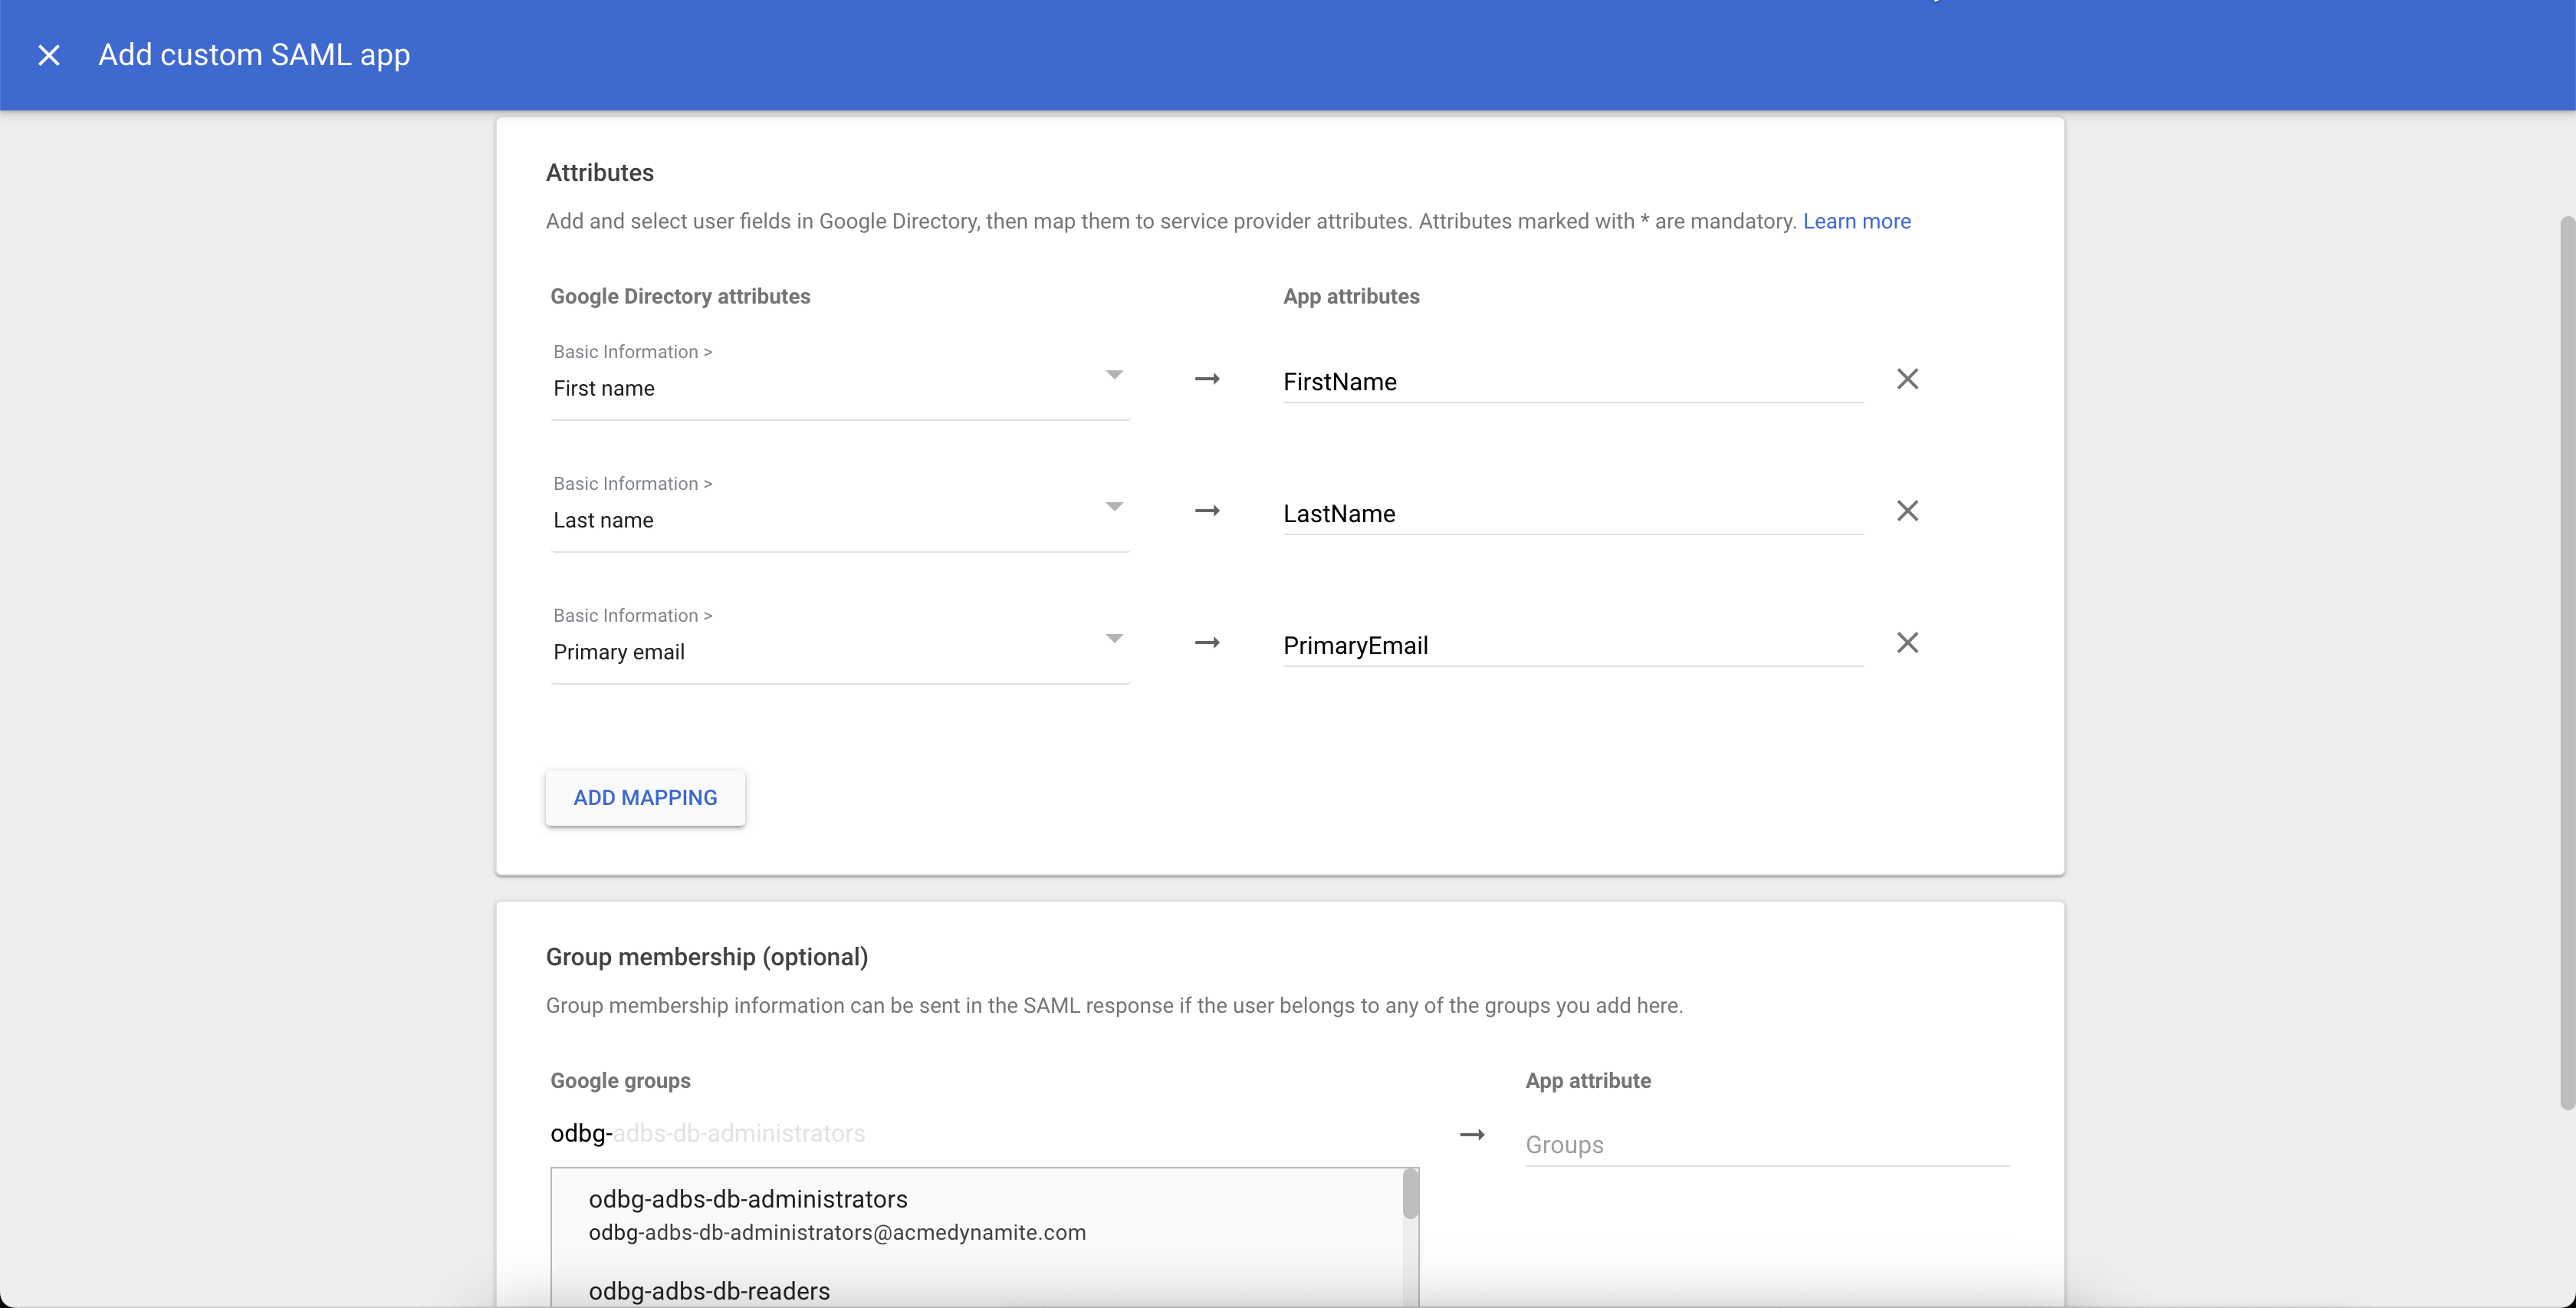
Add the following attribute mappings:
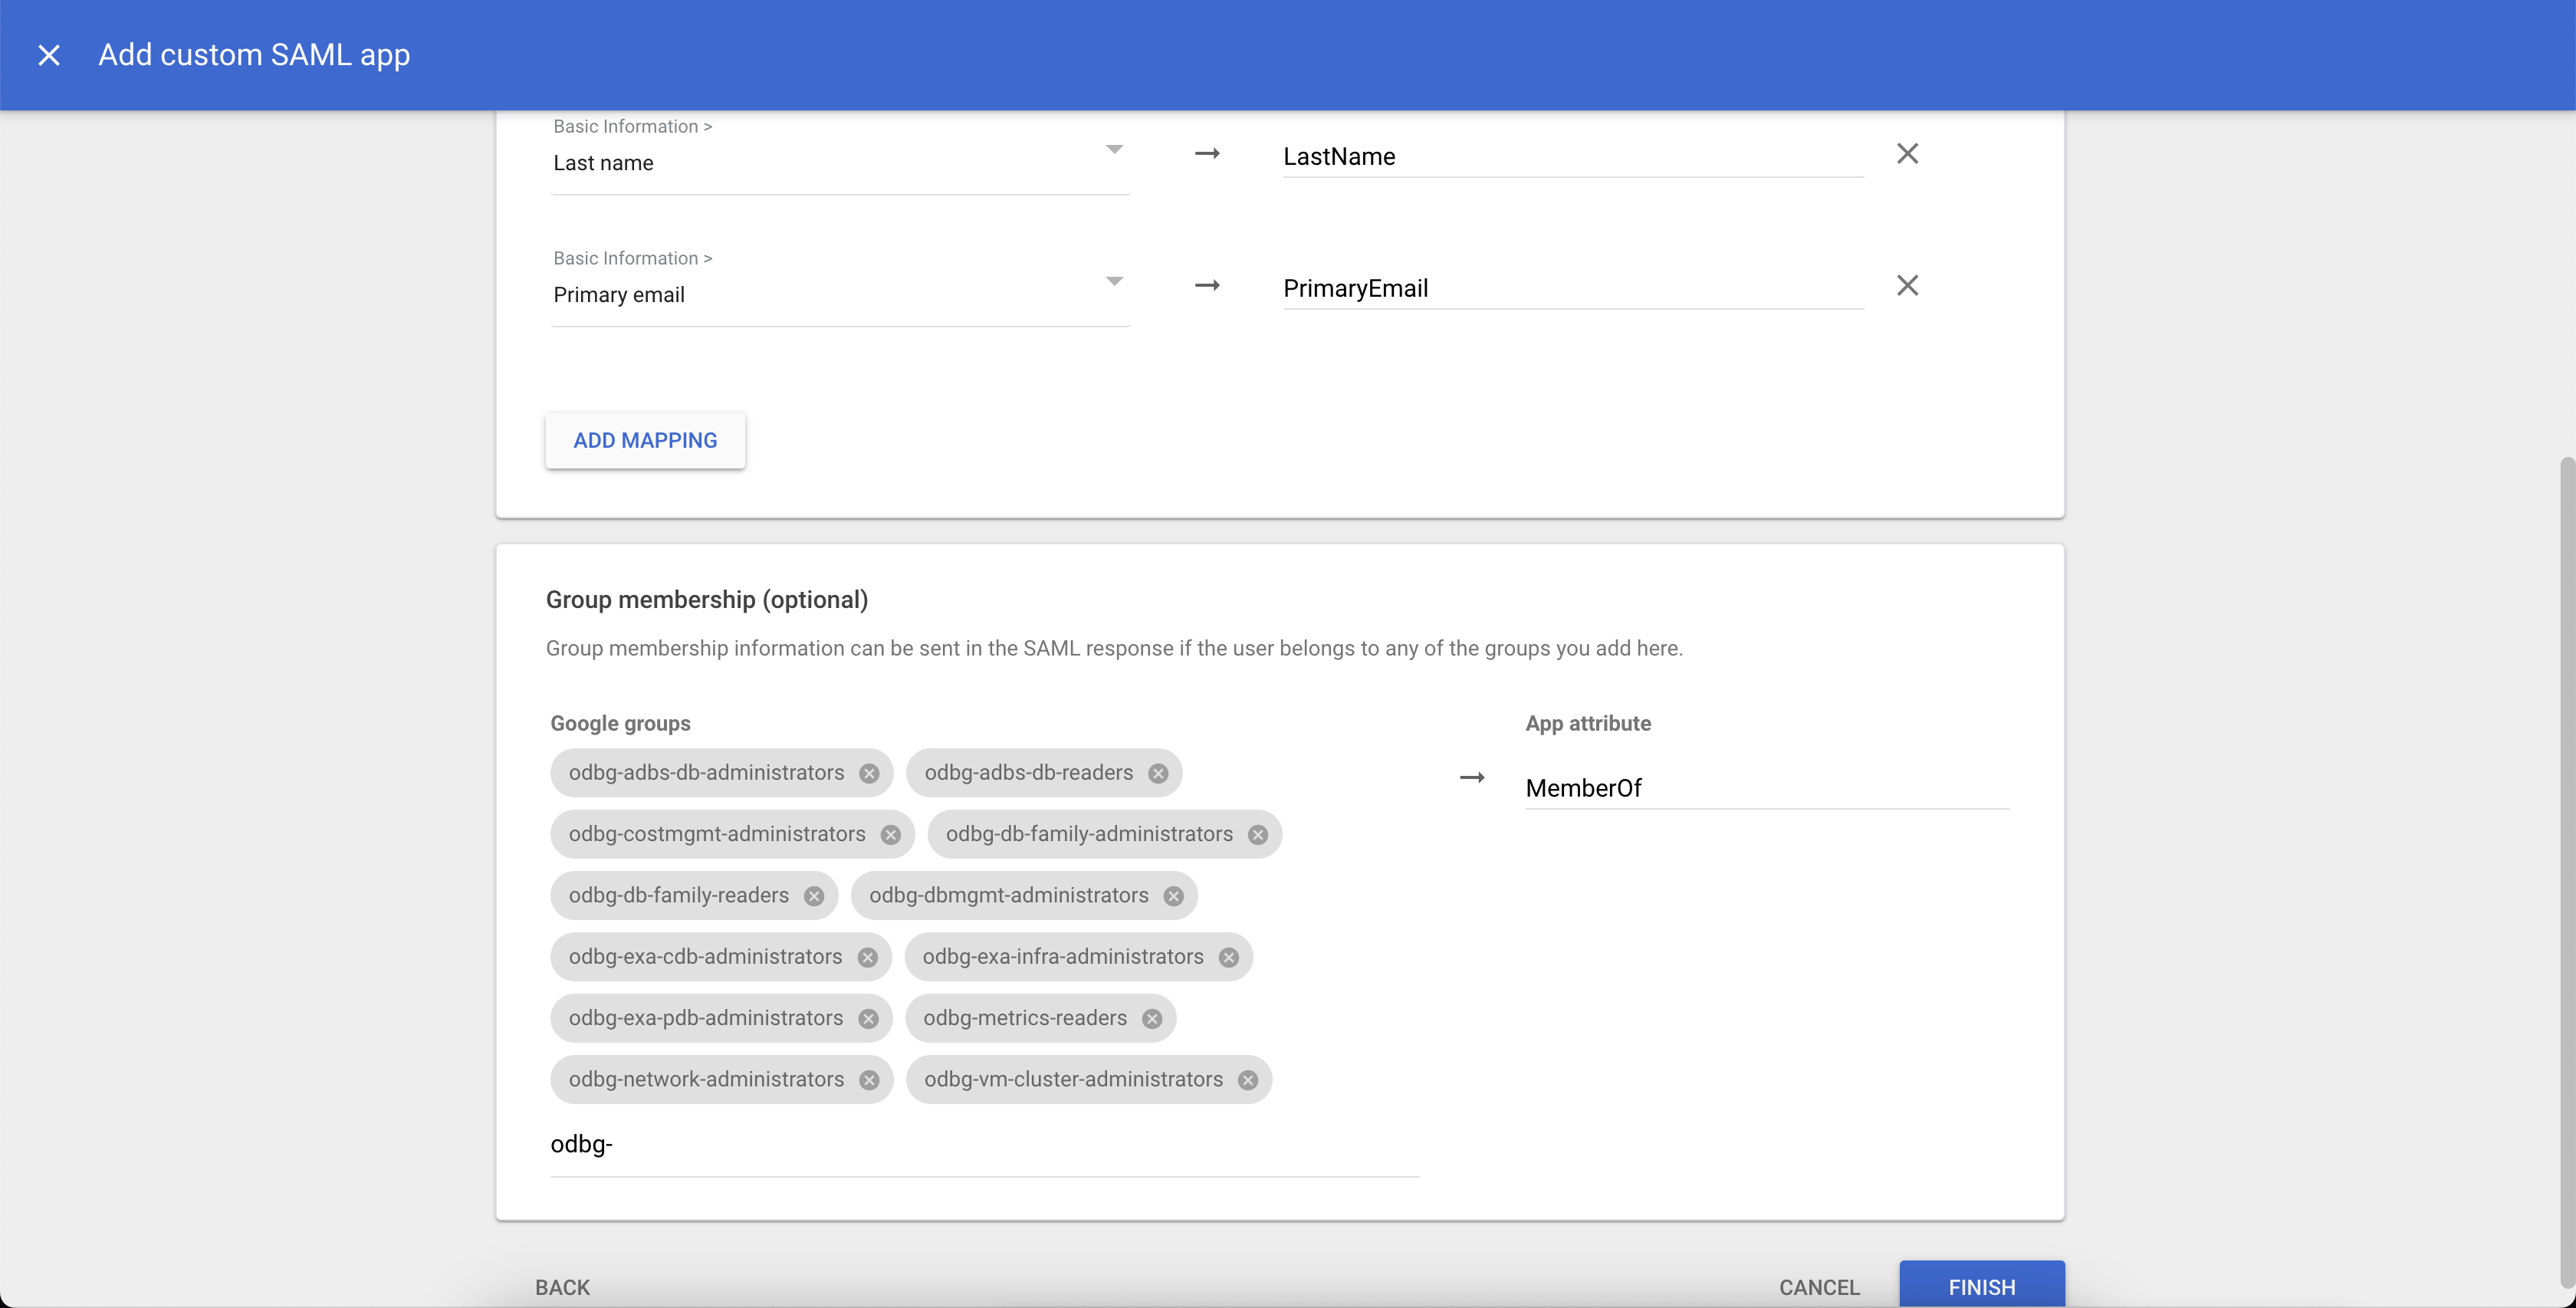
- First name → FirstName
- Last name → LastName
- Primary email → PrimaryEmail
For example, for the Basic Information attribute "First Name", enter the App attribute
FirstName. -
On the Attribute mapping page, in the Group membership section, add the following groups created for role based access control (RBAC). The App attribute for the groups is
MemberOf. Click FINISH to continue.- odbg-exa-infra-administrators
- odbg-vm-cluster-administrator
- odbg-exa-cdb-administrators
- odbg-exa-pdb-administrators
- odbg-dbmgmt-administrators
- odbg-adbs-db-administrators
- odbg-db-family-administrators
- odbg-network-administrators
- odbg-costmgmt-administrators
- odbg-db-family-readers
- odbg-network-readers
- odbg-metrics-readers
-
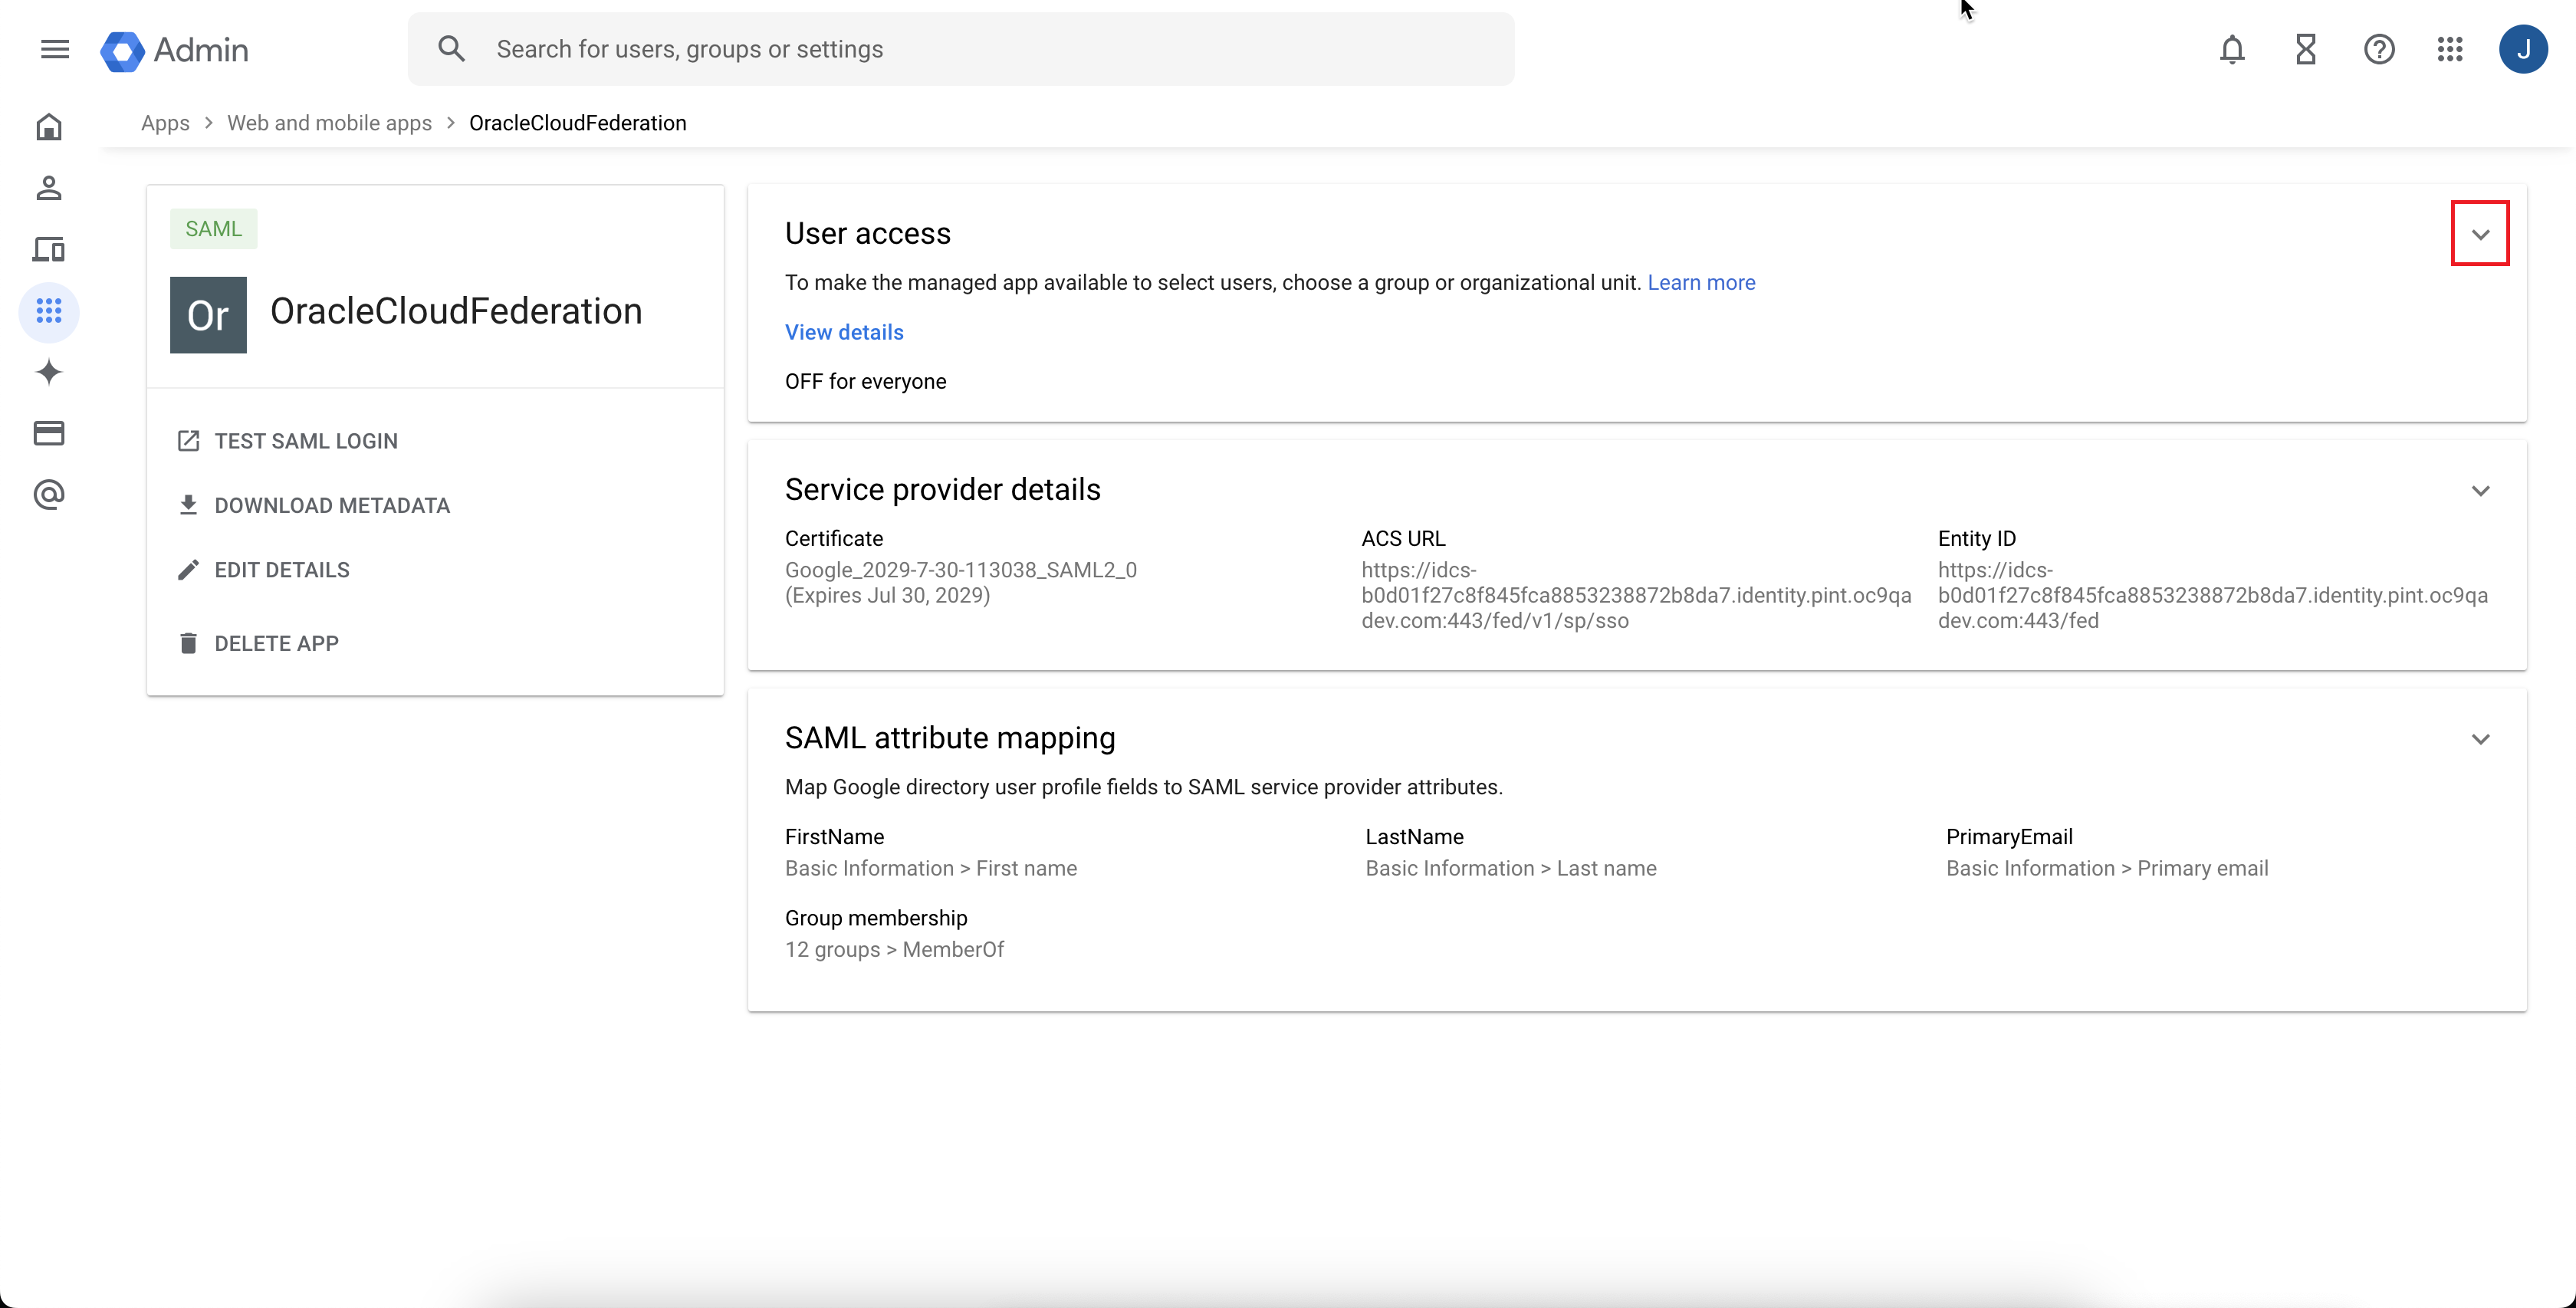
The Google Cloud admin console automatically redirects to the details page for the SAML application you have created. Expand the User access section.
-
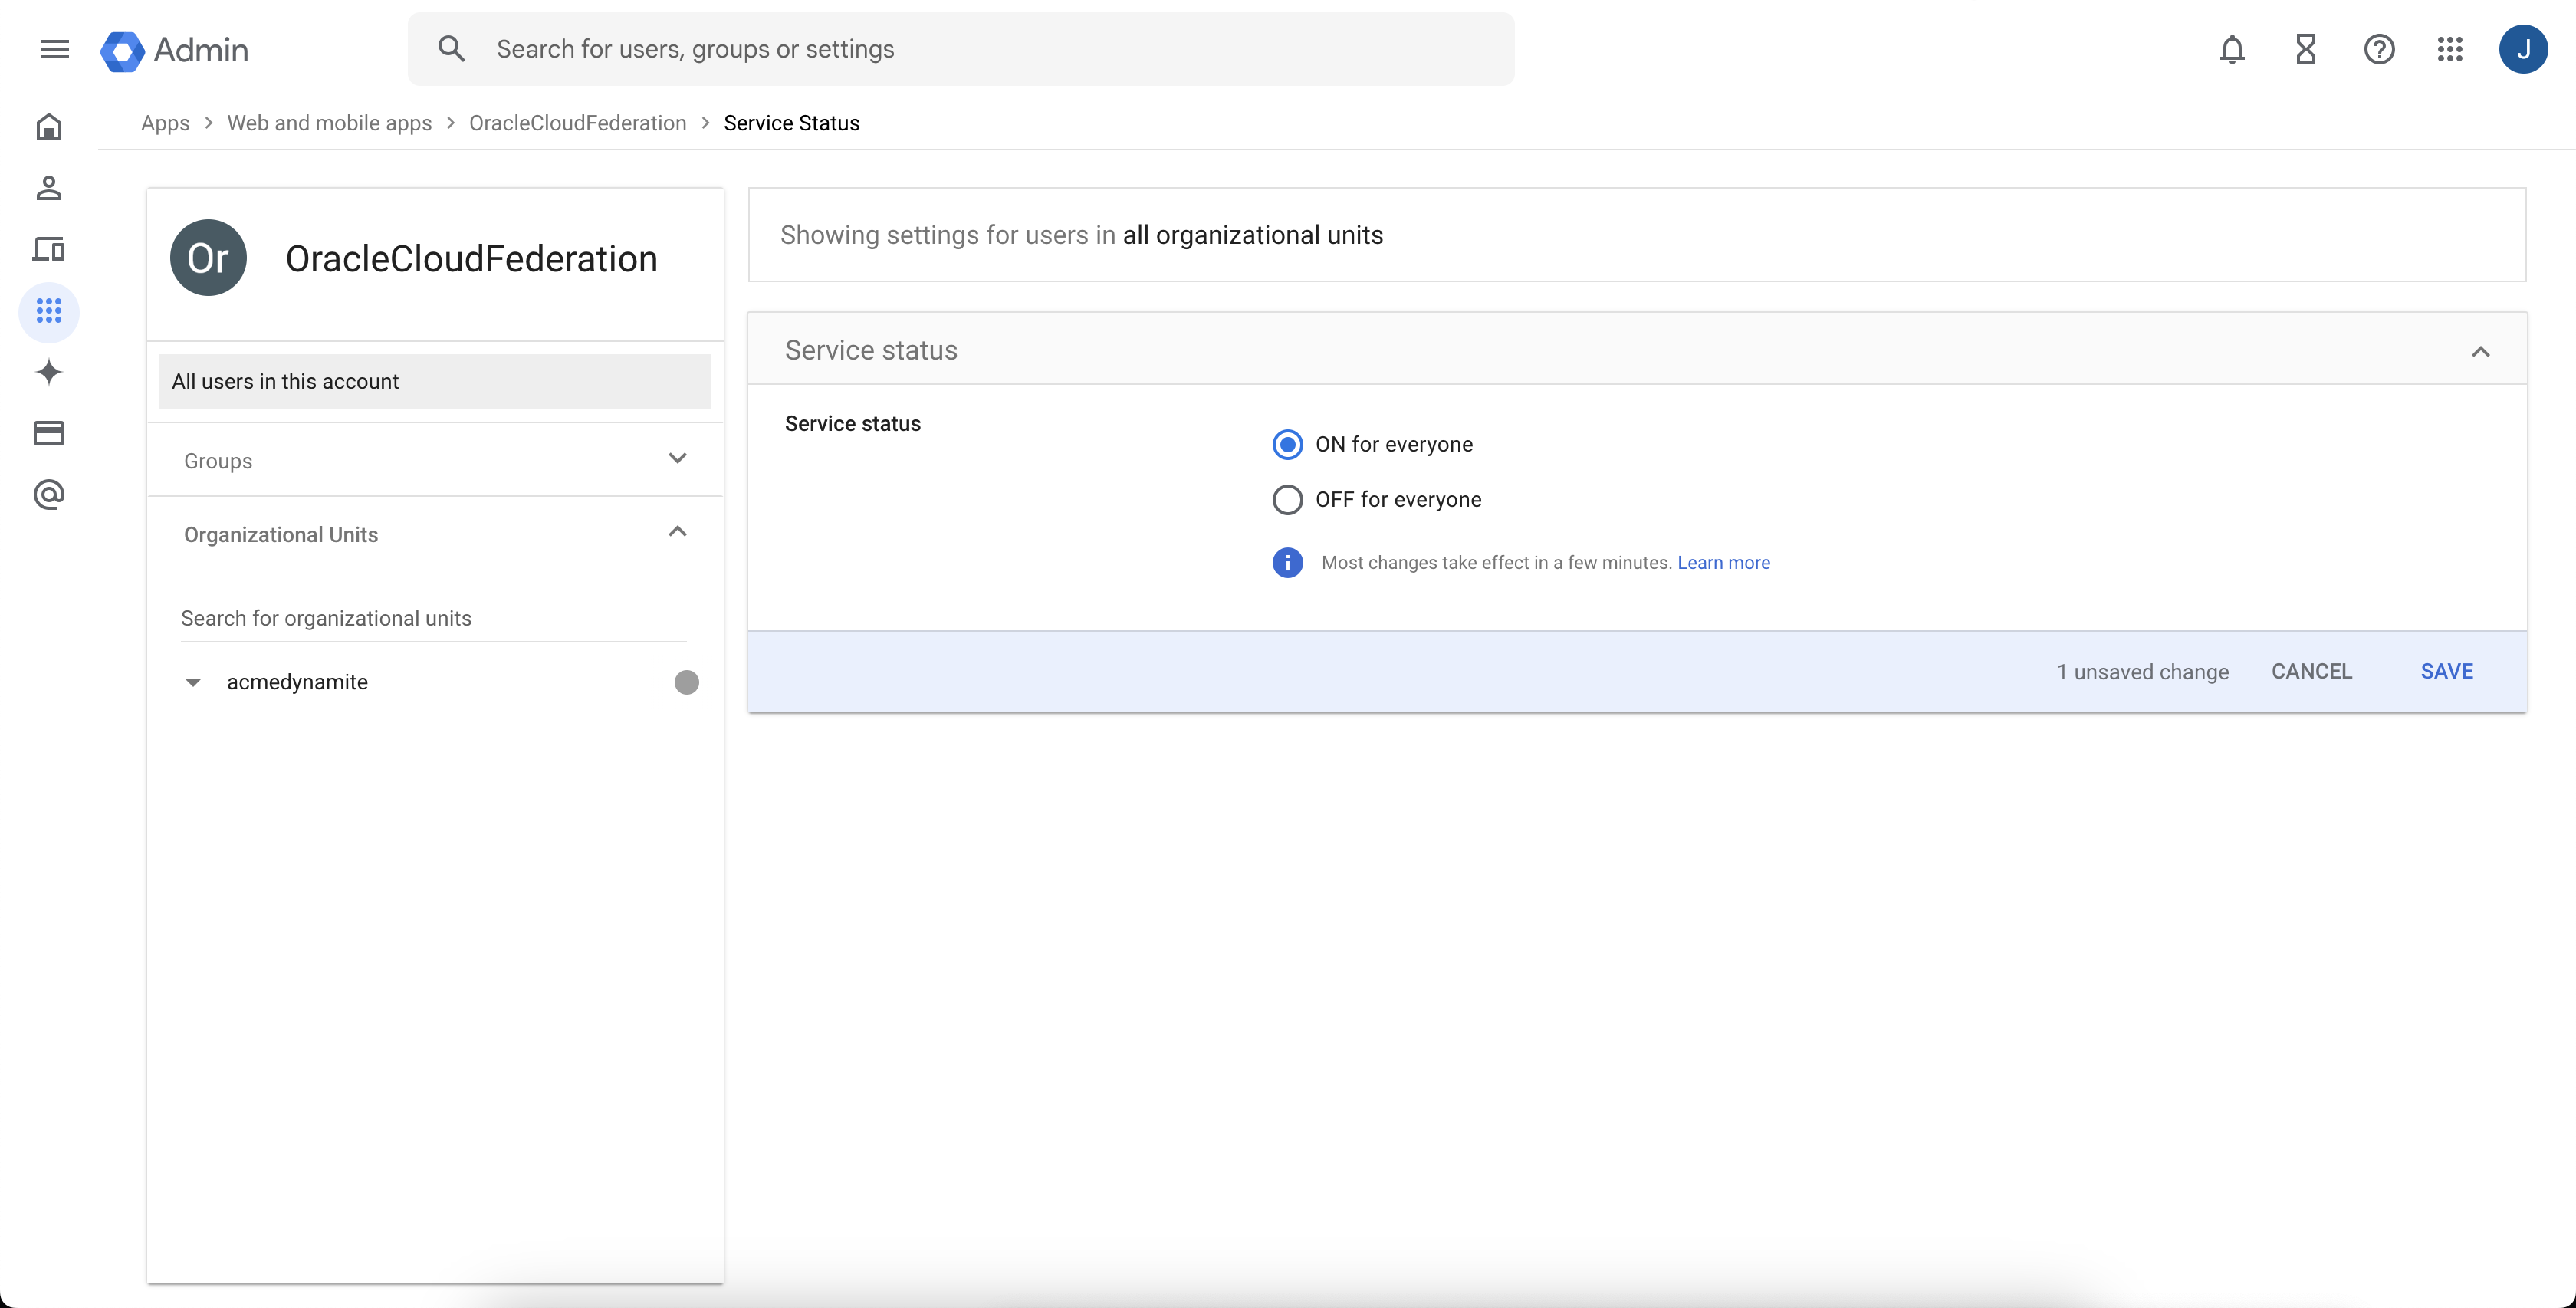
In the Service status section, select ON for everyone, then click SAVE.
-
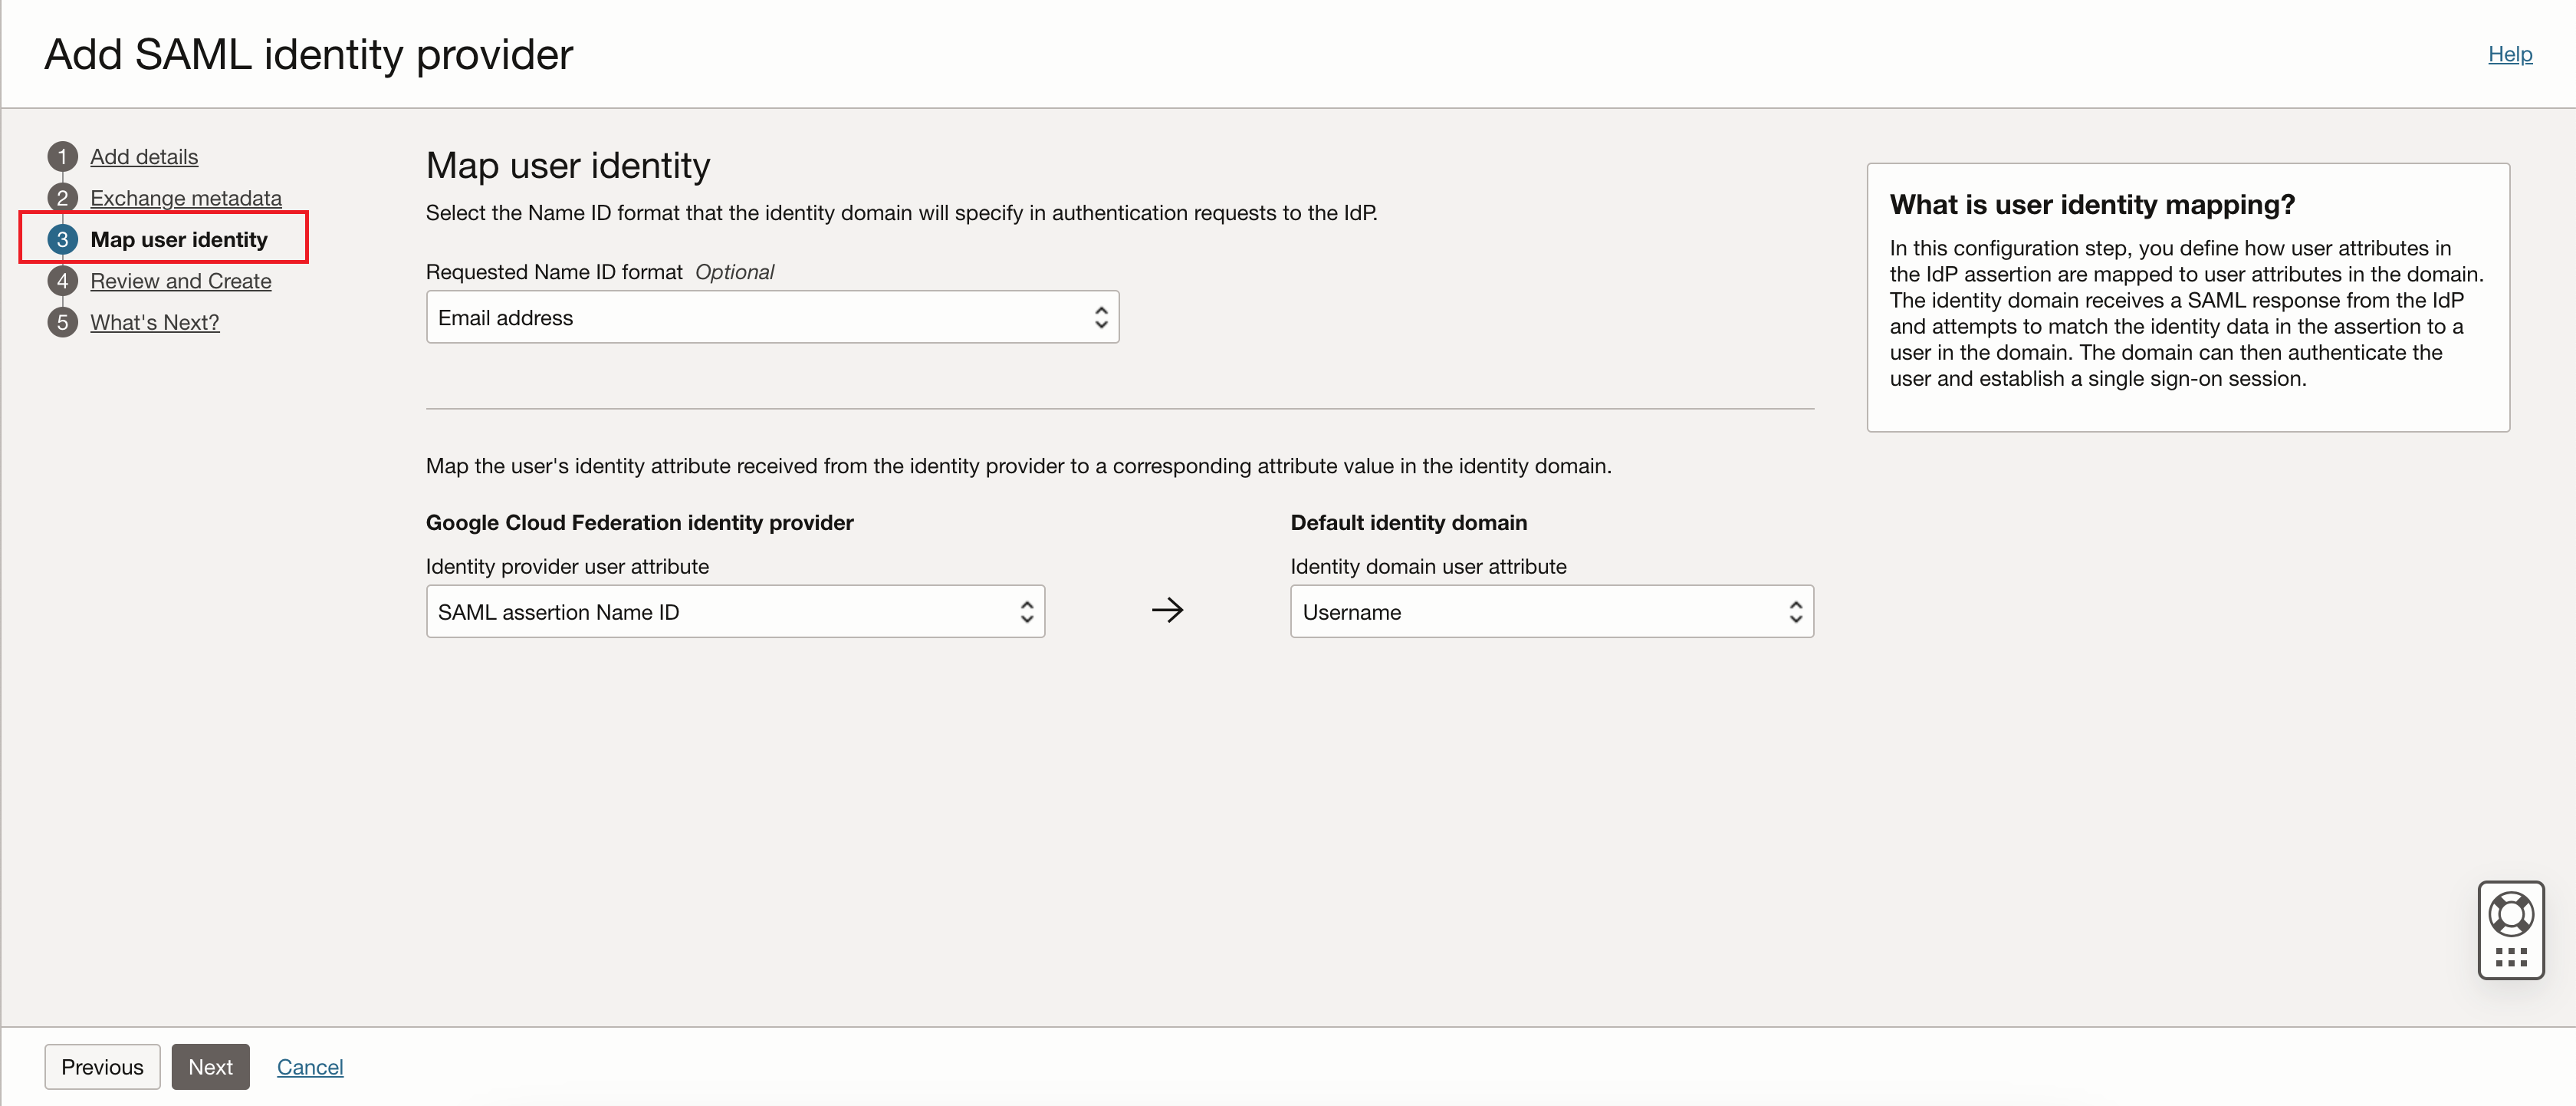
Return to the window or tab that displays the OCI Console. On the Add SAML identity provider page select Map user identity. Enter the following values:
- Requested Name ID format: Select "Email address".
- Identity provider user attribute: Select "SAML assertion Name ID"
- Identity domain user attribute: Select "Username"
-
On the Add SAML identity provider page select Review and Create.
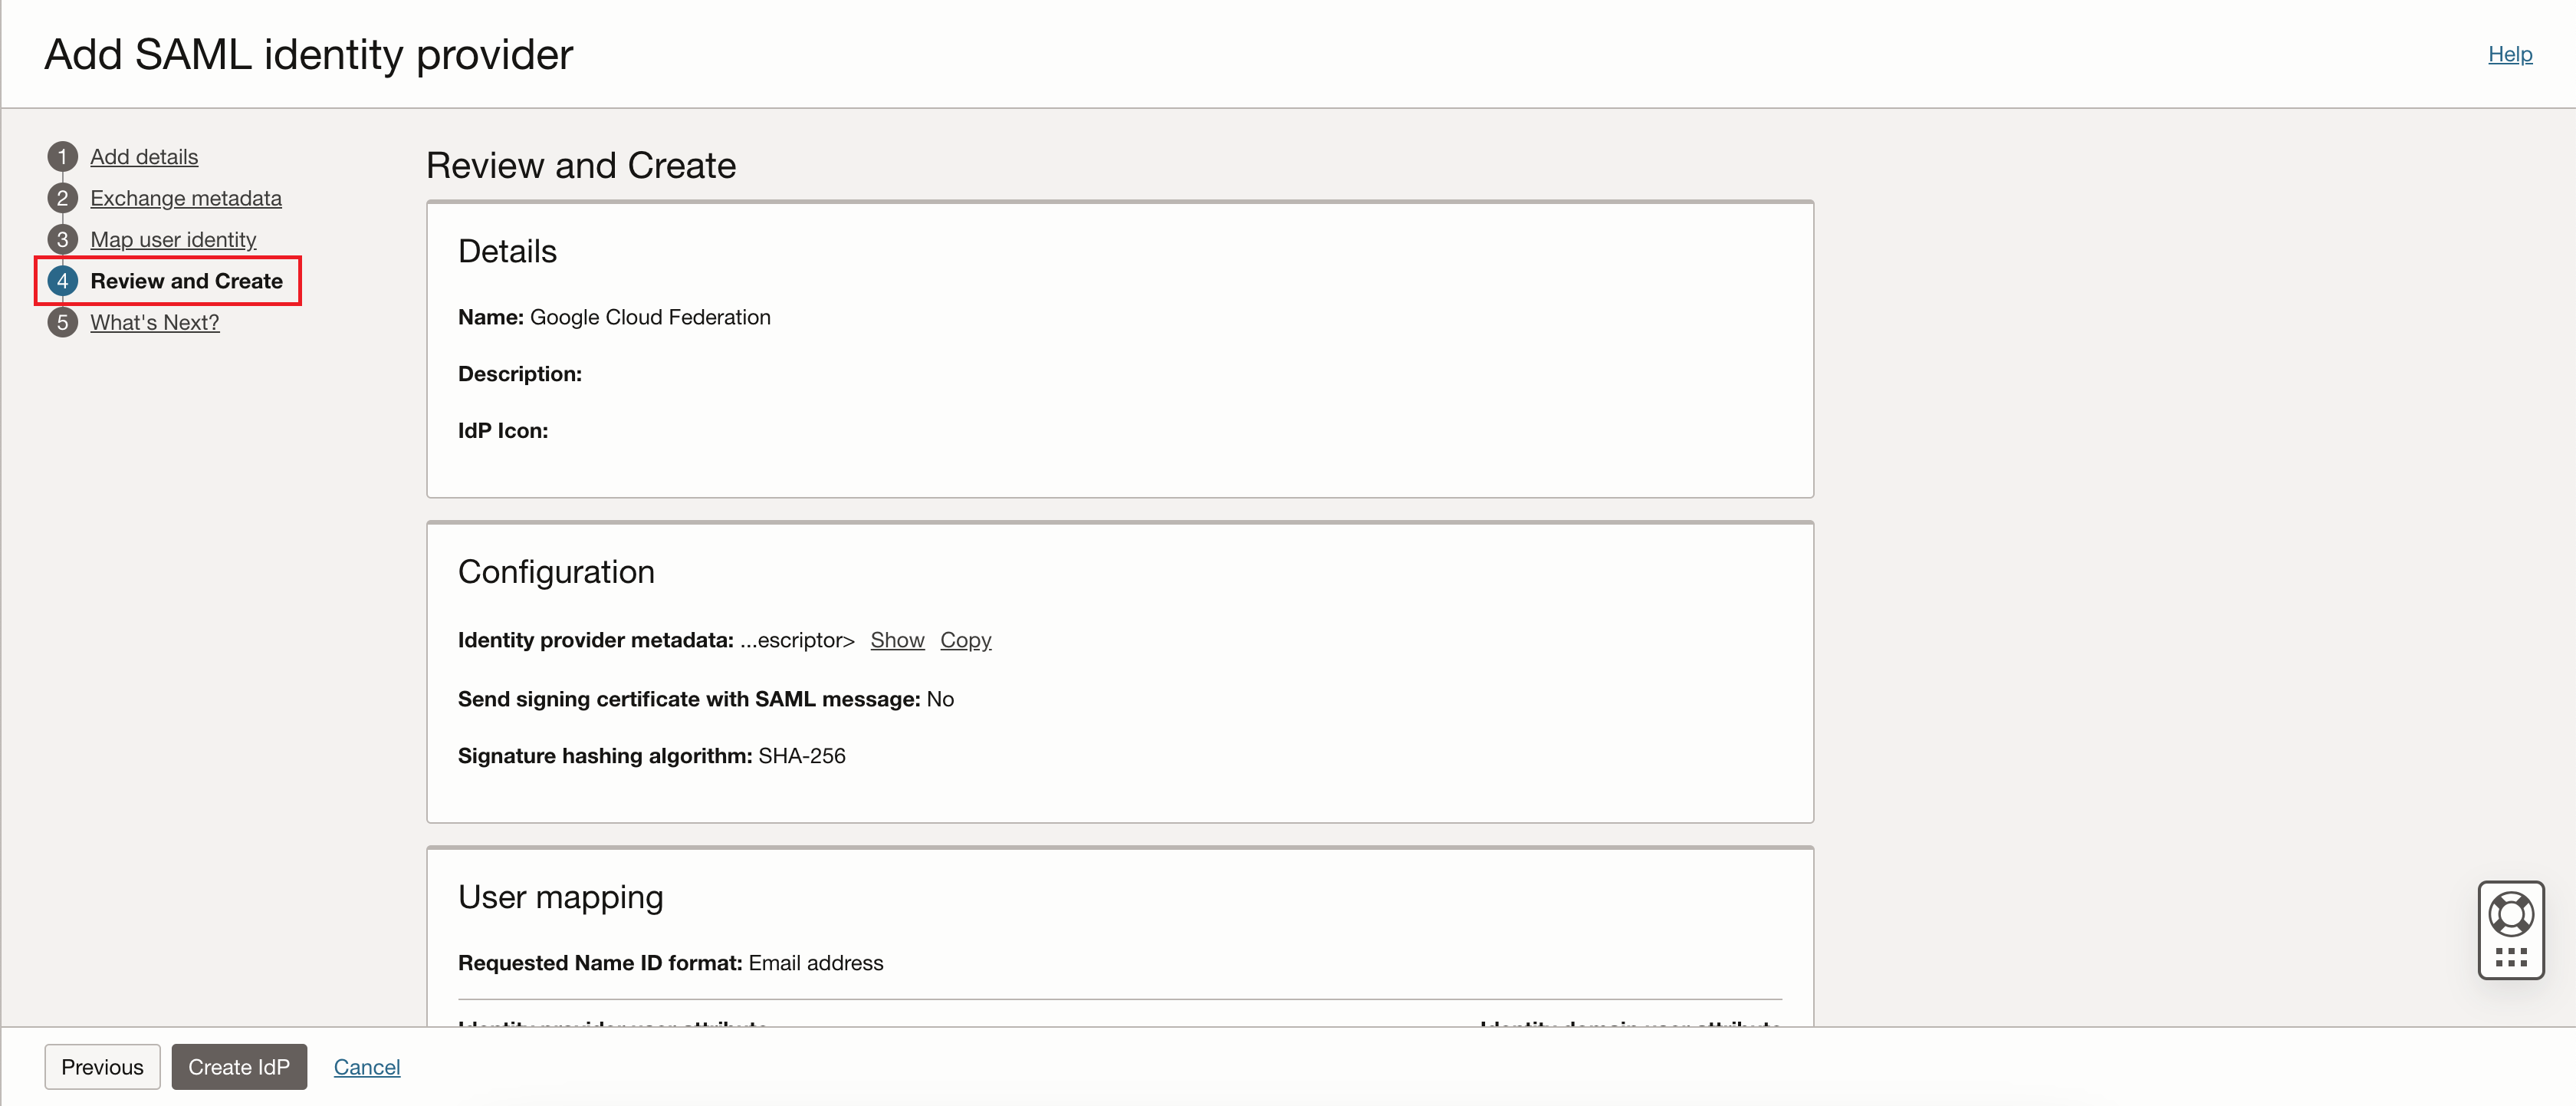
Review the SAML identity provider details, then click Create IdP.
-
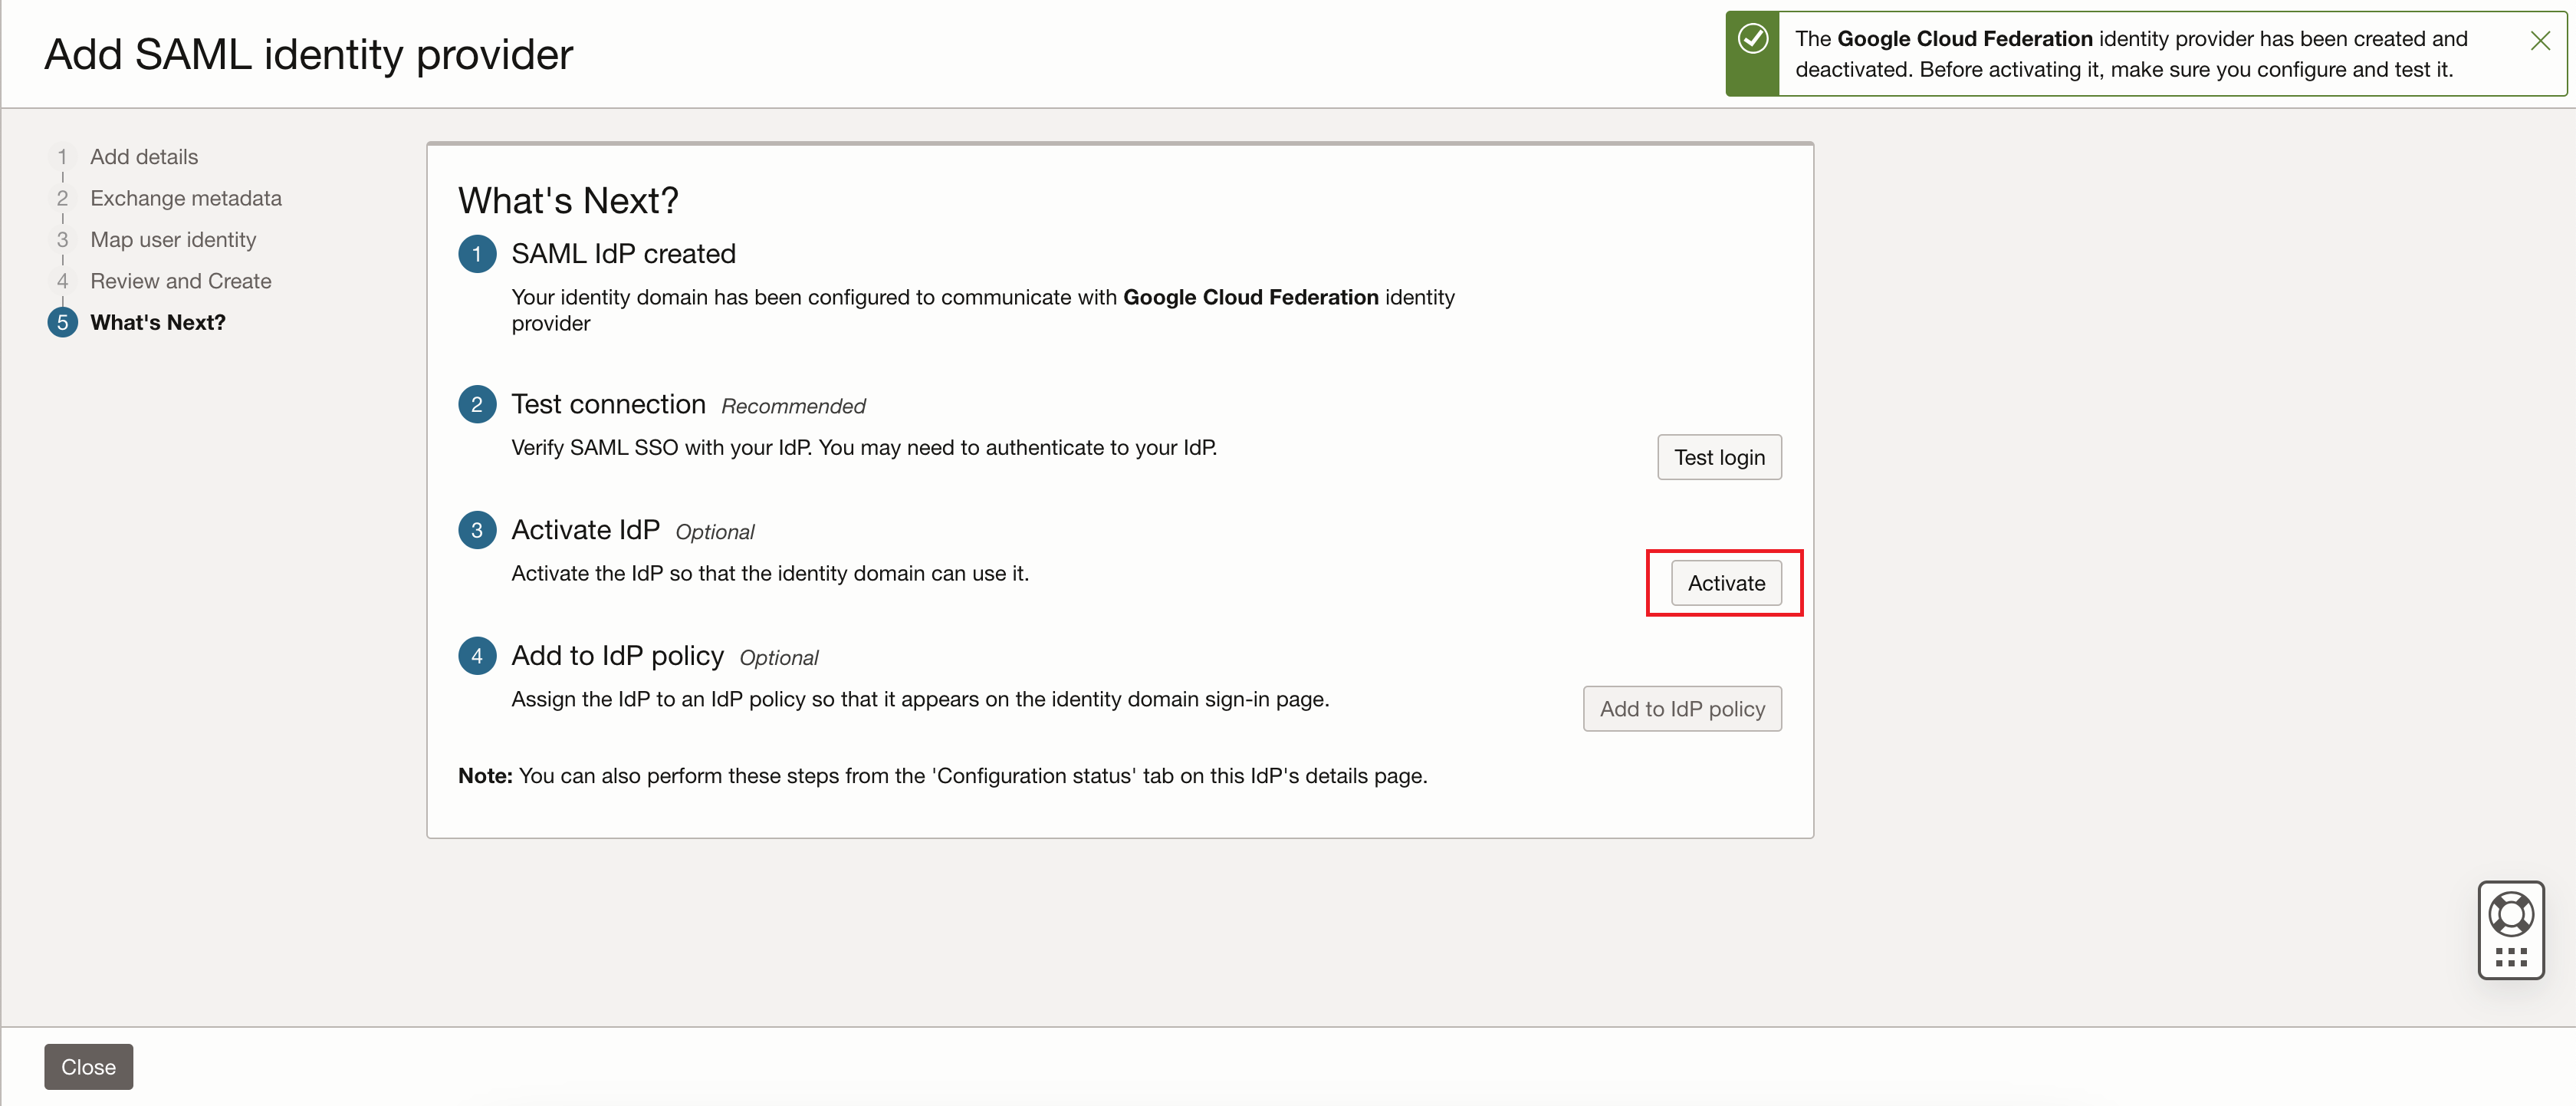
Click Activate to activate the identity provider (IdP).
-
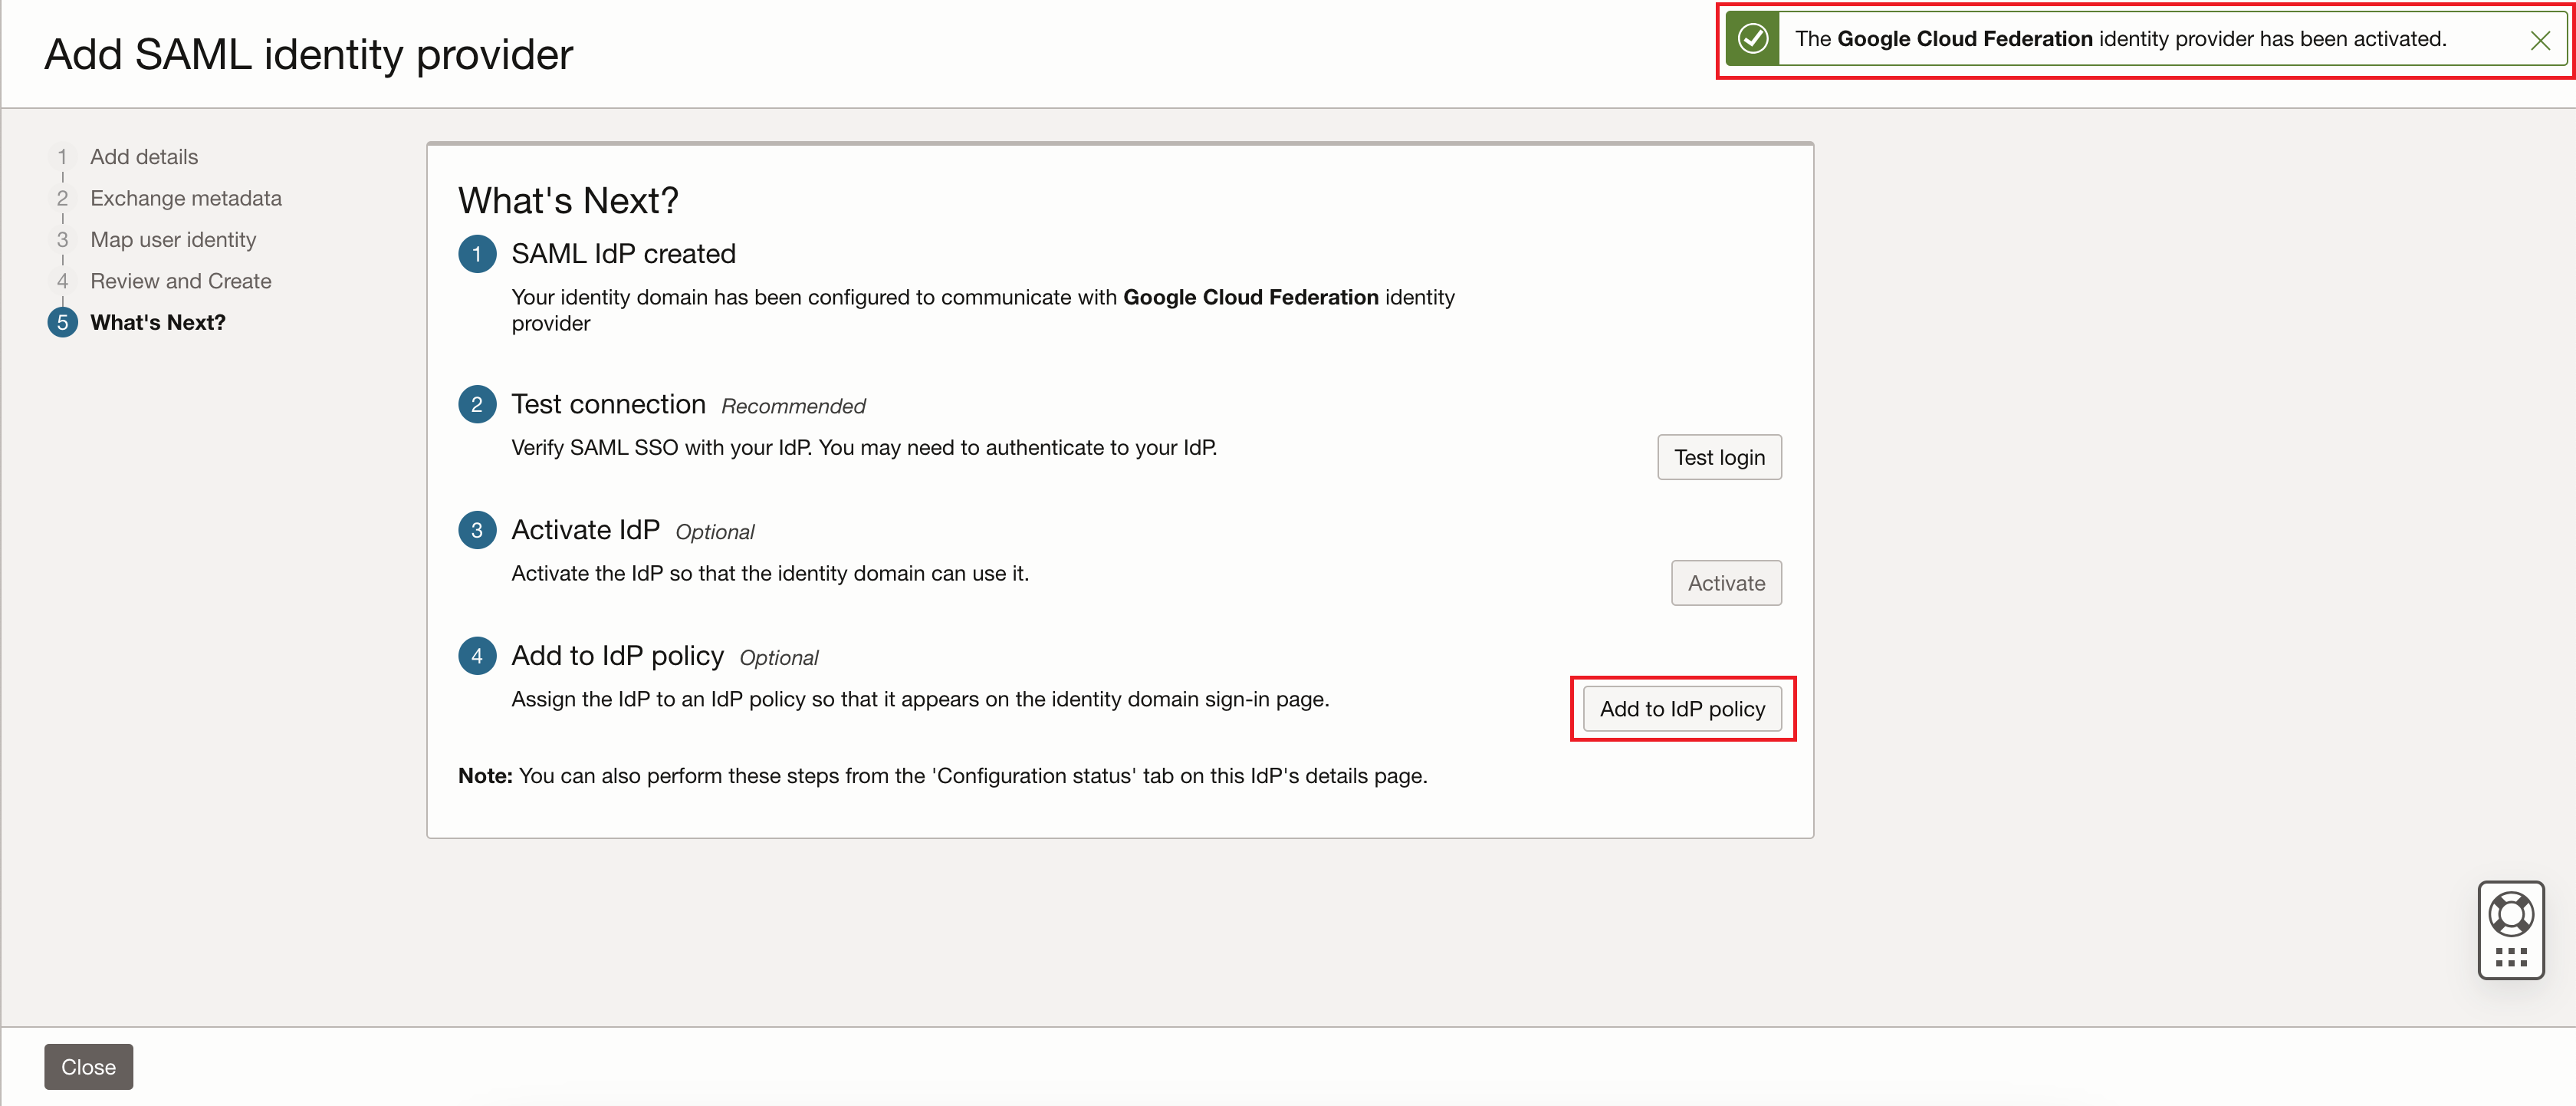
After you see the confirmation message that the identity provider has been activated, the identity provider is activated, click Add to IdP policy.
-
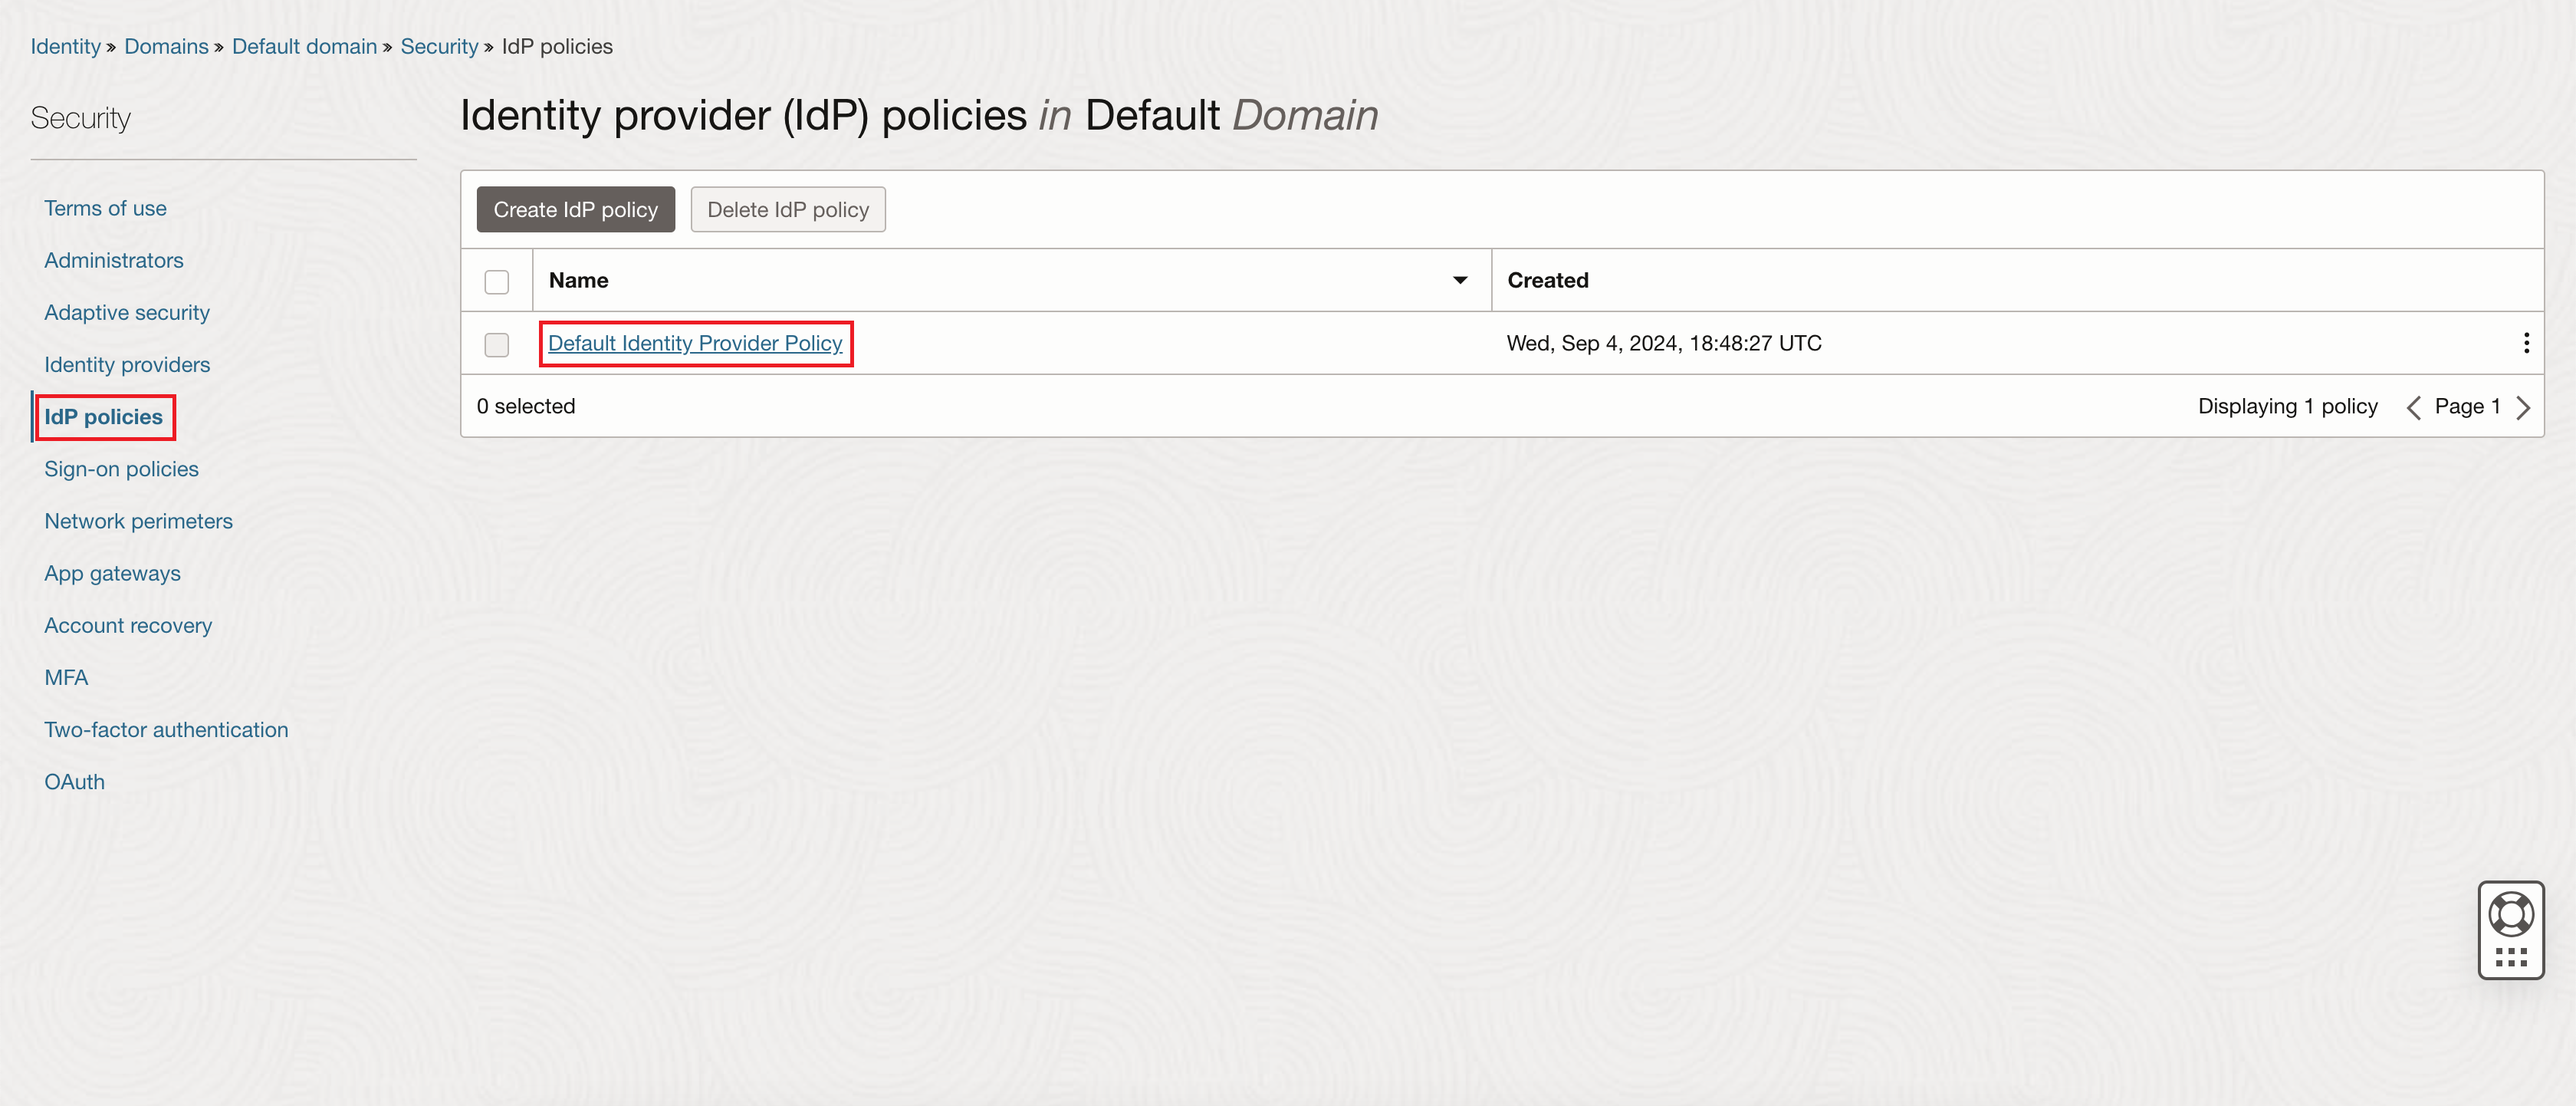
On the Identity provider (IdP) policies page, click Default Identity Provider Policy in the Name column of the list of policies.
-
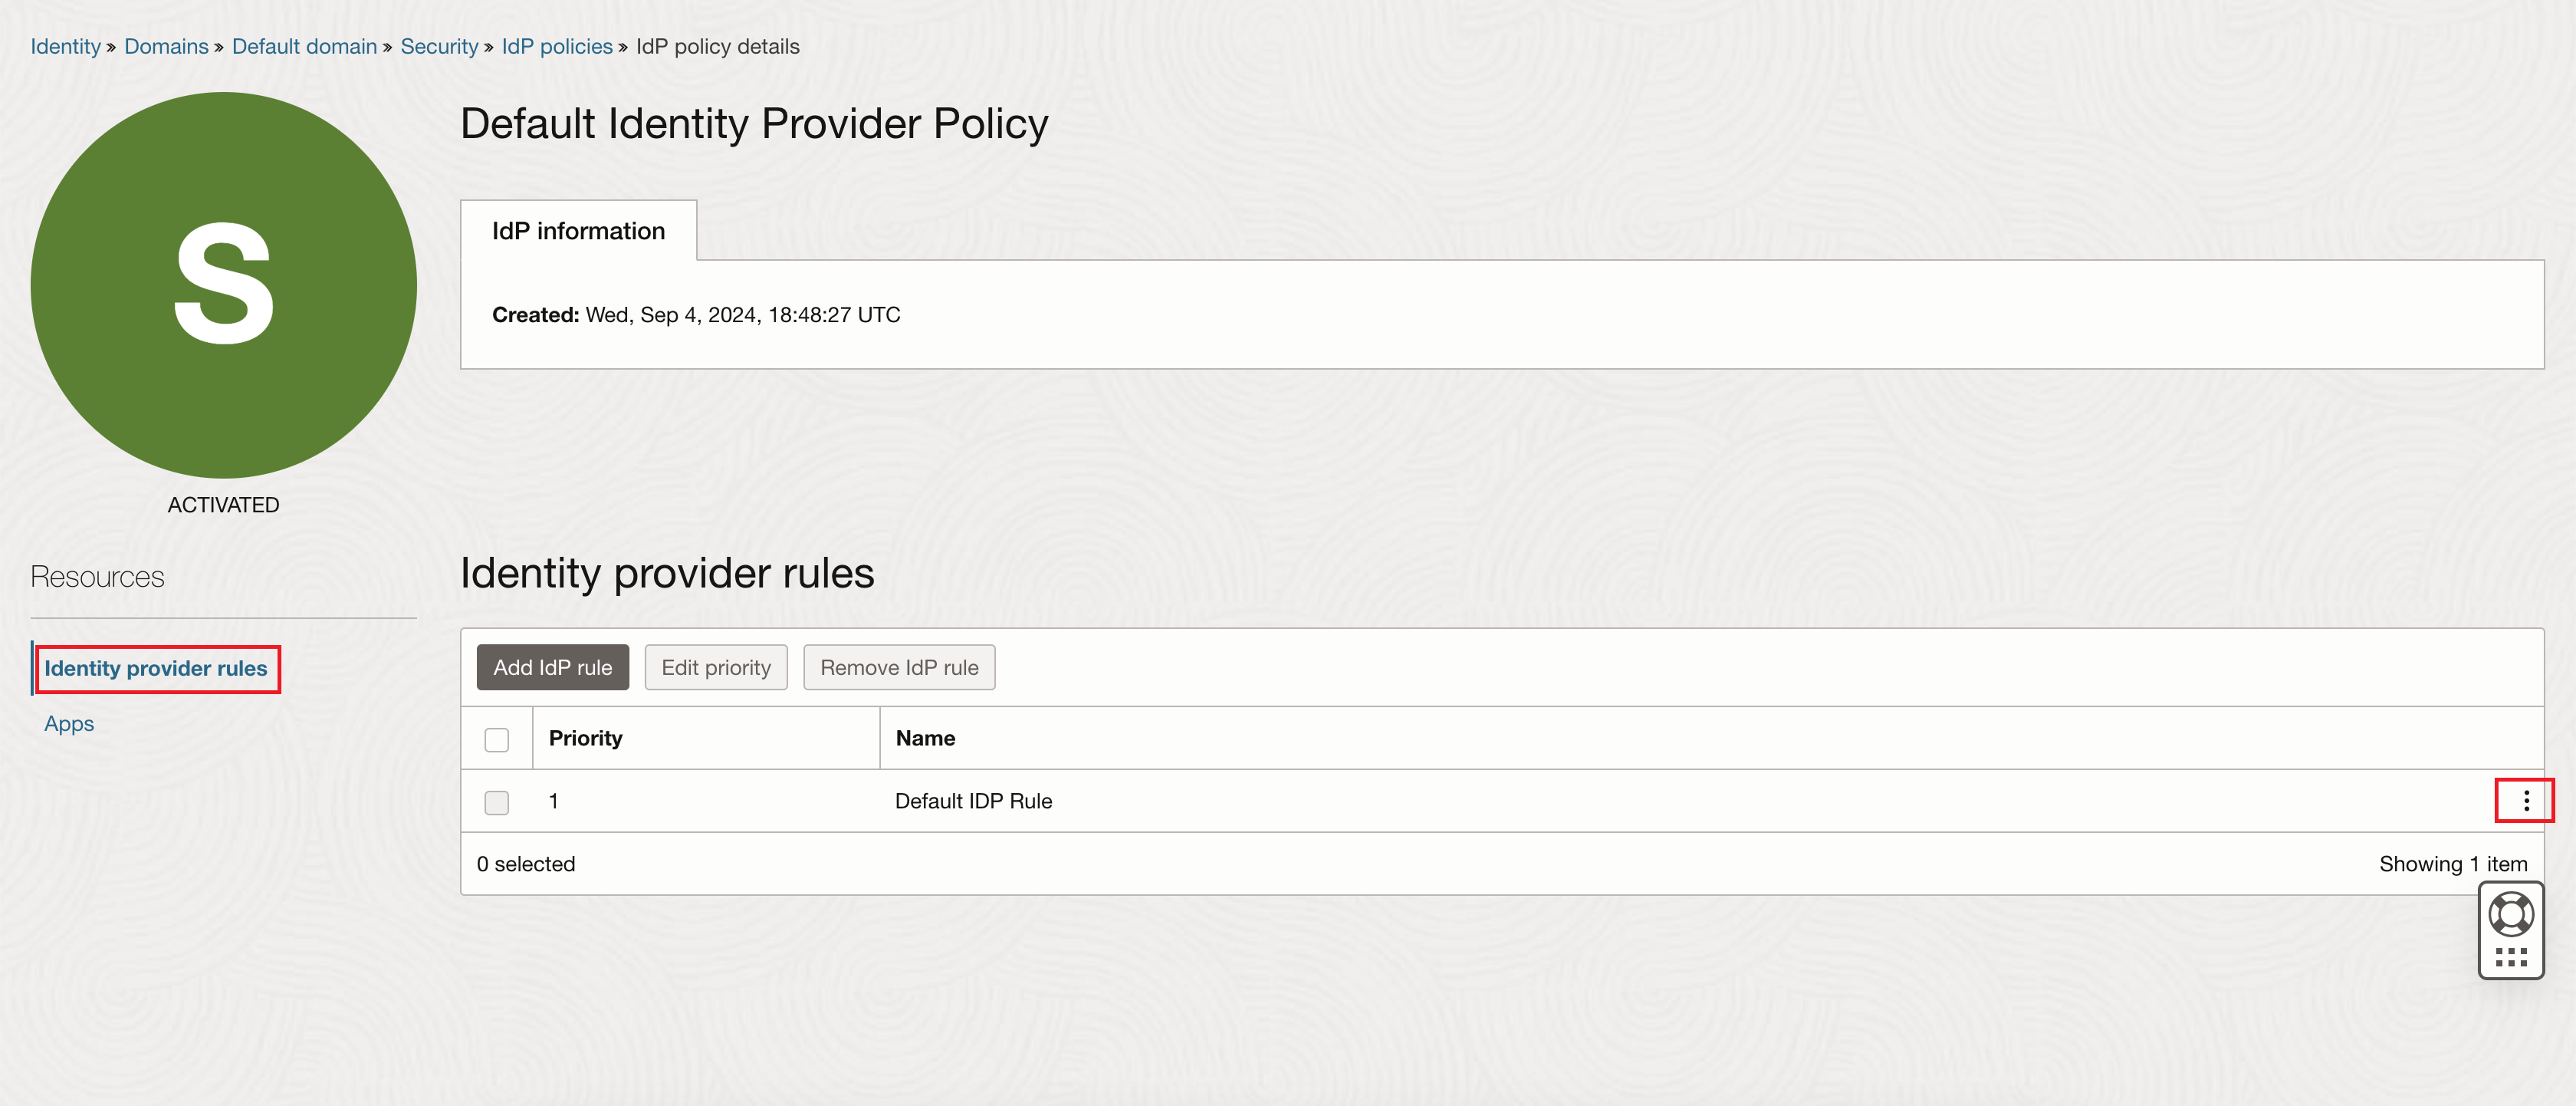
On the Default Identity Provider Policy policy details page, in the Identity prover rules section, click Edit IdP rule.
-
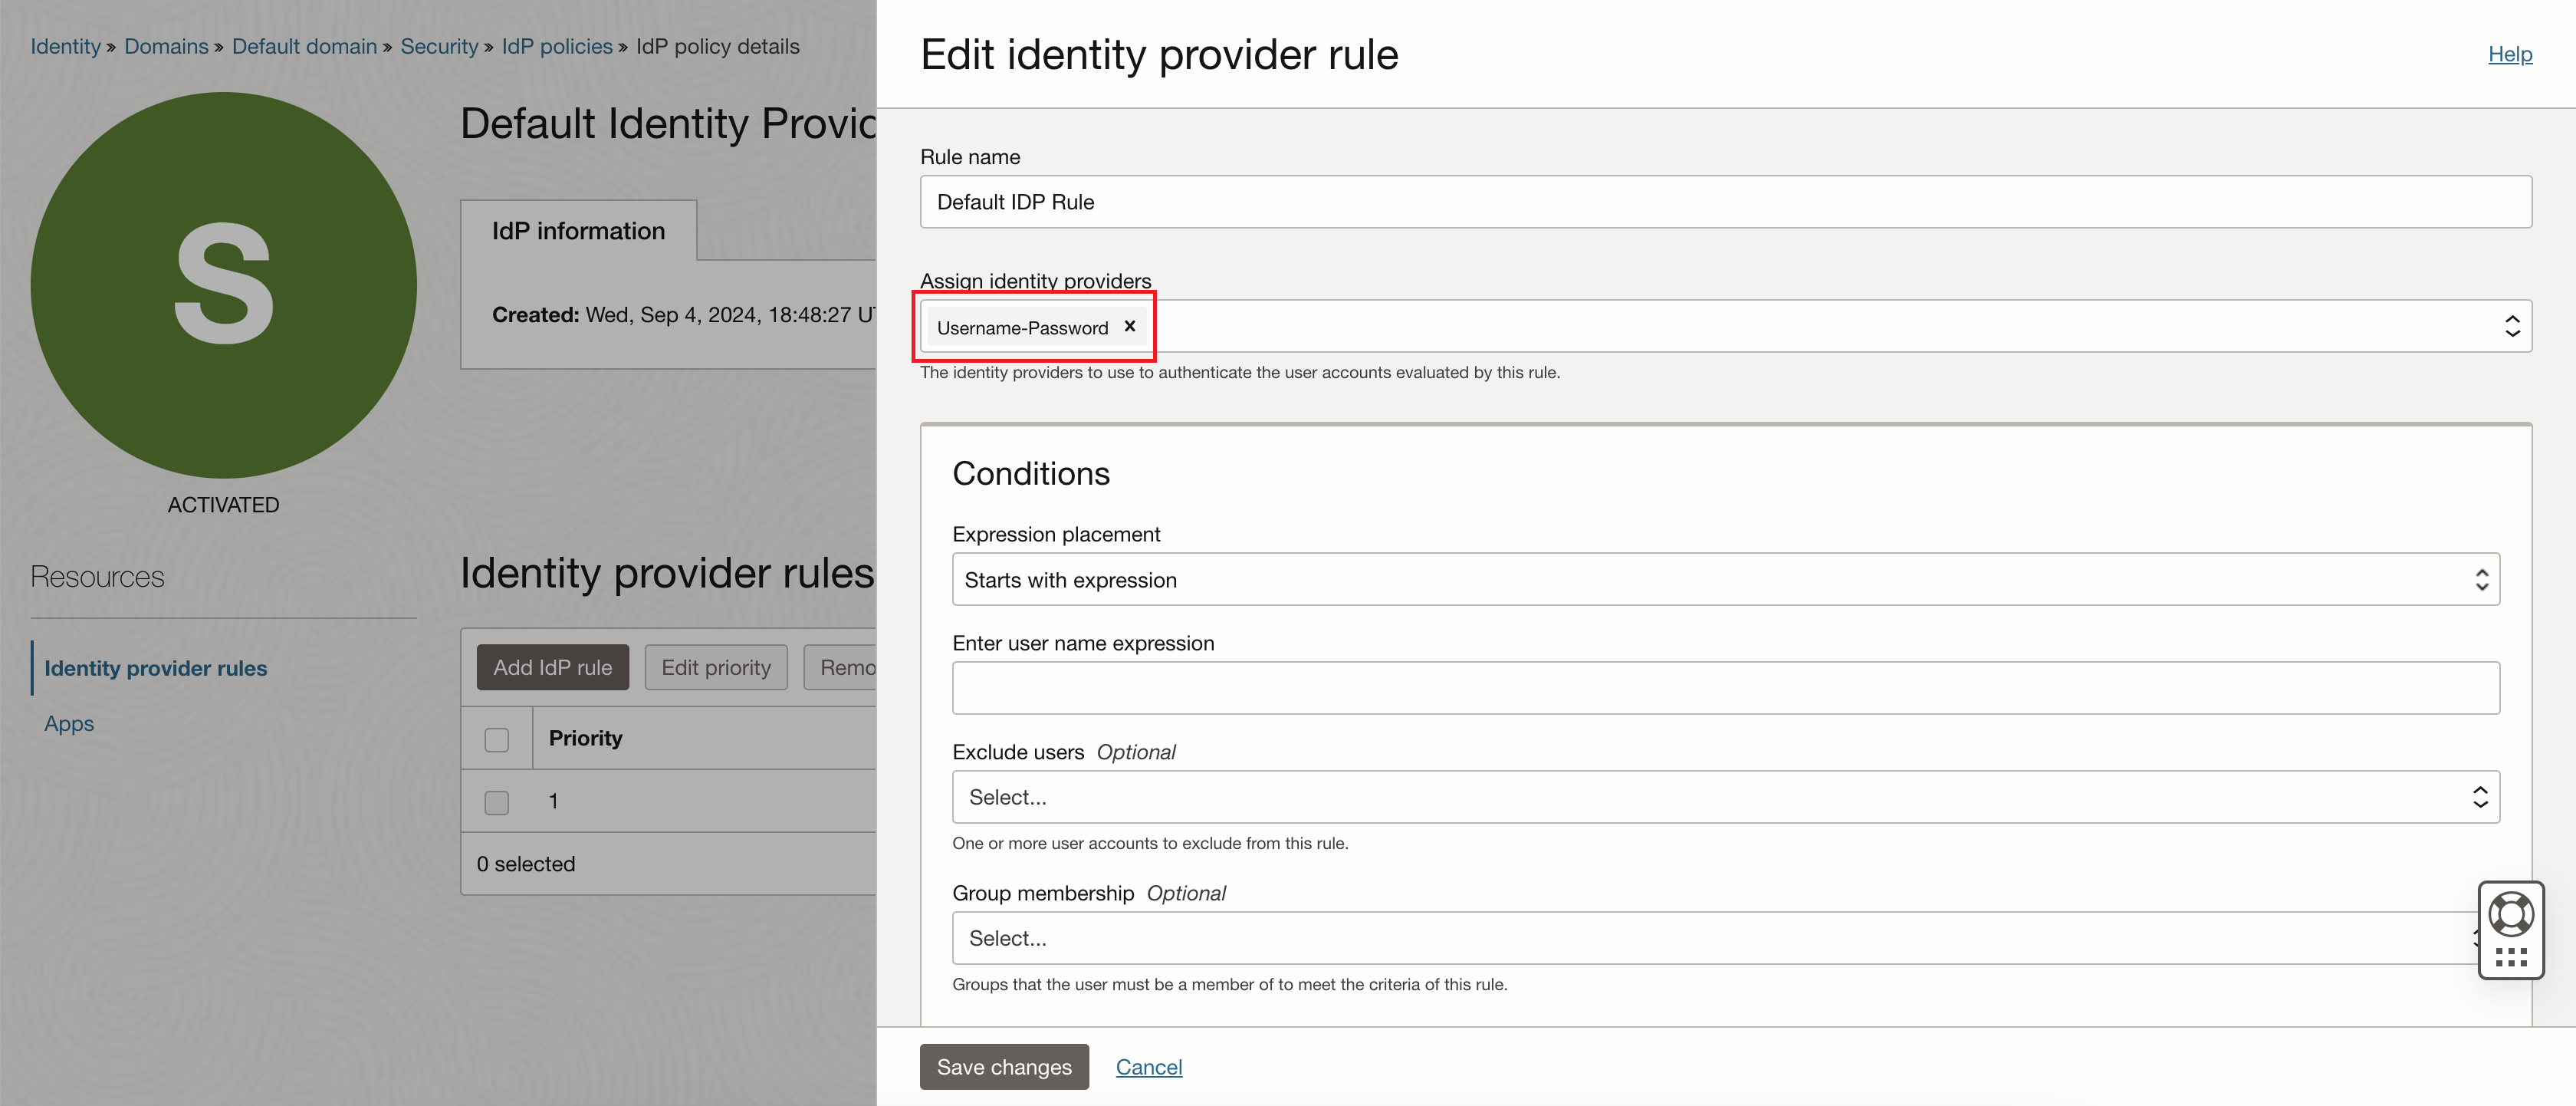
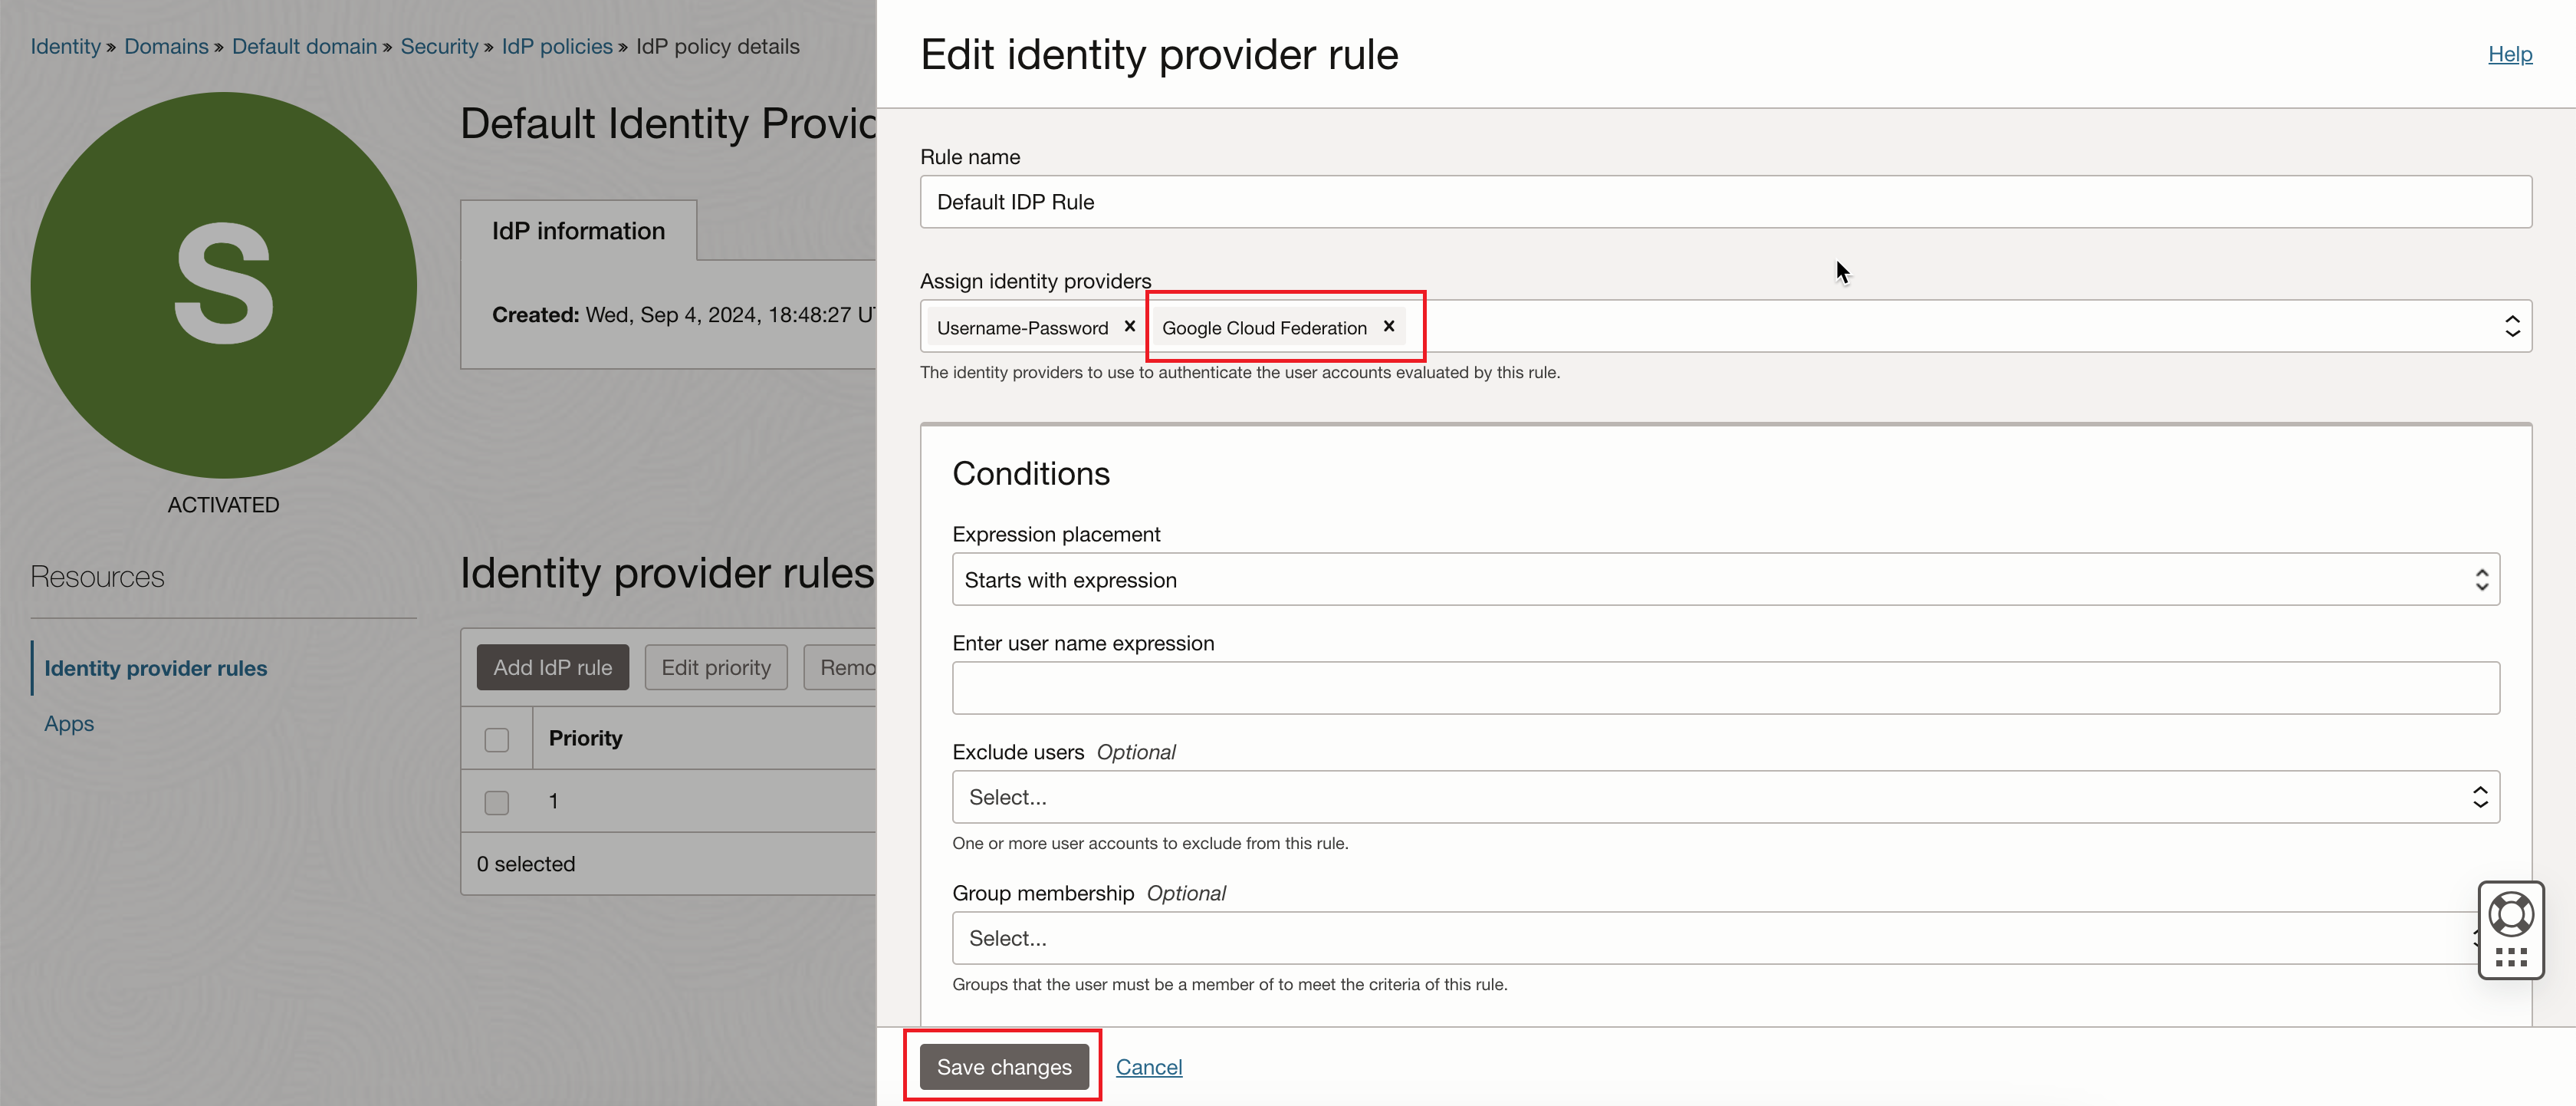
On the Edit Identity provider rule page, find the Assign identity providers field. The field displays "Username-Password". Add "Google Cloud Federation", then click Save changes.
After adding "Google Cloud Federation":
-
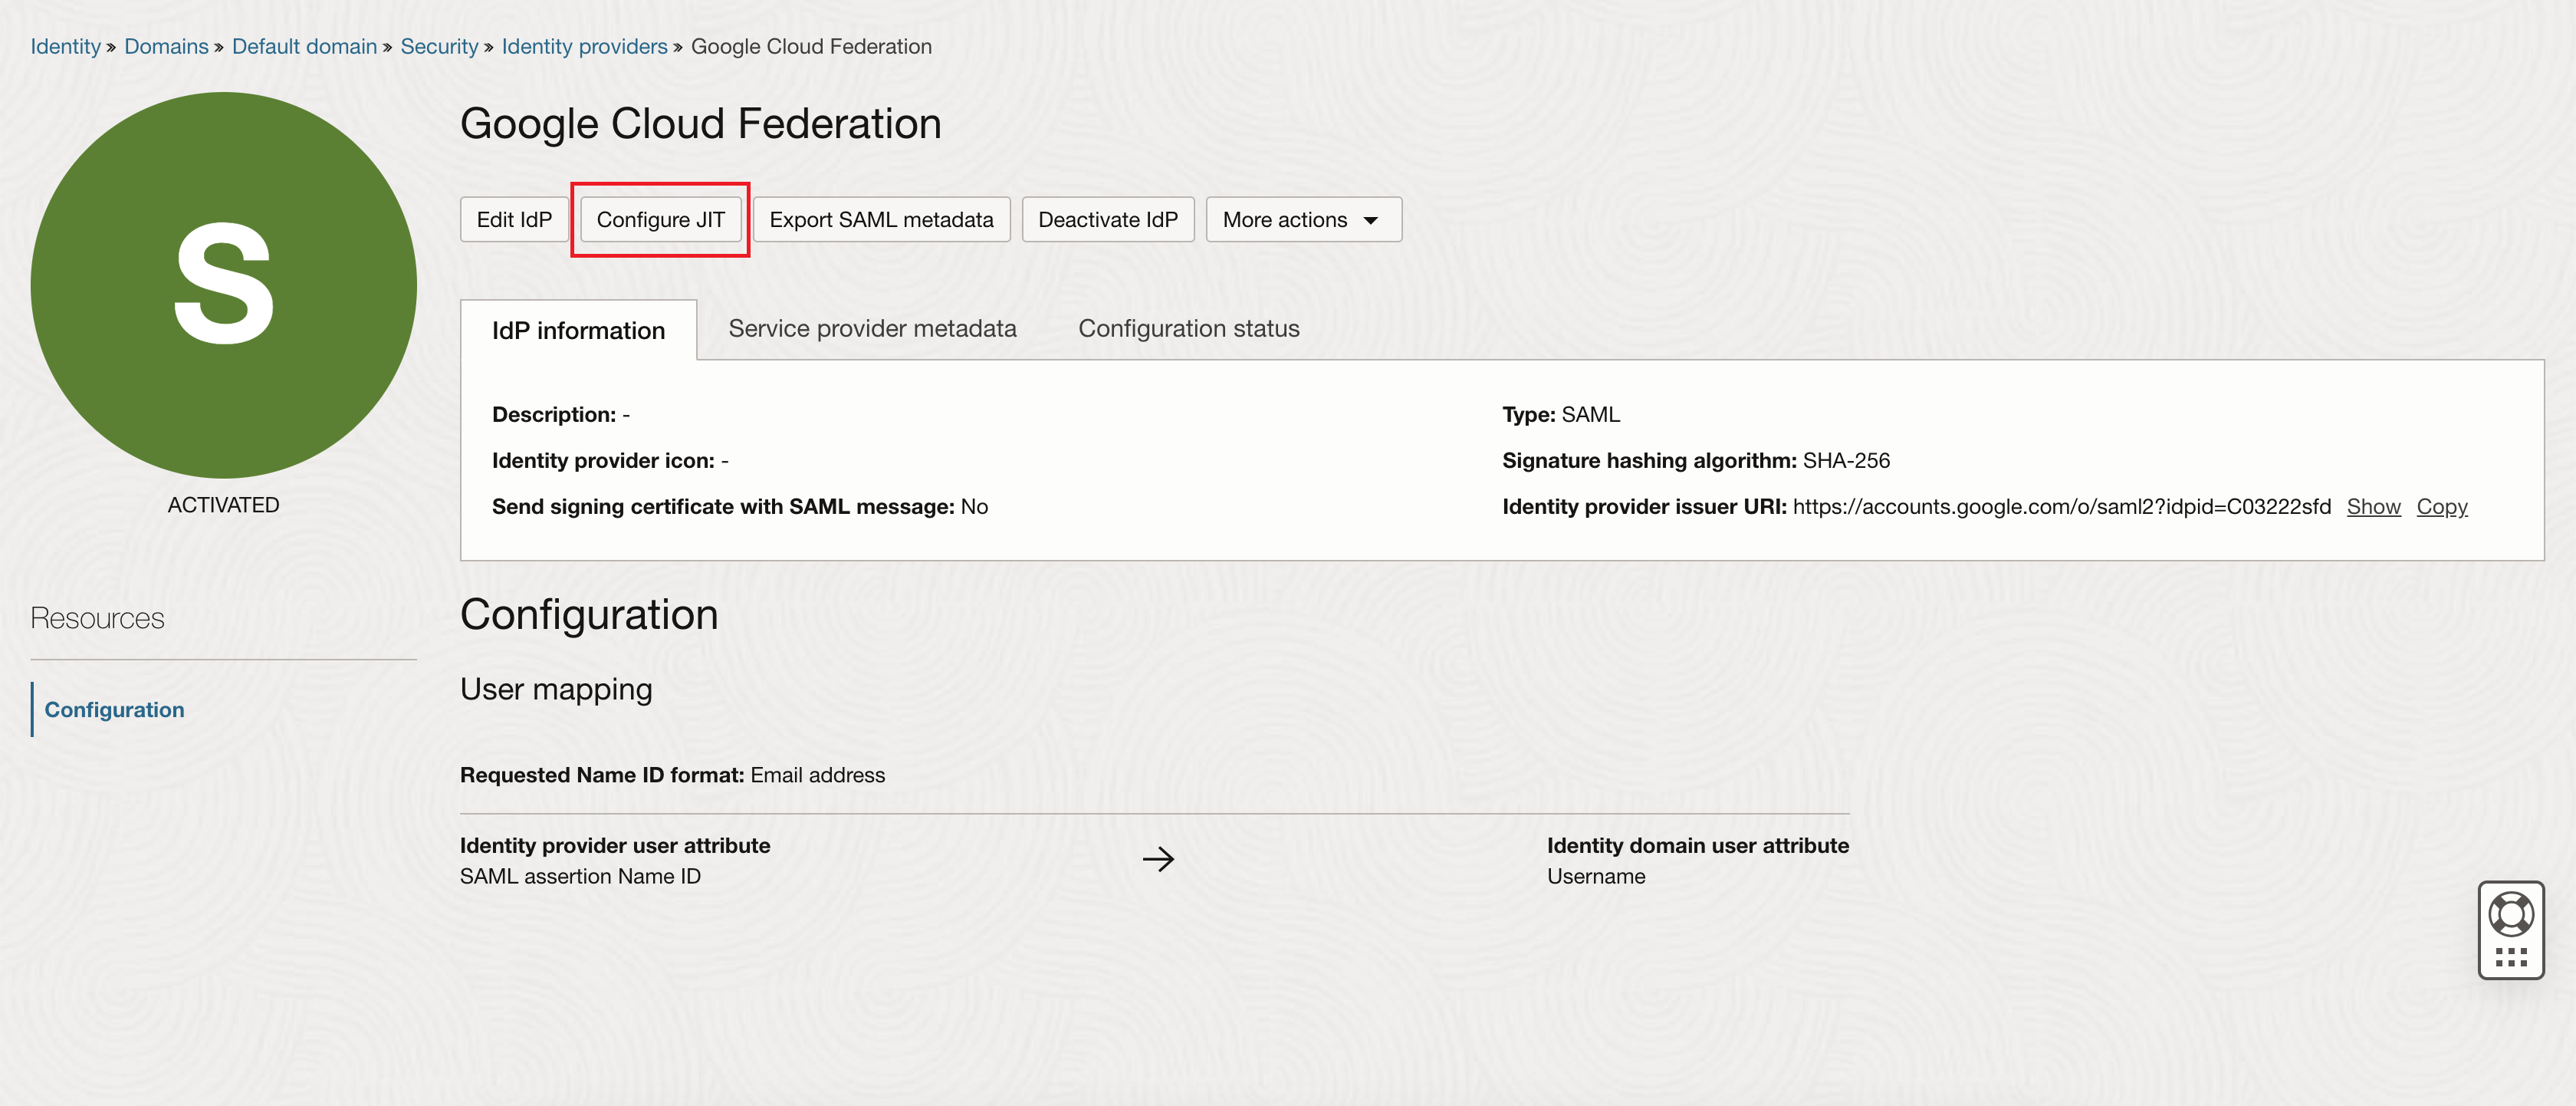
On the details page for the Google Cloud Federation identity provider, click Configure JIT.
-
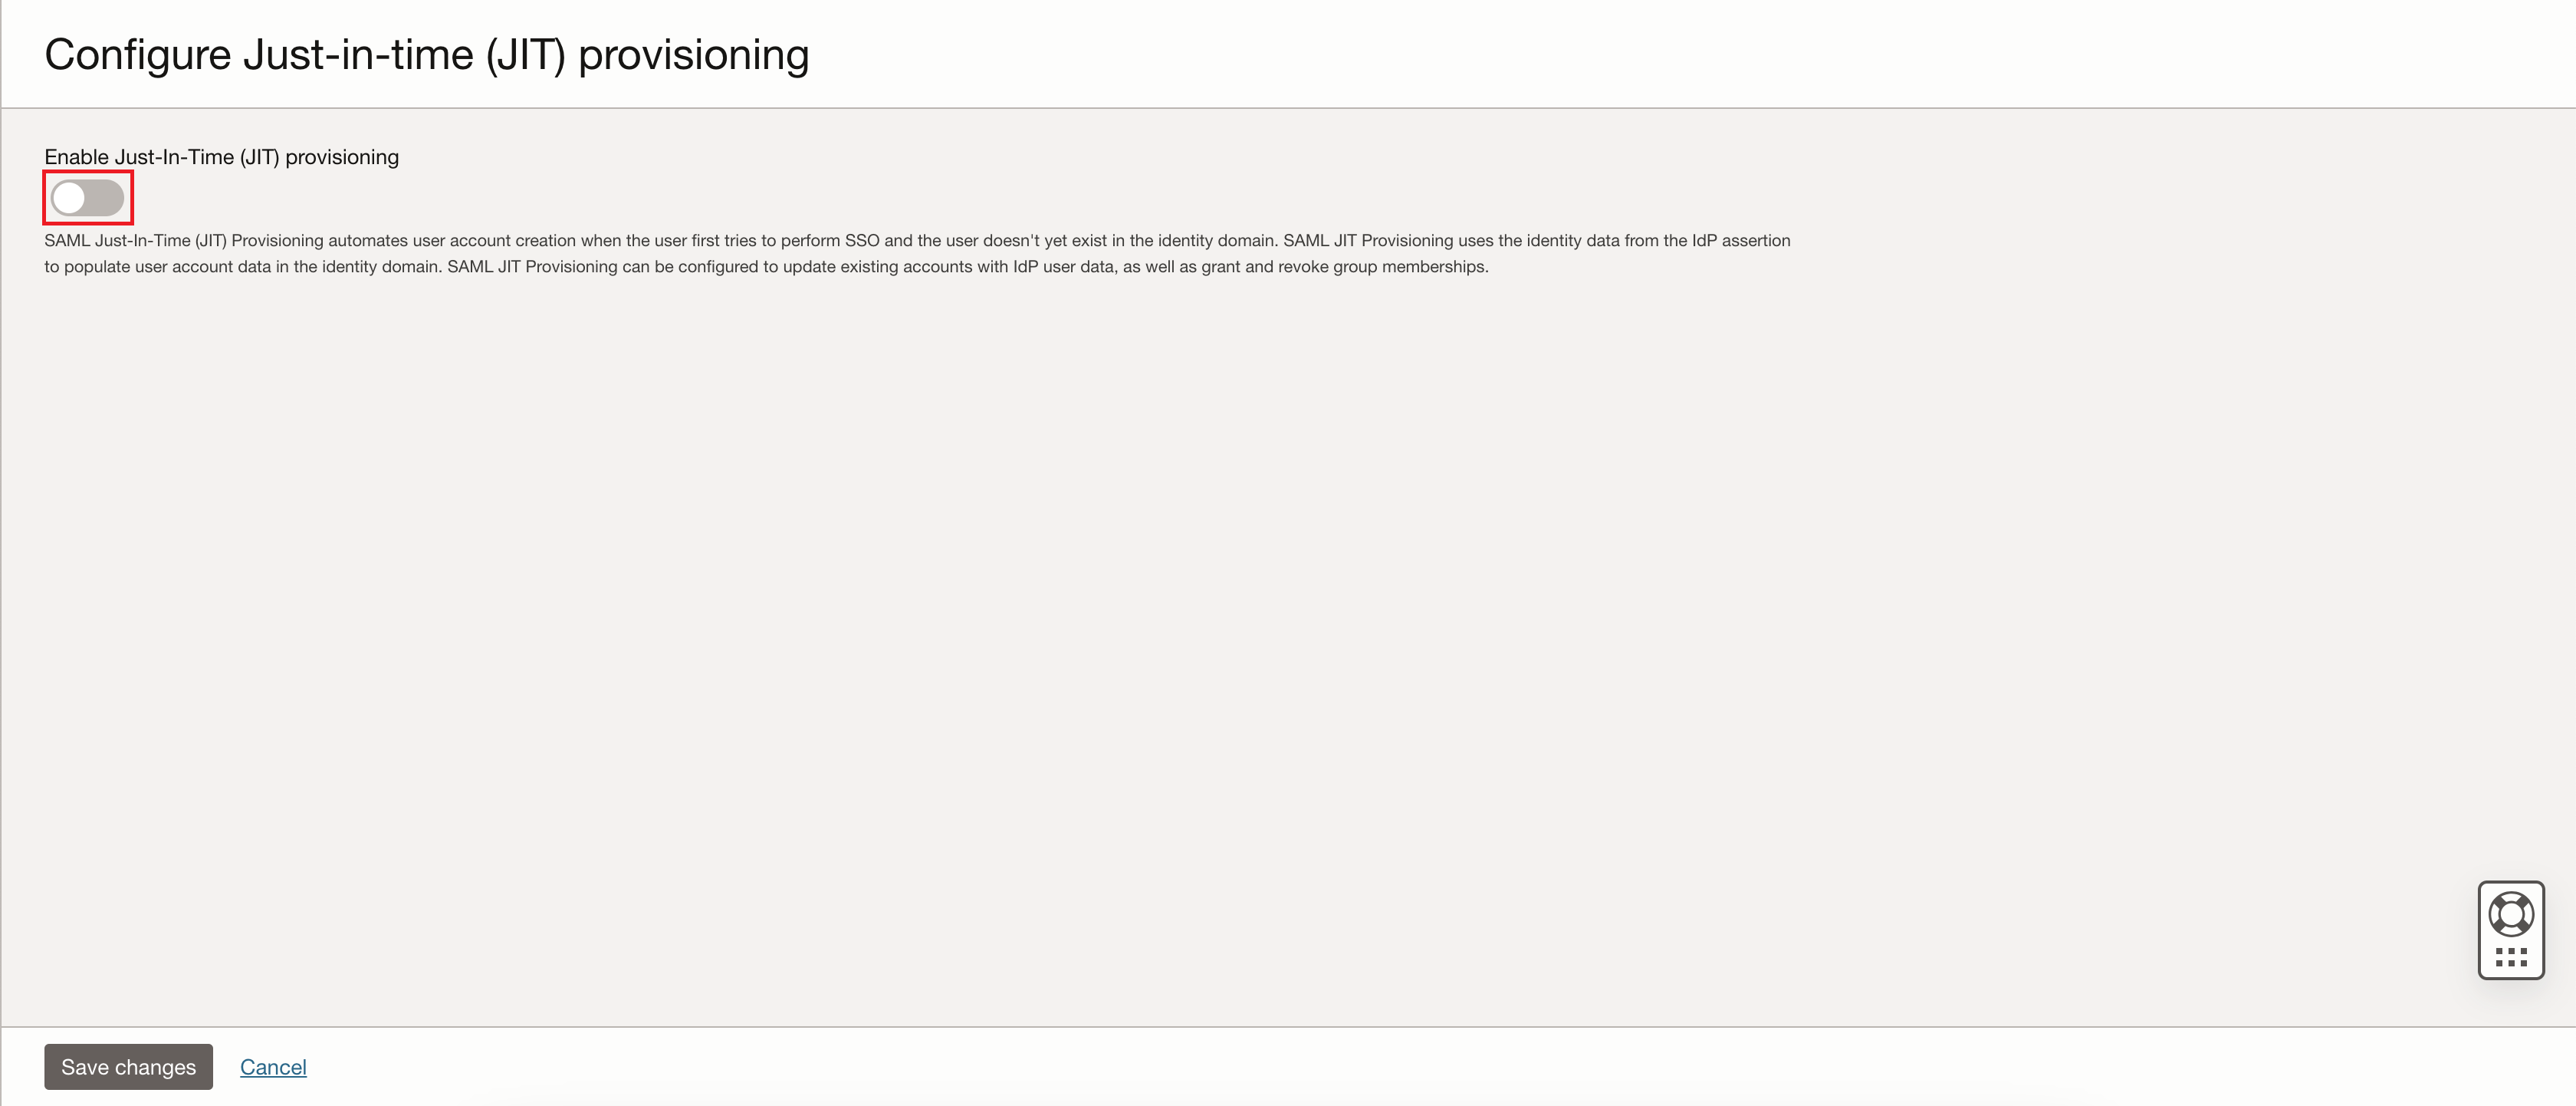
On the Configure Just-in-time (JIT) provisioning page, enable Enable Just-In-Time (JIT) provisioning using the toggle switch. Remain on this page for the next few steps.
-
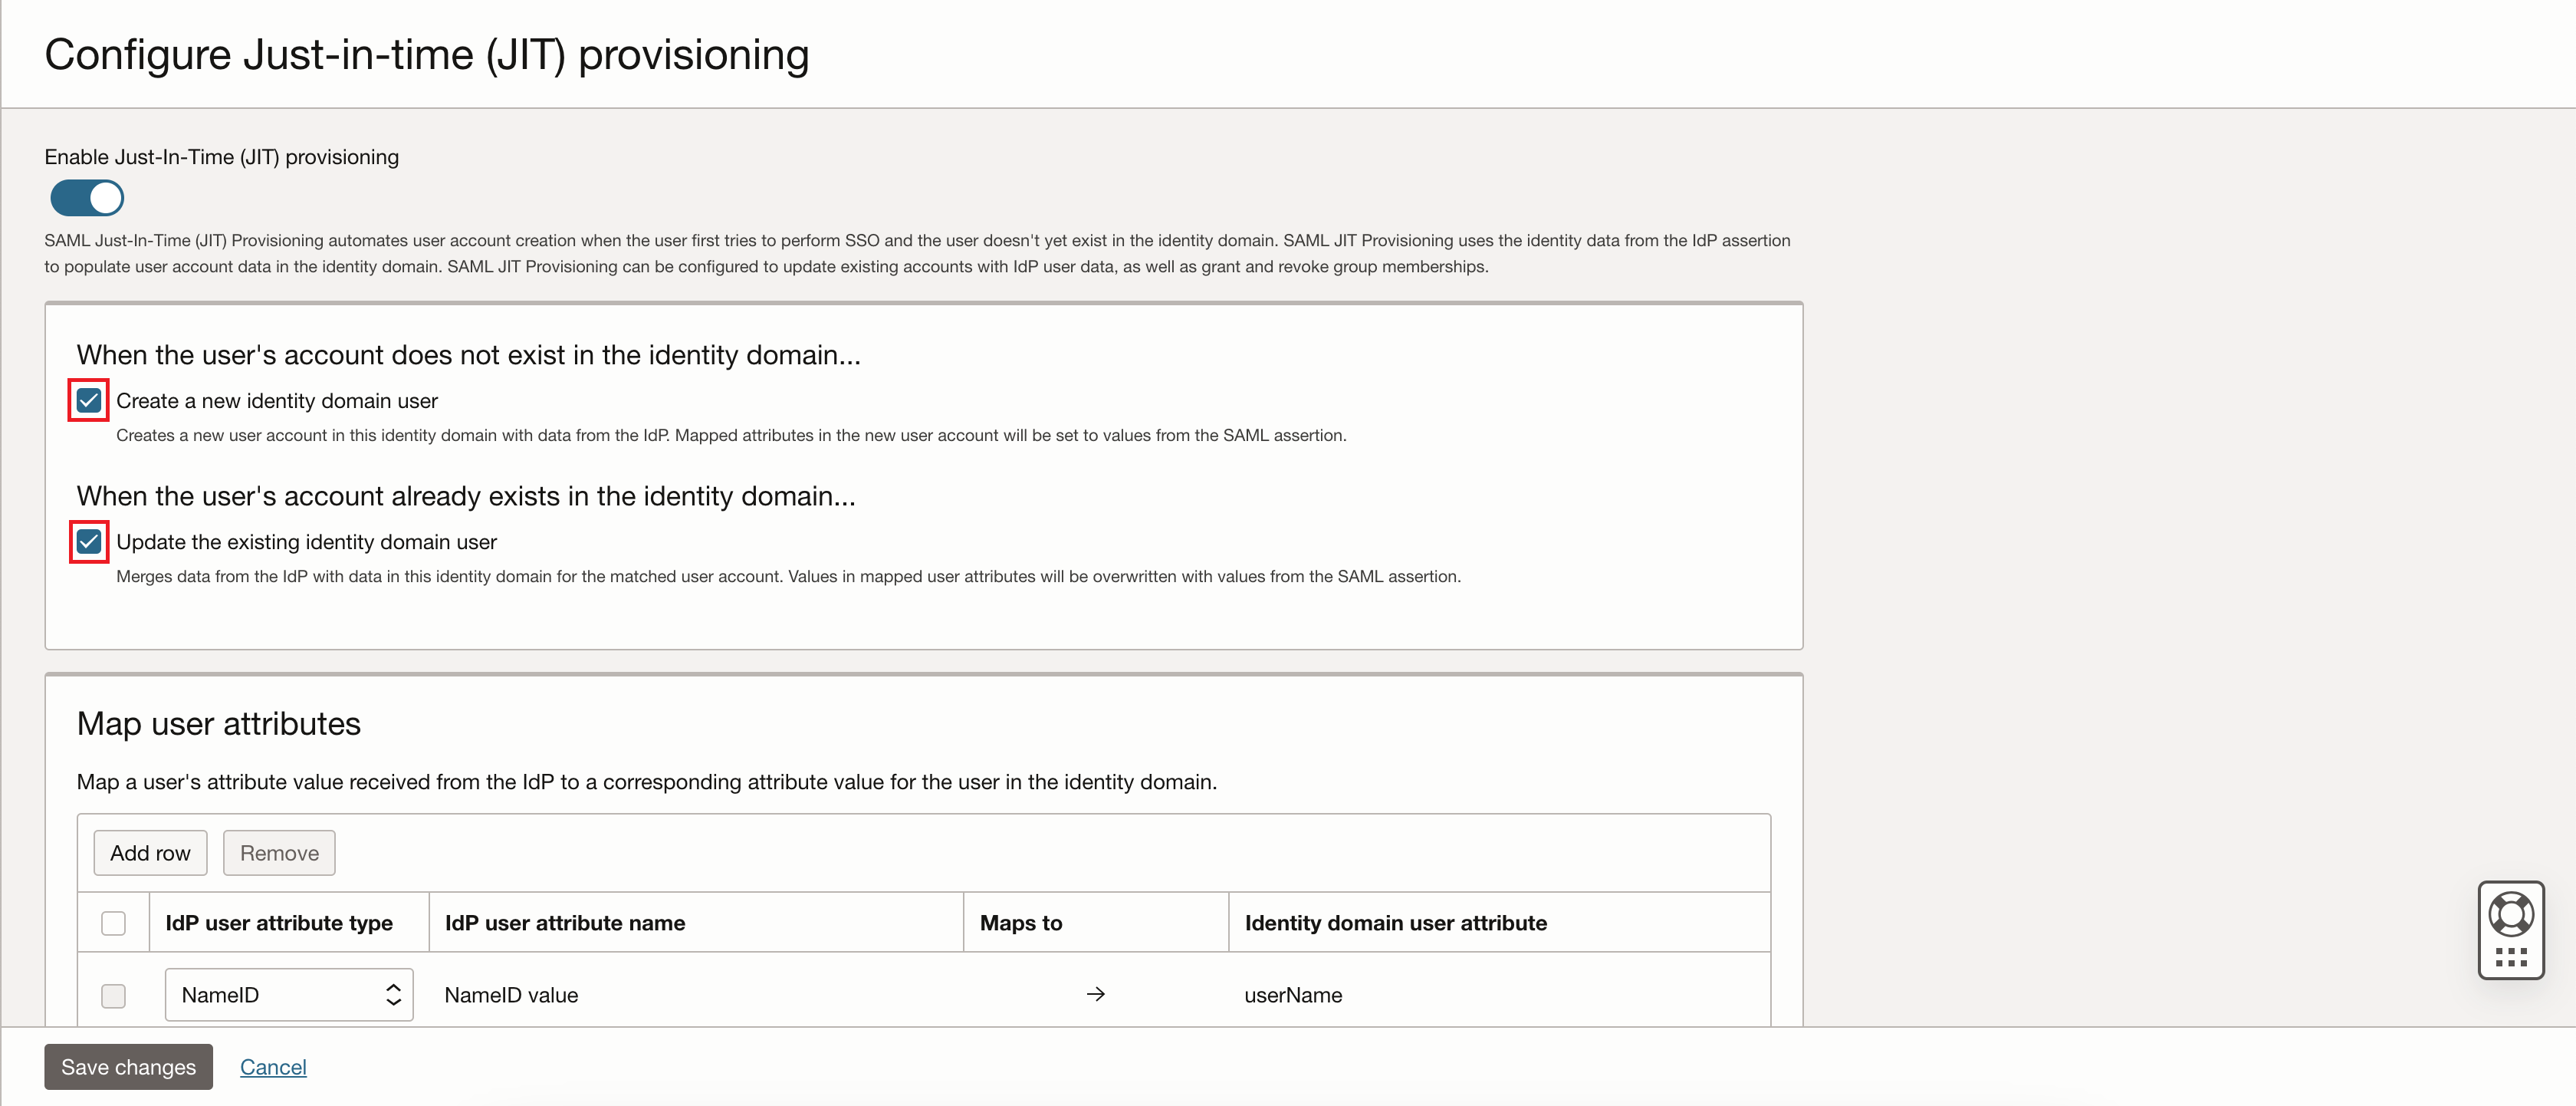
On the Configure Just-in-time (JIT) provisioning page, select Create a new identity domain user and Update the existing identity domain user.
-
On the Configure Just-in-time (JIT) provisioning page, map the user attributes as follows:
IdP user attribute type IdP user attribute name Maps to Identity domain user attributes NameID NameID value → userName Attribute LastName → familyName Attribute PrimaryEmail → primaryEmailAddress Attribute FirstName → firstName -
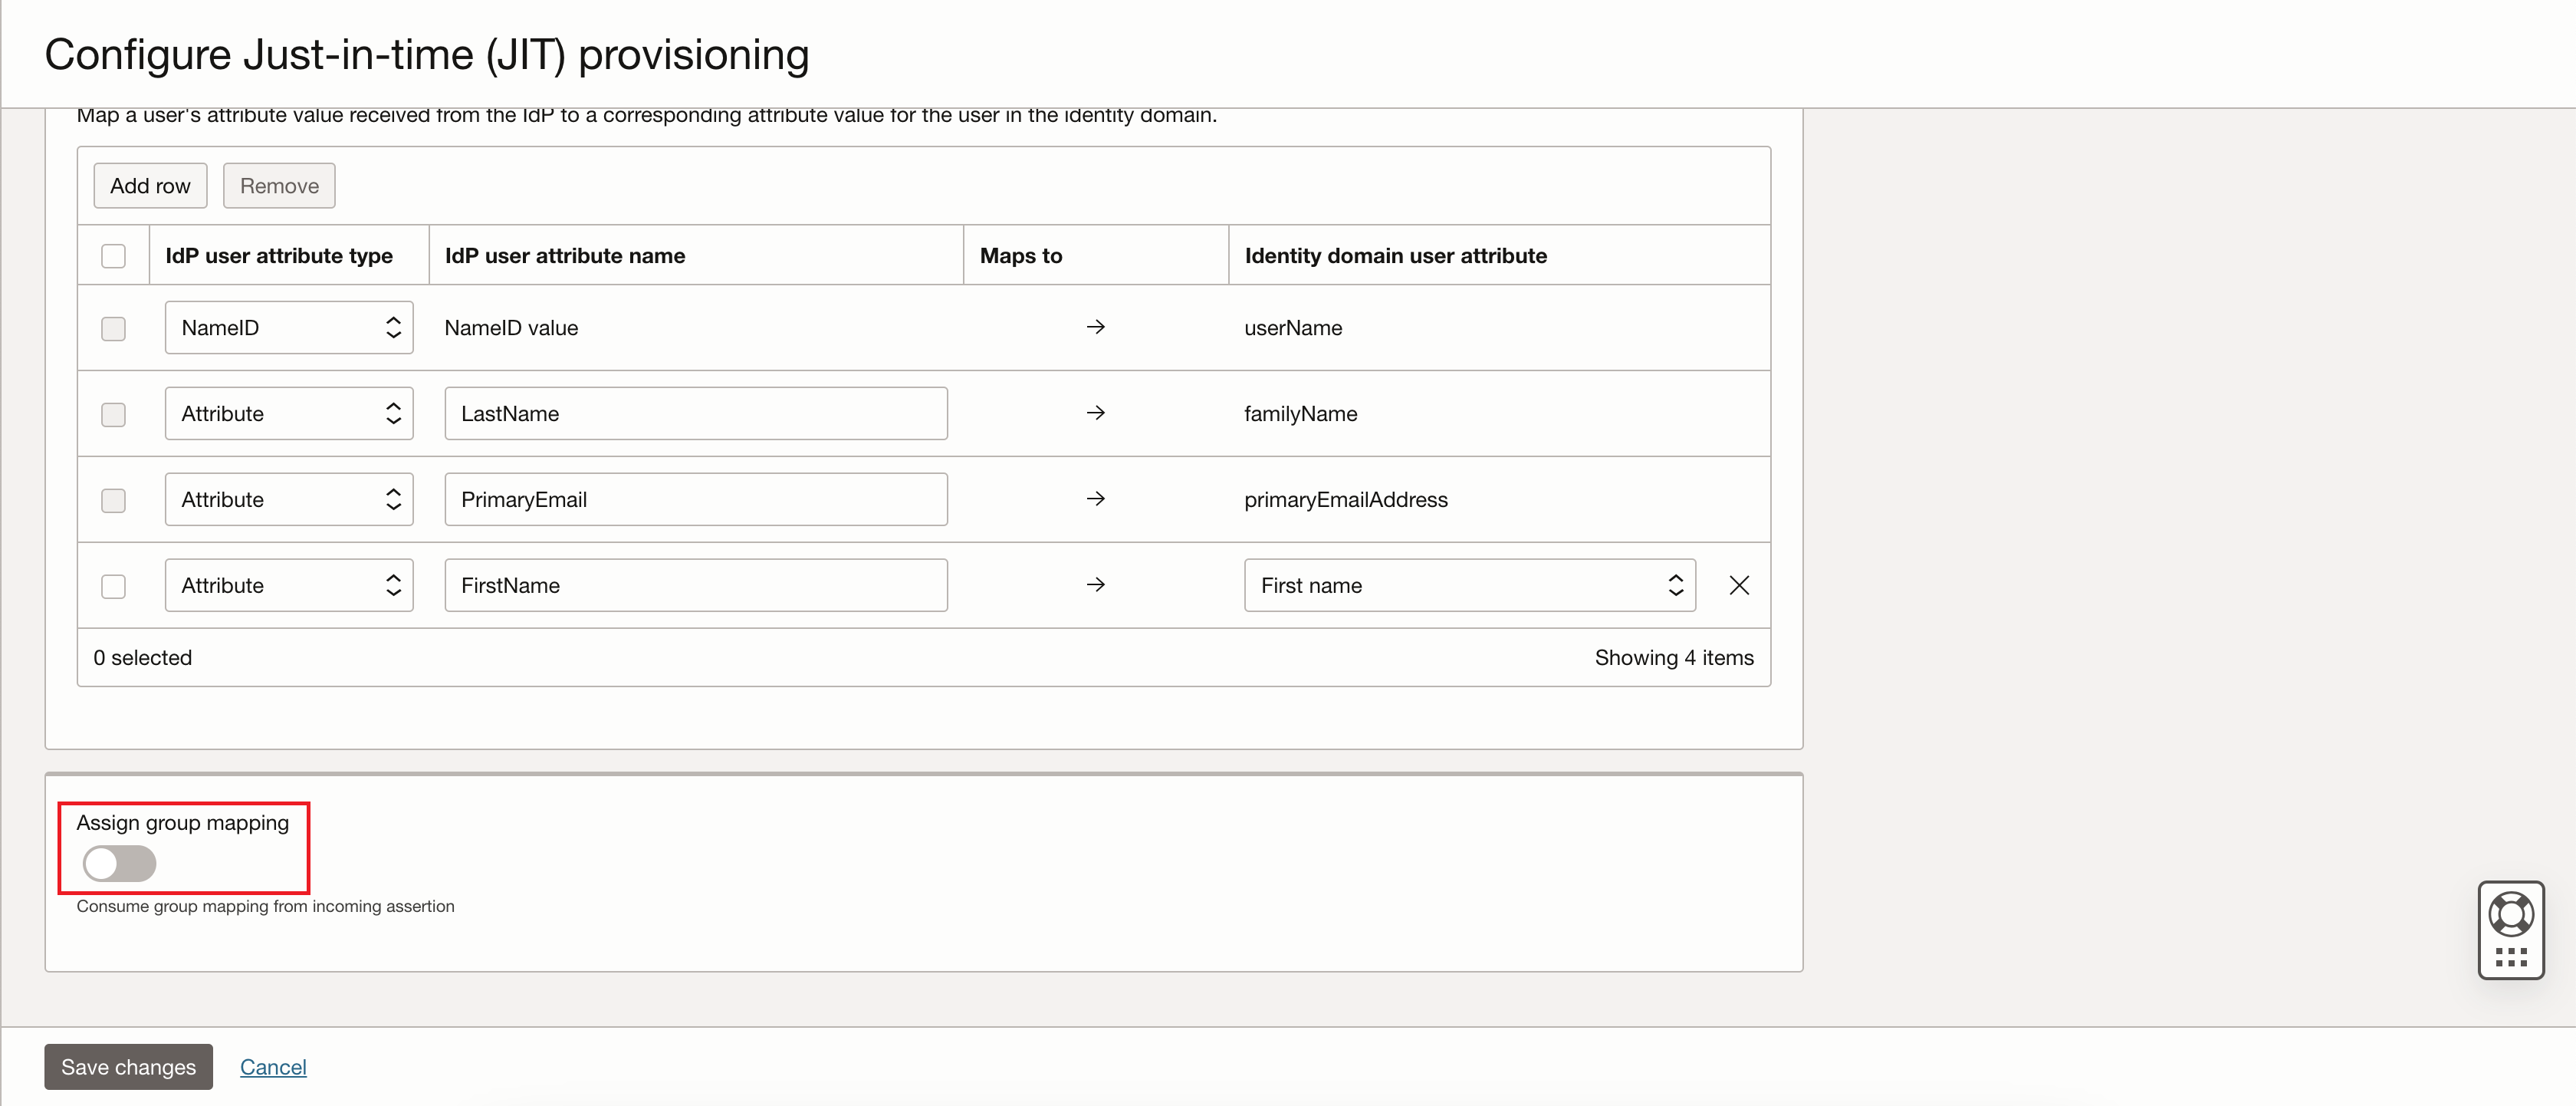
On the Configure Just-in-time (JIT) provisioning page, toggle the Assign group mapping switch to enable the group mapping you configured. The Assign group mapping section expands to display group mapping configuration options (see next step).
-
On the Configure Just-in-time (JIT) provisioning page, select or enter the following values:
- Group membership attribute name:
MemberOf - Assign implicit group membership: Select the radio button to enable this option
- When assigning group membership...: Merge with existing group memberships
- When a group is not found...: Ignore the missing group
Click Save changes after you select and enter the values.
- Group membership attribute name:
-
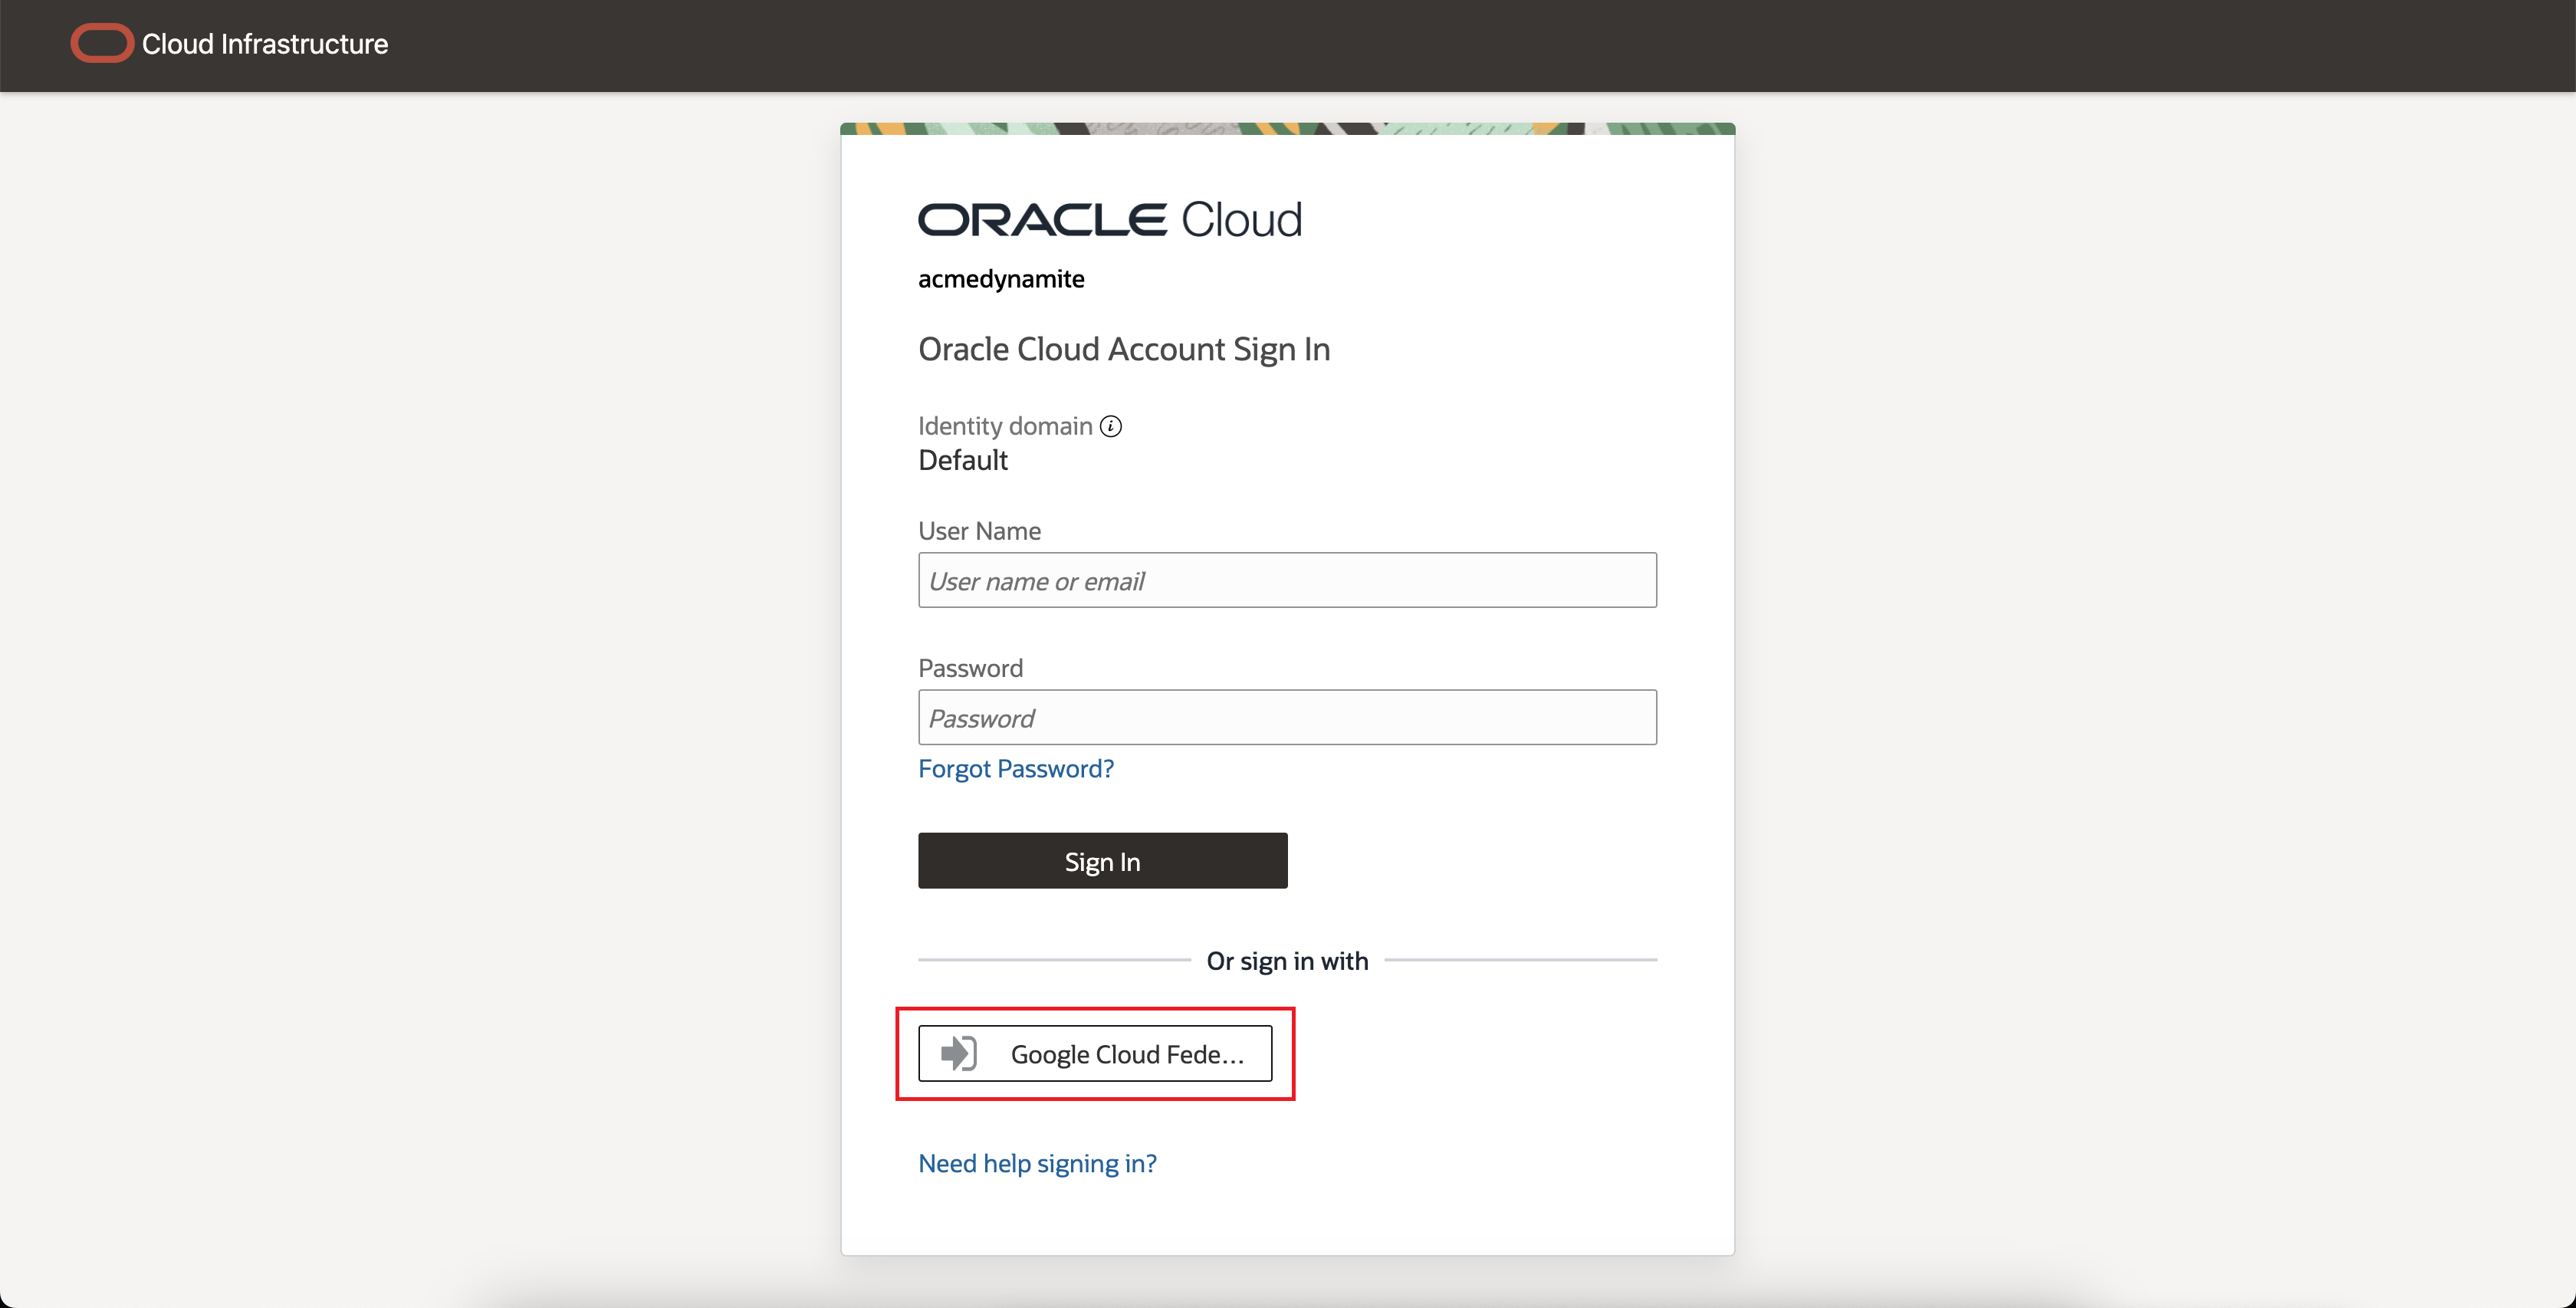
You have now completed the required steps to configure the identity federation between OCI and Google Cloud. To test the SSO:
- Sign Out on the OCI Console
- In the Or sign in with section of the login screen, click Google Cloud Federation.
What's Next?
If you want to allow additional users to open My Oracle Support (MOS) service requests, see the instructions in Task 4: Register with My Oracle Cloud Support. Federation does not automatically grant users access to My Oracle Support.
