Other Ways to Run Jobs
You can use jobs in a myriad of different ways such as using conda environments and zip files.
Using zip or compressed tar Files
You can use jobs to run an entire Python project that you archive into a single file.
zip or compressed tar files that are run as a job can leverage the Data Science service conda environments, and, the custom conda environments.
For the job run, you point to the main entry file using the
JOB_RUN_ENTRYPOINT environment variable. This variable is only
used with jobs that use zip or compressed tar job artifacts.
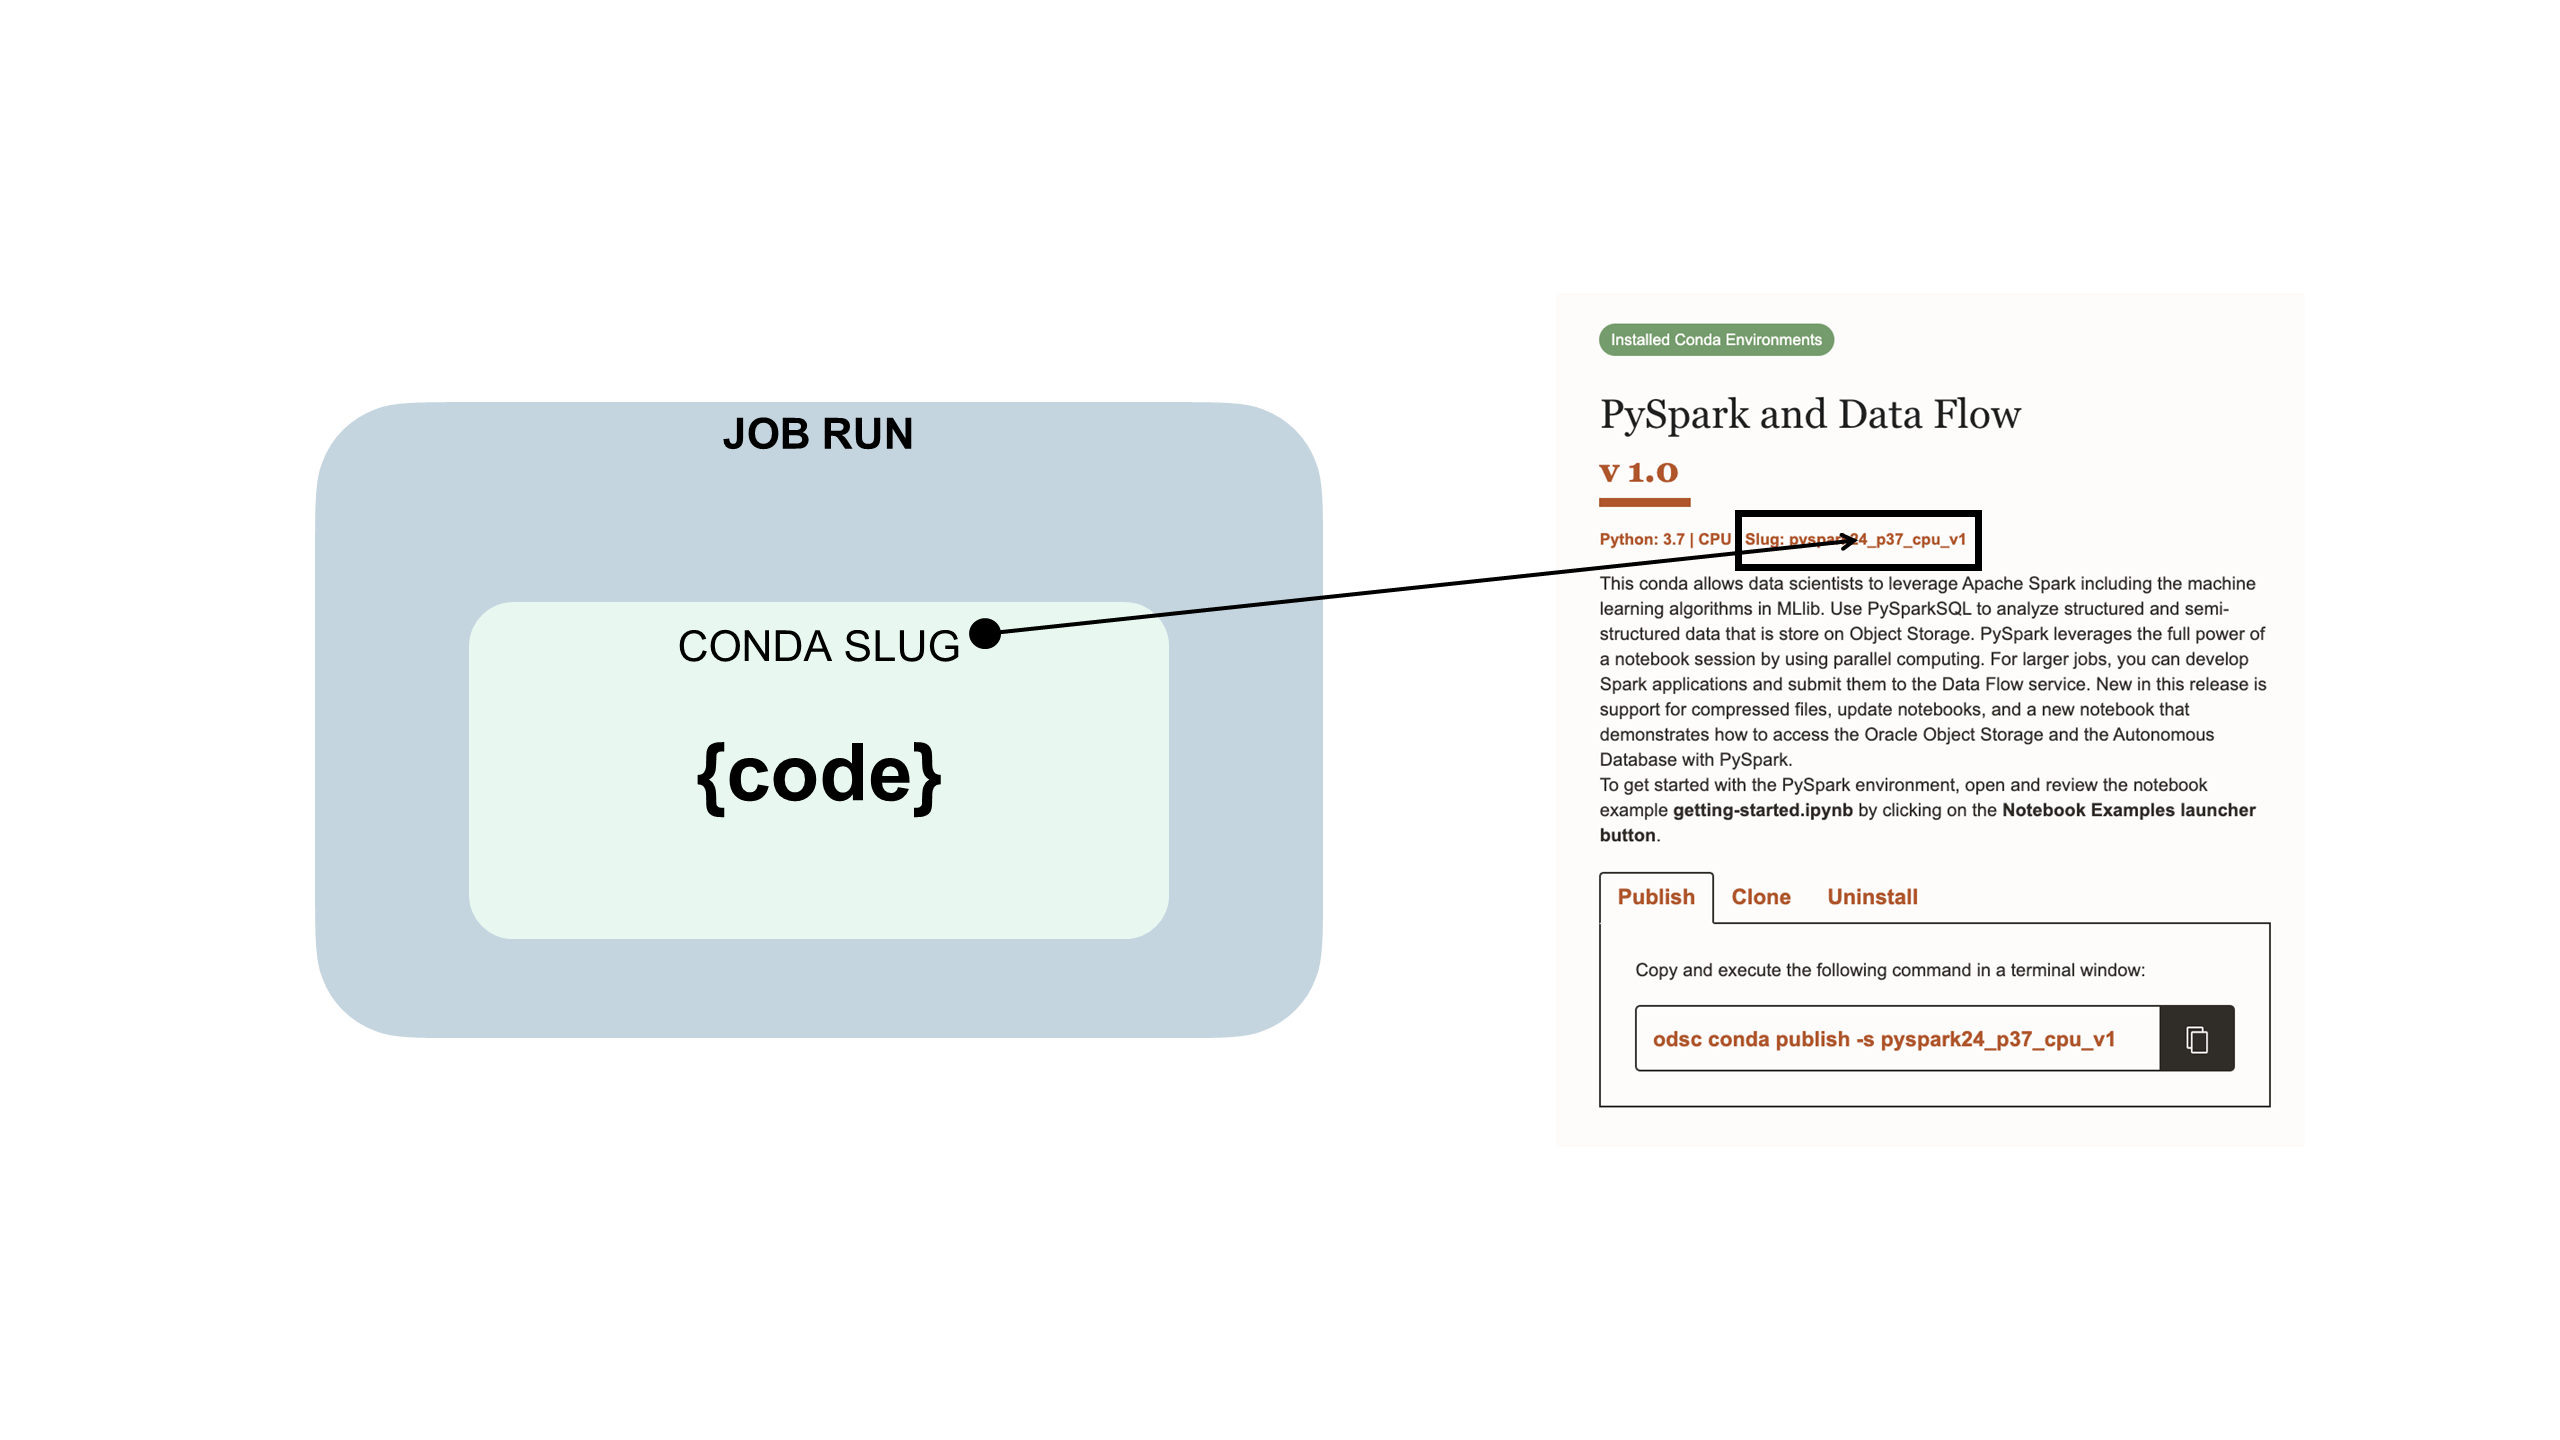
Using a Data Science Conda Environment
You can use one of the Data Science conda environments that are included in the service.
A conda environment encapsulates all the third-party Python dependencies (such as Numpy, Dask, or XGBoost) that the job run requires. Data Science conda environments are included and maintained in the service. If you don't specify a conda environment as part of job and job run configurations, a conda environment isn't used because there's no default.
Your job code is embedded in a Data Science conda environment:
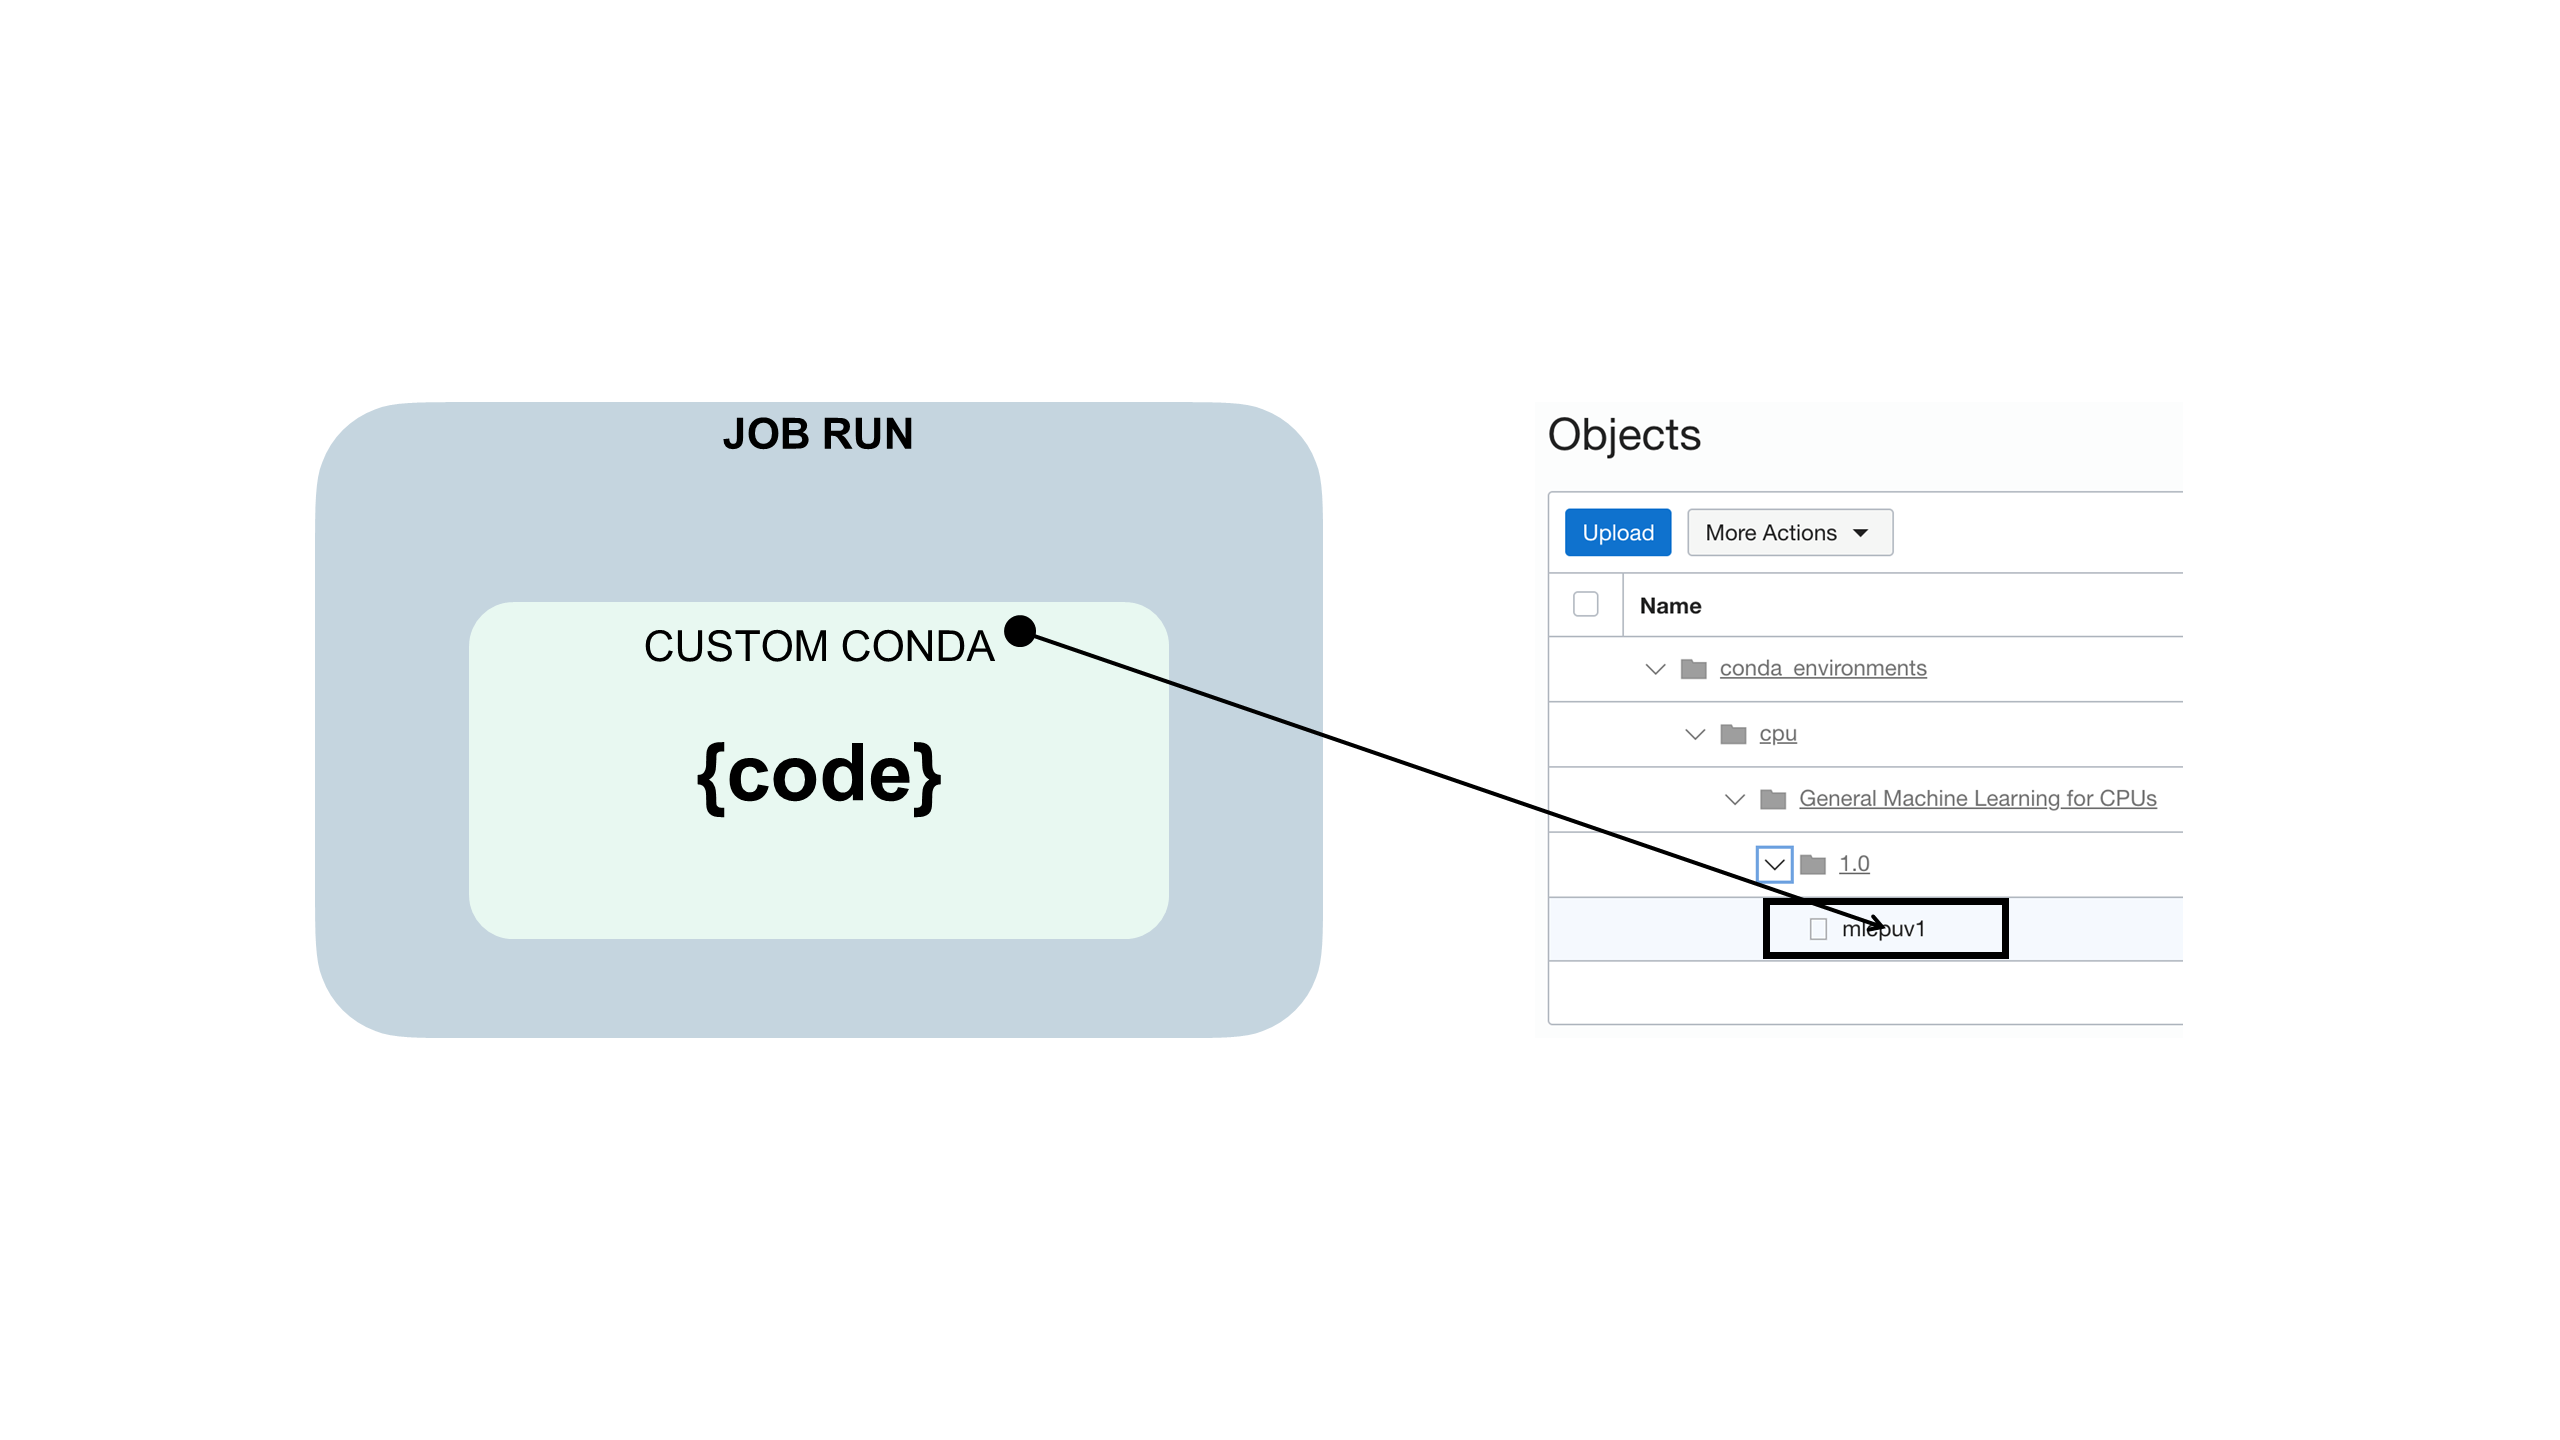
Using a Custom Conda Environment
You can use a zip and compressed tar file jobs with custom conda environments or Data Science conda environments.
A conda environment encapsulates all the third-party Python dependencies (such as Numpy, Dask, or XGBoost) that your job run requires. You create, publish, and maintain custom conda environments. If you don't specify a conda environment as part of job and job run configurations, a conda environment isn't used because there's no default
Your job code is embedded in a custom conda environment such as this:
Using a Runtime YAML File
You can use a runtime YAML file to configure job environment variables rather than using the Console or SDK.
Before you begin:
Download, unzip, and review the jobruntime.yaml and conda_pack_test.py sample files to create and test your job project.
Using a jobruntime.yaml file makes setting custom environment
variables in your project easier.
Using a Vault
You can integrate the OCI Vault service into Data Science jobs using resource principals.
Before you begin:
-
For the resource principal in the job to have access to a vault, ensure that you have a dynamic group in your compartment that either specifies the instance or the resource principal. For example, you could use the resource principal and a dynamic group with this rule:
all {resource.type='datasciencejobrun',resource.compartment.id='<compartment_ocid>'} -
For the job to run, you must ensure that you can at least manage secret-family on the dynamic group. For example:
Allow dynamic-group <dynamic_group_name> to manage secret-family in compartment <compartment_name>The Using the OCI Instance Principals and Vault with Python to retrieve a Secret blog post provides useful details.
-
Download, unzip, and review the
zipped_python_job.zipsample file that shows the following:- Initializing the vault client in the job using the Python SDK
- Reads a secret by using the secret OCID.
- Decodes the secrete bundle and shows the actual secret content.
Because jobs have access to the resource principal, you could initialize all the Vault clients available in the Python SDK.
-
Create a vault that has a master key, a secret, and add policy statement to all the job resource principals to
manage secret-family.
- From the Console, create a new job.
- Run the job to test that it works.
- Monitor the job run for a successful finish.
- (Optional) If you used logging, then you can review them to see the job run values.