Tutorial 2: Entra ID as Authoritative Source to Manage Identities Using the OCI IAM Application Catalog
Configure Entra ID as the authoritative identity store to manage identities in OCI IAM and pull users, groups, and group membership from Entra ID into OCI IAM.
Note
This tutorial takes you through the steps to synchronize all users from Entra ID into OCI IAM. Before you begin, ensure that you understand the limits on users so that you avoid any additional licensing costs. See IAM Identity Domain Object Limits.
This tutorial takes you through the steps to synchronize all users from Entra ID into OCI IAM. Before you begin, ensure that you understand the limits on users so that you avoid any additional licensing costs. See IAM Identity Domain Object Limits.
- Configure Entra ID to use OCI IAM as the identity store. Create an app in OCI IAM for Entra ID, and in this app you add OCI IAM as an IdP.
- Prove that it works by pulling users, groups, and group memberships from Entra ID into the Entra ID app OCI IAM, and enable synchronization.
- Validate that it works by pulling users, groups, and group memberships from Entra ID, and confirm that the same users and groups have been populated in OCI IAM.
1. Create an App in OCI IAM for Entra ID
Set up Entra ID (formerly Azure) so IAM is the identity store to manage identities in OCI IAM.
- In the identity domain you are working in, select Integrated applications.
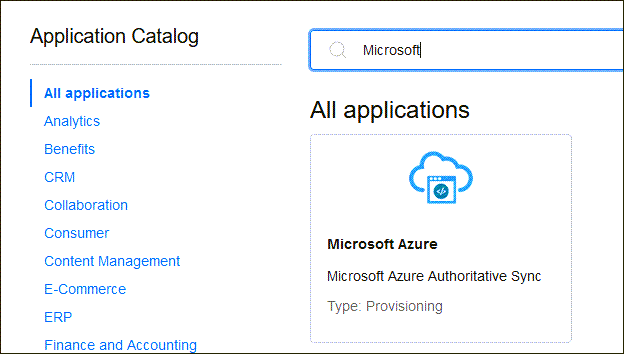
- Select Add Application, and choose Application Catalog and select Launch app catalog.
- Search for the Microsoft application template by entering the string
Microsoft. - Select the Microsoft Azure tile.
- Enter a name for the application, or use the default
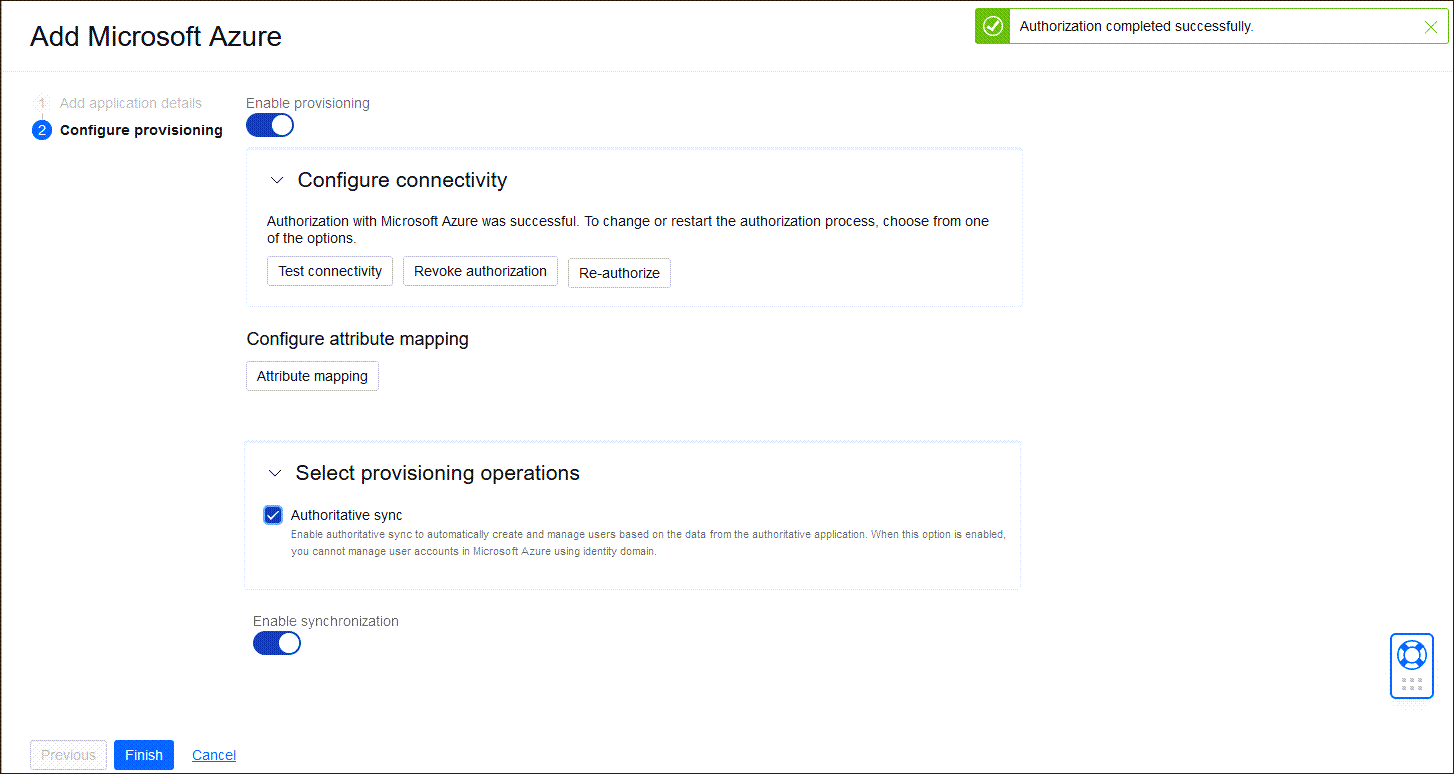
Microsoft Entra ID. - Select Next, and on the Configure provisioning page, enable provisioning, and confirm that you want to enable provisioning.
- Configure connectivity by selecting Authorize with Microsoft Azure.
- A browser instance opens showing the Microsoft Entra ID login page. Sign in using your Microsoft Entra ID credentials, in the Permissions requested dialog select Accept.
- The Console displays the message
Authorization completed successfully. - Choose Enable synchronization so that users are synchronized between OCI IAM and Microsoft Entra ID.
- Select Finish.
- On the application overview page, select Activate and confirm that you want to activate the application.
2. Import Users from Entra ID to IAM
Import Entra ID users into the Entra ID app in OCI IAM.
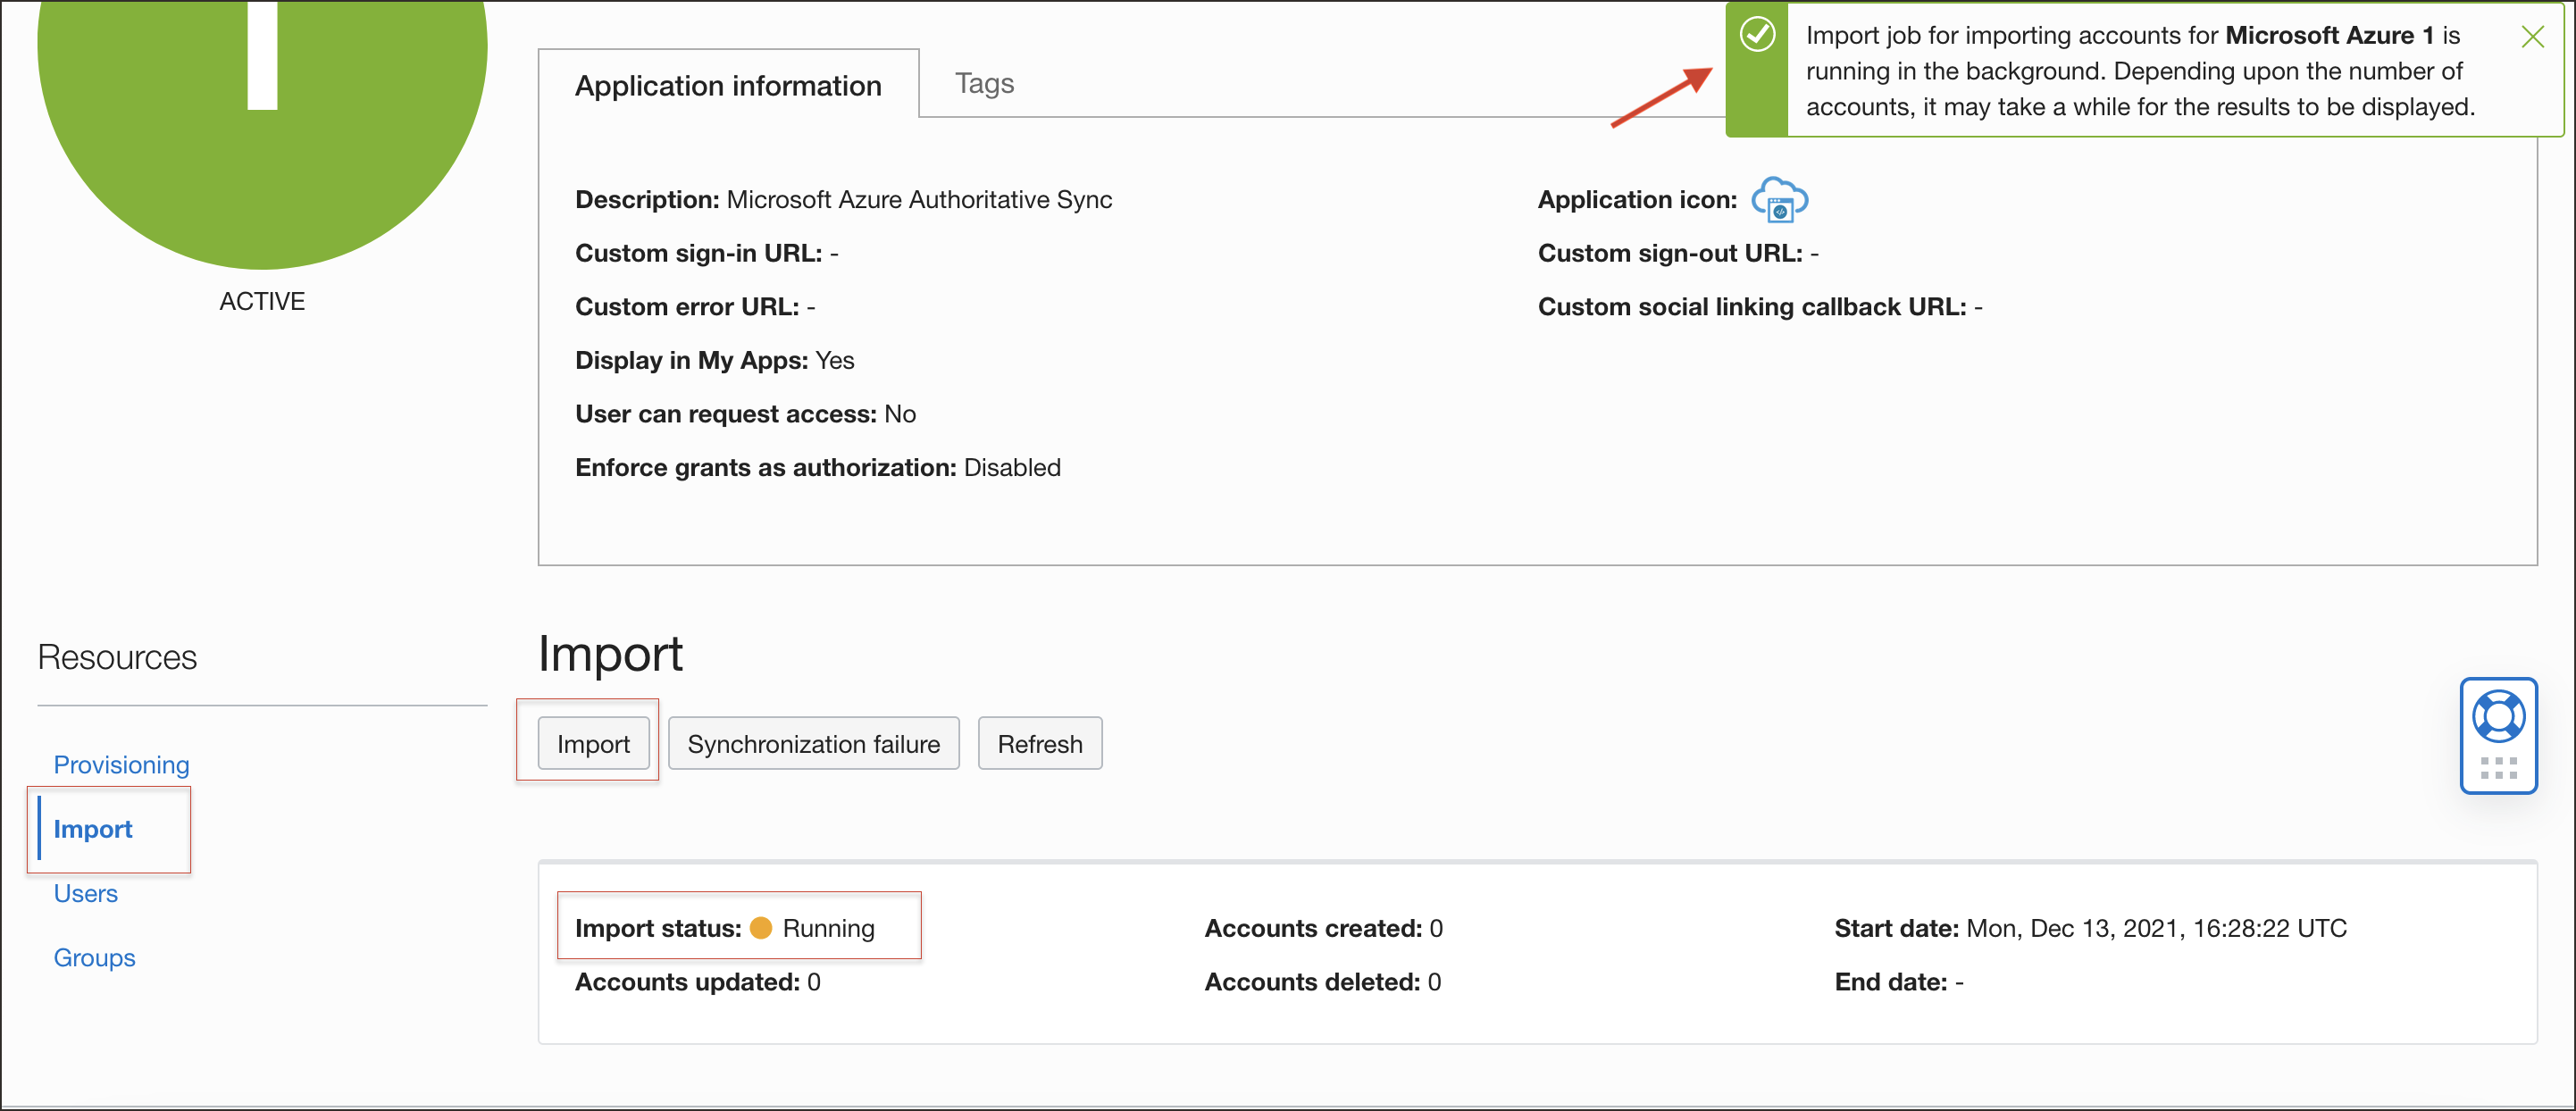
- In the Microsoft Entra ID app in OCI IAM, select Import under Resources.
- The Console displays
Import job for importing accounts for Microsoft Azure is running in the background. Depending upon the number of accounts, it may take a while for the results to be displayed. - Check the import status. When the status changes to
Succeeded, a list of users is displayed.
You have successfully created an Entra ID application in OCI IAM to use as an identity store, and imported users from Entra ID to OCI IAM.


