JIT Provisioning from ADFS to OCI IAM
In this tutorial, you configure Just-In-Time (JIT) Provisioning between the OCI and Microsoft ADFS, where ADFS acts as the IdP.
You can set up JIT provisioning so that identities can be created in the target system during run time, as and when they make a request to access the target system.
This tutorial covers the following steps:
- Update the Relying Party configurations in ADFS.
- Update the ADFS IdP in OCI IAM for JIT.
- Test that you can provision users from ADFS to OCI IAM.
This tutorial is specific to IAM with Identity Domains.
To perform this tutorial, you must have the following:
- A paid Oracle Cloud Infrastructure (OCI) account, or an OCI trial account. See Oracle Cloud Infrastructure Free Tier.
- Identity domain administrator role for the OCI IAM identity domain. See Understanding Administrator Roles.
- An ADFS installation. Note
This tutorial describes using the ADFS software provided with Microsoft Windows Server 2016 R2. - In addition, you must verify that:
- The same user exists in OCI and ADFS.
- ADFS is working.
- Open the ADFS management utility. For example, in Windows 2016 Server Manager utility, select Tools, then select Microsoft Active Directory Federation Services Management.
- Under ADFS, select Relying Party Trusts.
- Right-click the Relying Partying Trust you previously configured for OCI called
OCI IAMin the tutorial SSO Between OCI and ADFS. - Choose Edit Claim Issuance Policy.
- Edit the Email claim to add three additional claim rules for First Name, Last Name, and Group.
First Name attribute:
- LDAP Attribute:
Given-Name - Outgoing Claim Type:
Given Name
Last Name attribute:
- LDAP Attribute:
Surname - Outgoing Claim Type:
Surname
Group attribute:
- LDAP Attribute:
Token-Groups - Unqualified Names - Outgoing Claim Type:
Group
- LDAP Attribute:
- Select OK on the rules page, then OK again.
You can add additional attributes to suit your business requirements, but you only need these for this tutorial.
In the OCI IAM Console, configure the ADFS IdP for JIT.
-
Open a supported browser and enter the Console URL:
- Enter your Cloud Account Name, also referred to as your tenancy name, and select Next.
- Select the identity domain which will be used to configure SSO.
- Sign in with your username and password.
- Open the navigation menu and select Identity & Security.
- Under Identity, select Domains.
- Select the identity domain in which you have already configured ADFS as IdP in step 1 of the tutorial "SSO Between OCI and ADFS".
- Select Security from menu on the left, and then Identity providers.
- Select the ADFS IdP.
- On the ADFS IdP page, select Configure JIT.
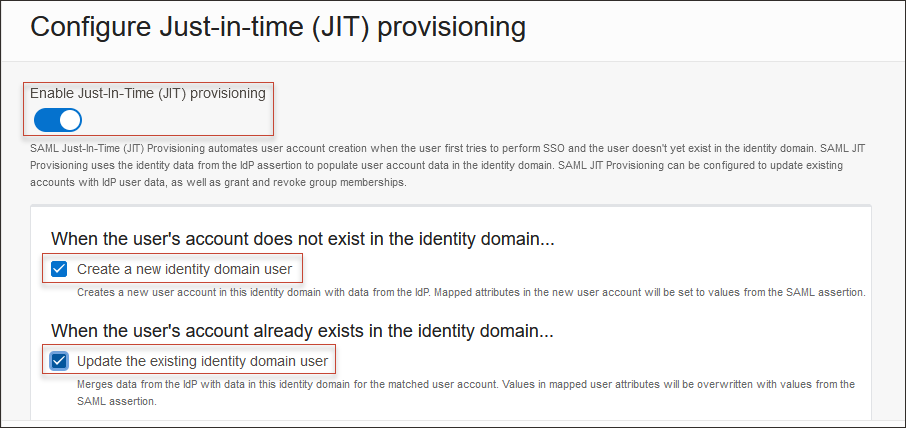
- On the Configure Just-in-time (JIT) provisioning page:
- Select Enable Just-In-Time (JIT) provisioning.
- Select Create a new identity domain user.
- Select Update the existing identity domain user.
- Under Map user attributes:
- Leave the first row for
NameIDunchanged. - For other attributes, under IdP user attribute select
Attribute. - Provide the IdP user attribute name as follows:
- familyName:
http://schemas.xmlsoap.org/ws/2005/05/identity/claims/surname - primaryEmailAddress:
http://schemas.xmlsoap.org/ws/2005/05/identity/claims/emailaddress
- familyName:
- Select Add Row:
- Under IdP user attribute select
Attribute. - For IdP user attribute name, enter
http://schemas.xmlsoap.org/ws/2005/05/identity/claims/givenname
- Under IdP user attribute select
- Leave the first row for
- Select Assign group mapping.
- Enter the Group membership attribute name. Use
http://schemas.xmlsoap.org/claims/Group. - Select Define explicit group membership mappings.
- Under IdP group name maps to identity domain group name, do the following:
- In IdP Group name, provide the name of the group in ADFS which will be present in the SAML assertion sent by ADFS.
- In Identity domain group name, in OCI IAM select the group in OCI IAM to be mapped to the corresponding group in ADFS.
- Under Assignment rules, select the following:
- When assigning group memberships: Merge with existing group memberships
- When a group is not found: Ignore the missing group
Note
Select options based on your organization's requirements. - Select Save changes.
- In ADFS, create a user in ADFS which doesn't exist in OCI IAM.
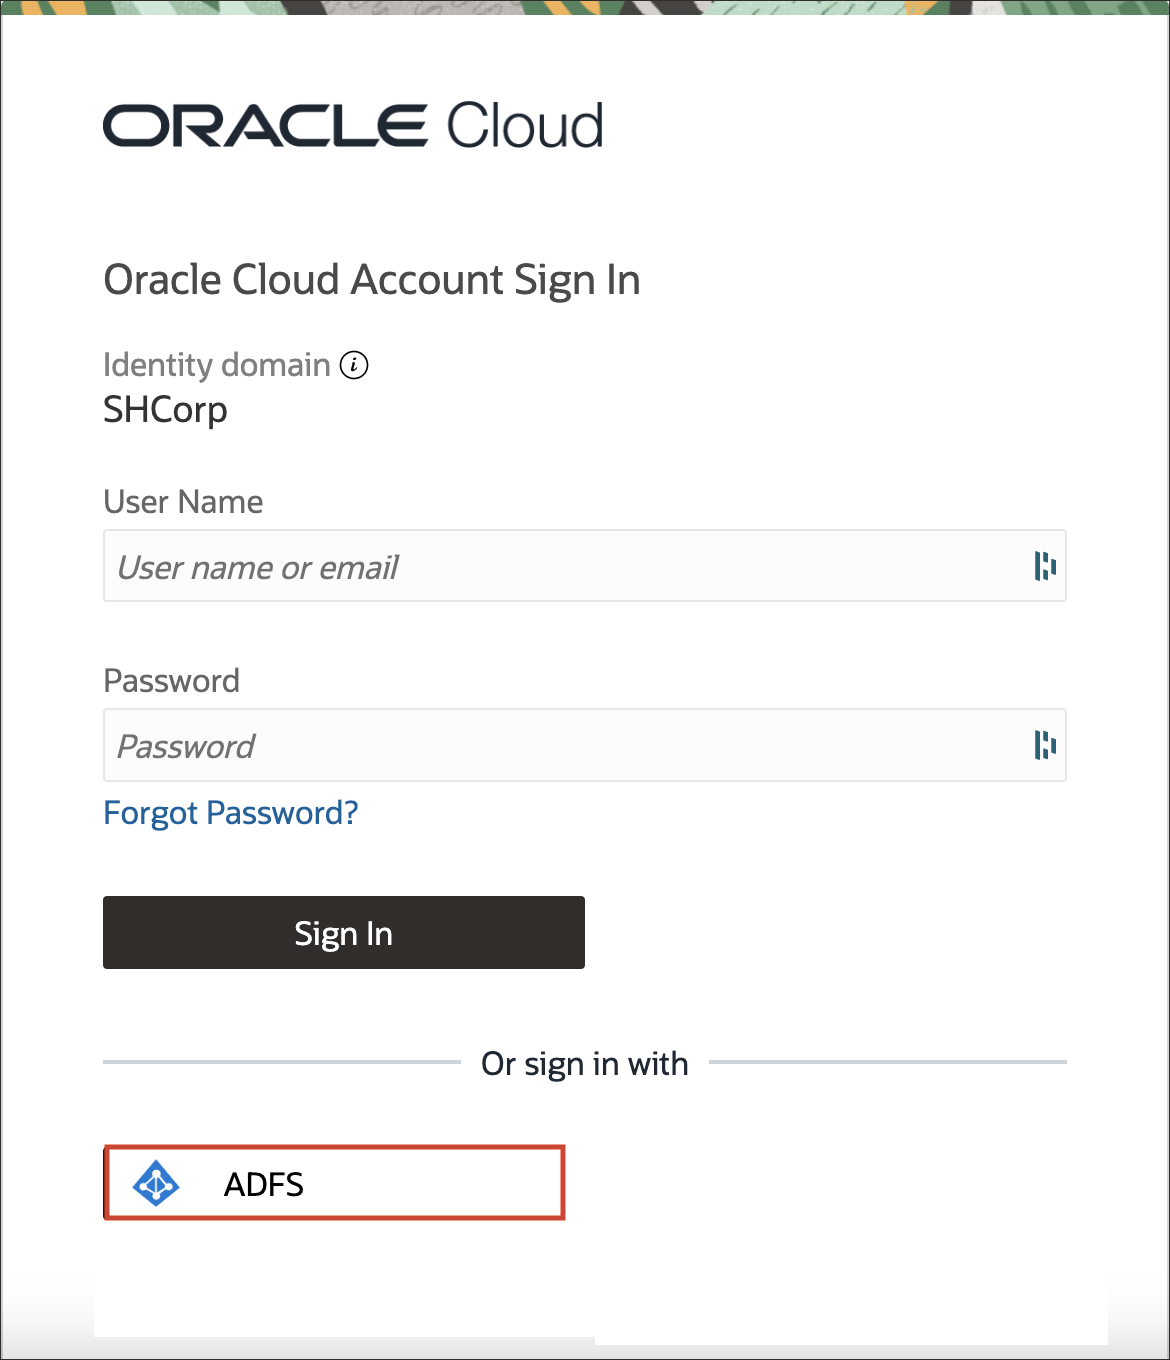
- Restart your browser, and enter the Console URL to access the OCI Console:
cloud.oracle.com - Enter the Cloud Account Name, also referred to as the tenancy name, and select Next.
- Select the identity domain in which JIT configuration has been enabled.
- From the sign in options, select ADFS.
- On the ADFS login page, provide the newly created user's credentials.
- On successful authentication, an account is created for the user in OCI IAM and the user is signed in to the OCI
Console.
You can view the new user in the OCI domain, and verify that it has the same identity attributes and group memberships as you entered.
Congratulations! You have successfully set up JIT provisioning between ADFS and OCI IAM.
To explore more information about development with Oracle products, check out these sites:


