Create Subject Area
You can create a subject area as a container and later add facts and dimensions to your new subject area or create a subject area based on an existing one. The subject area enables you to organize all entities and attributes available for reporting.
- On the Semantic Model Extensions page, under Customizations Sandbox, hover over an applicable sandbox to view Actions, and then click View Sandbox.
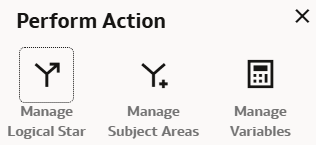
- On the selected sandbox Details page, click Perform
Action, and then select Manage Subject
Areas.

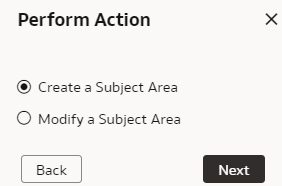
- In Perform Action, select Create a Subject Area, and
then click Next.

- In step 1 of the wizard, create a subject area using one of the methods:
- Select Create a Subject Area to create a subject
area container, and provide these details:
- Enter a name without any leading or trailing white spaces, add a description, and then click Next.
- In step 2 of the wizard, click Add Elements, and then click either New Custom Elements to select custom elements that you created or Pre-built Custom Extensions to select factory data elements to rearrange the subject area elements that are delivered by Oracle.
- Click Add Subject Area to select and add data elements from multiple subject areas.
- In step 3 of the wizard, organize and rename the data elements in your new subject area, and then click Next.
- In step 4 of the wizard, review your new subject area and click Finish to create it.
- Select Create a Subject Area based on an existing one to create a subject area using an existing one in the system, select an existing subject area, name your subject area, and then click Next. Complete steps 2, 3, and 4 of the wizard.
- Select Create a Subject Area to create a subject
area container, and provide these details: